
- Thread starter
- #1
Well, finally complete it, a volume knob for the 4th gen Toyota Tacoma!
Note #1: This project is subject to availability of a USB plug to connect the knob. An adapter may be needed for factory radio, I did this with my aftermarket 15.6" Android radio in mind. Read all instructions and see all attached pictures before starting.
Note #2: I remember seen somewhere another project that utilized a factory 14.6' volume knob adapted to our vehicles that didn'tcome factory with one.
Note #3: I ended not using an included 1.5 inch metal control knob due to space constraints. An old radio volume knob with round spine known as Plum (knobs with half moon hole in the back may also with a bit more force but not recommended). 6mm or 1/4 hole (guitar) knobs with an allen screw may also work, plus you can easily adjust the height.
Note #4: The volume control knob should have included metric Pot Nut and Washer, if not... https://a.co/d/0cENIVti
Note #5: On the AliExpress basic knob option (cheapest), funtions includes volume up/down, center push for mute or pause, if command is accepted by app by default. There are other kits that by factory design, may have more functionality. Look around, the only constraint is the board size to fit inside de aprox 2"x3" space between the vents to mount the project.
Note #6: round 1 inch (25mm) wide by 3/4 (16 to 19mm) height Control knobs are available in most online marketplaces:
AliExpress https://a.aliexpress.com/_mK7nbI7 here https://a.aliexpress.com/_mrD2Hab and here https://a.aliexpress.com/_mtFnKDd
eBay
https://ebay.io/m/56DviN
Amazon
This one may work but further mounting positioning steps may be required https://a.co/d/0dHKB9zm also this https://a.co/d/0bWKH5qT and this one https://a.co/d/05SZ0PHZ
Parts:
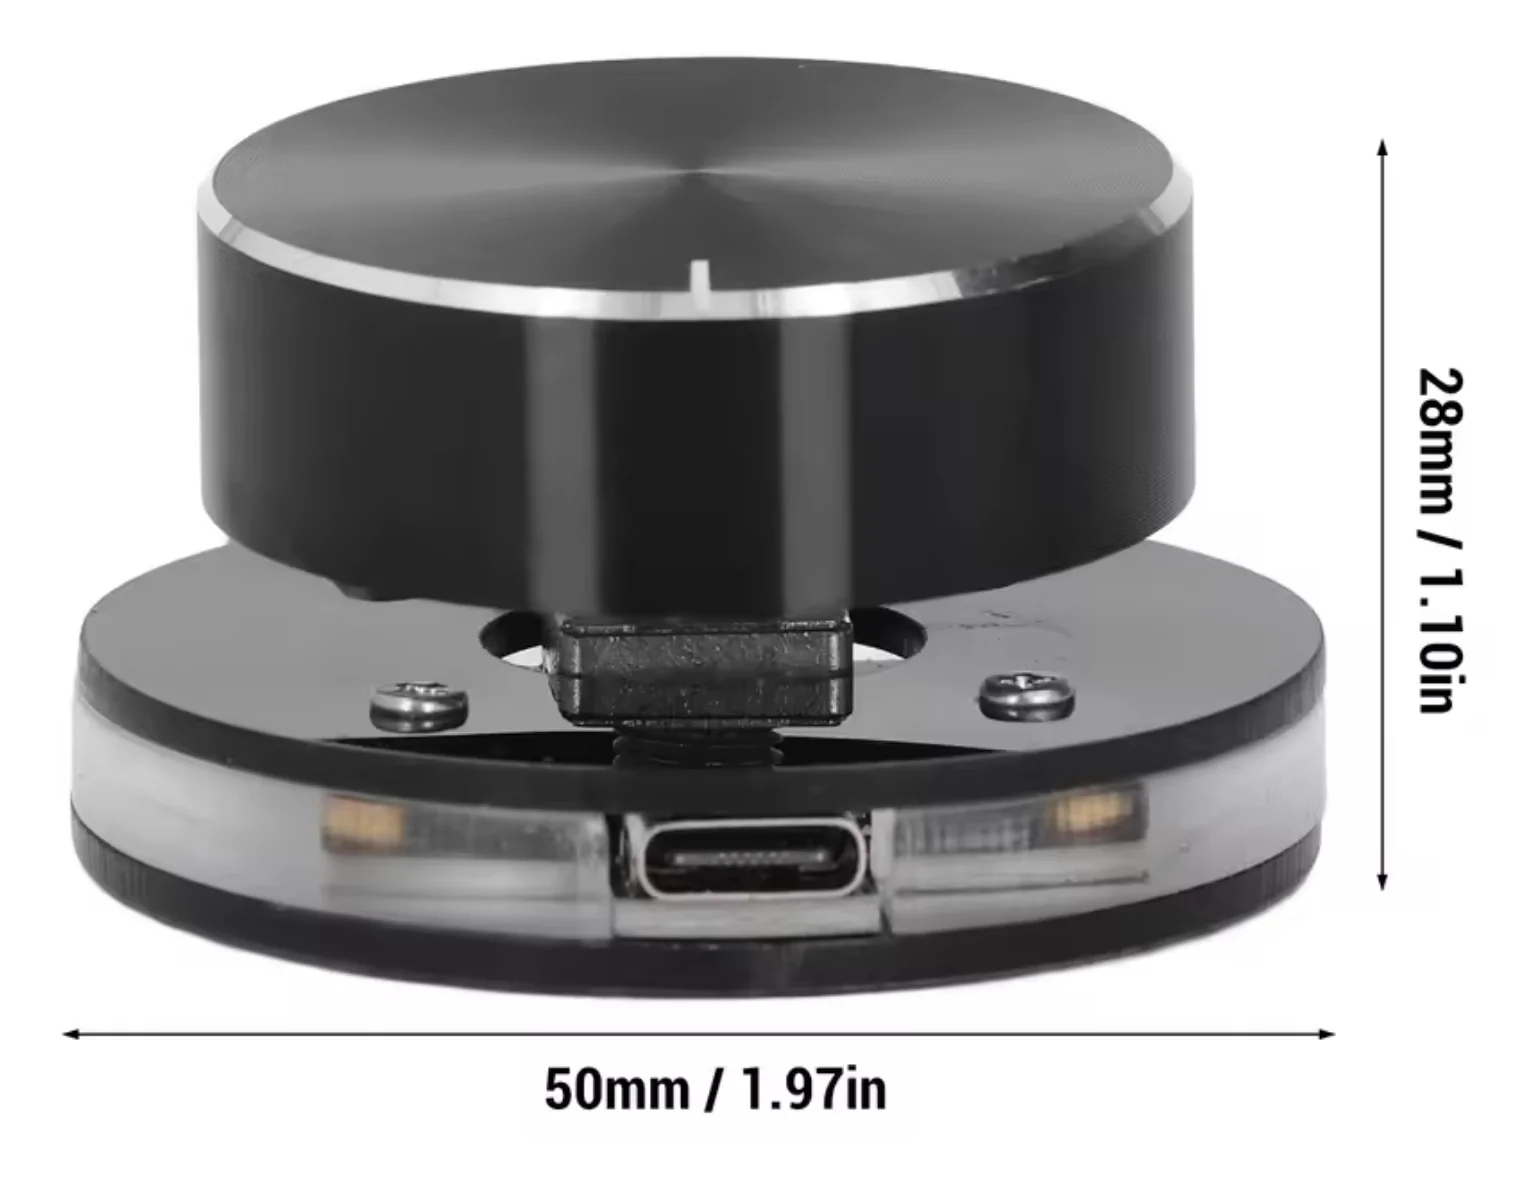
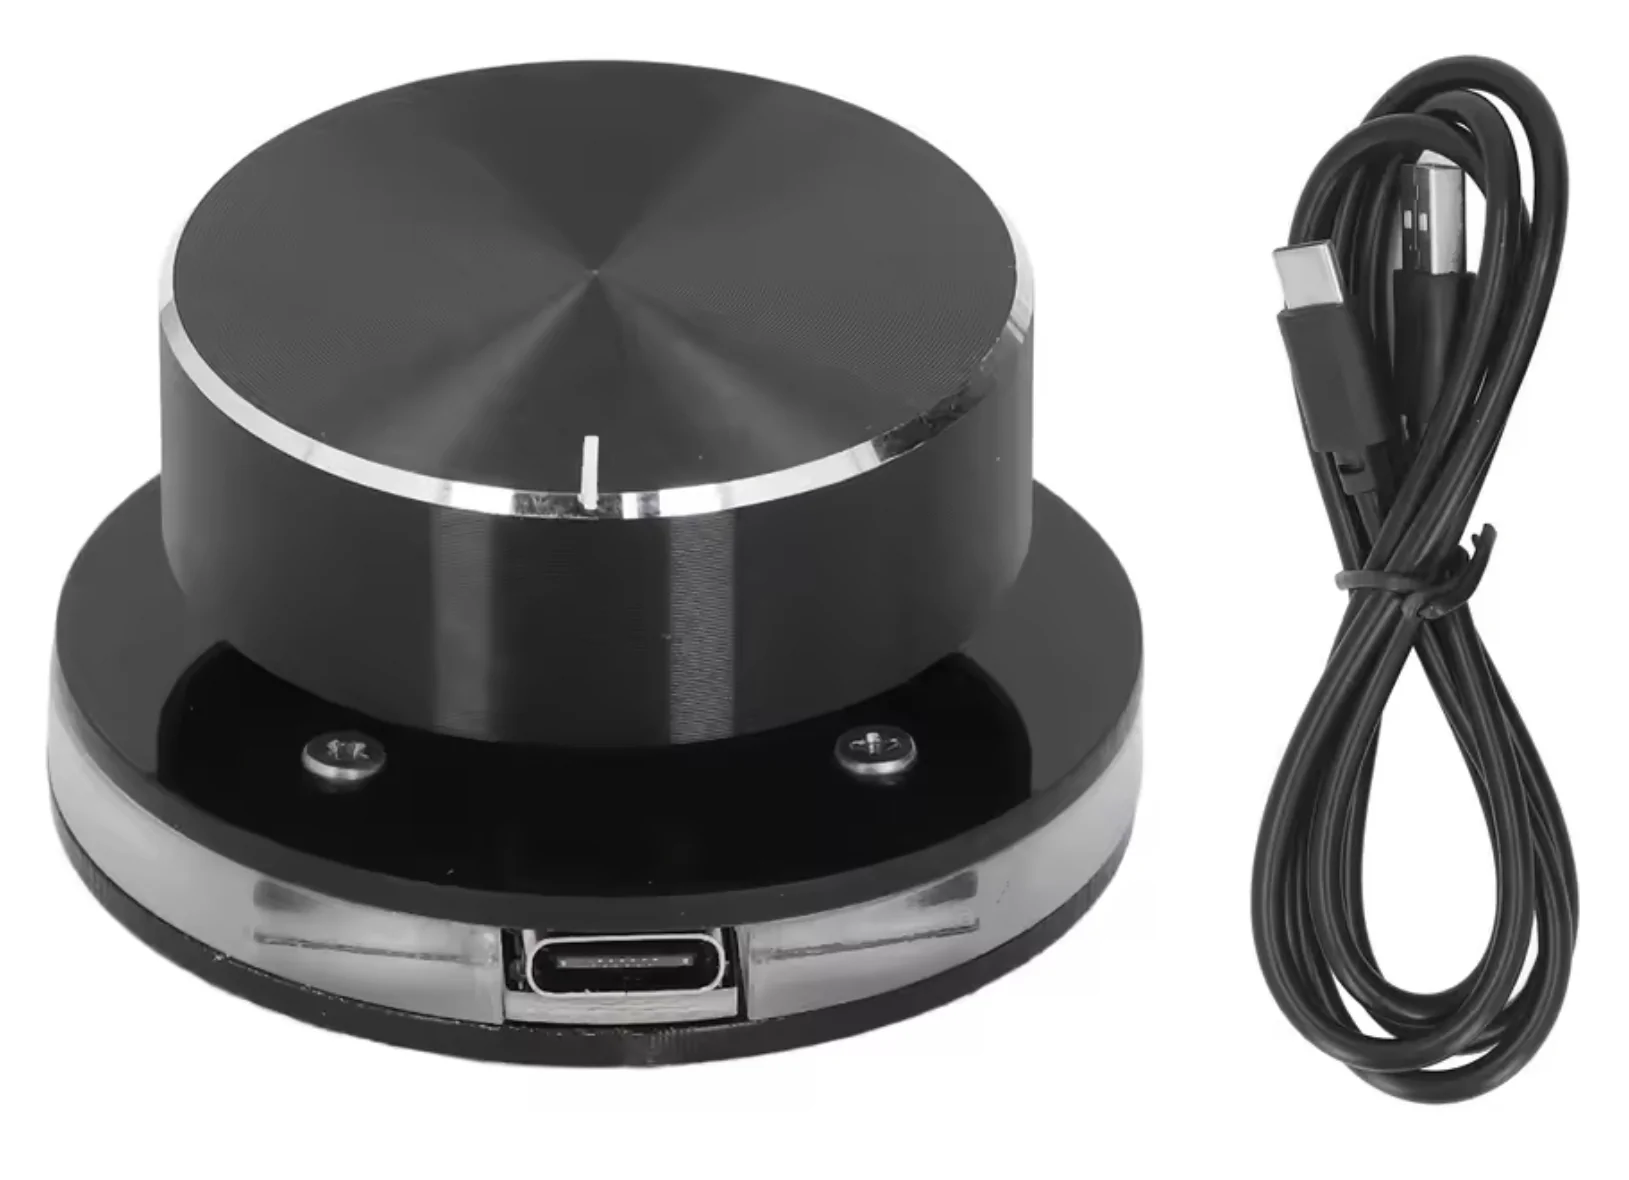
1. USB Type-C Volume knob with mute (here's an economic version, but any other with the same size/characteristics should be fine, the RGB LED function, is not used)
2. USB A to 90 degree Type-C one foot cable: https://a.co/d/06TiNeiQ (a data cable, not only charging). The AliExpress volume knob comes with one but the space is very limited and a 90 degree Type C plug is required.
3. Volume control knob, also known as a Pot (potentiometer) Hat.
Tools:
- 10mm deep socket or regular with short extension/rachet to remove radio.
- Pry tool to remove plastic parts. Plastic pry tool is preferable but metallic could work as long you understand that marring may occur if not done carefully.
- #2 Phillips screw driver to remove the knob factory casing shell.
- Multi step drill bits or Multi size bits set. Wood or metal would work to make the mounting hole.
Steps:
Note: all parts are attached by plastic clips except the radio that is secured with four 10mm screws under the plastic trim cover, behind the screen.
1. Lift plastic trim cover behind the screen with pry tool to expose screws securing radio. Very easy, just take your time to avoid creating any markings with the tool.
2. Remove four 10mm screws.
3. Carefully pull radio and unplug/secure it. Again, just red plastic clips holding the radio after the 4 screws are removed.
4. Pull long (gray on my SR5) trim cover that starts under the radio and expands all the way to the "Tacoma" (or TRD) logo. Just pull carefully toward you, only plastic clips here too.
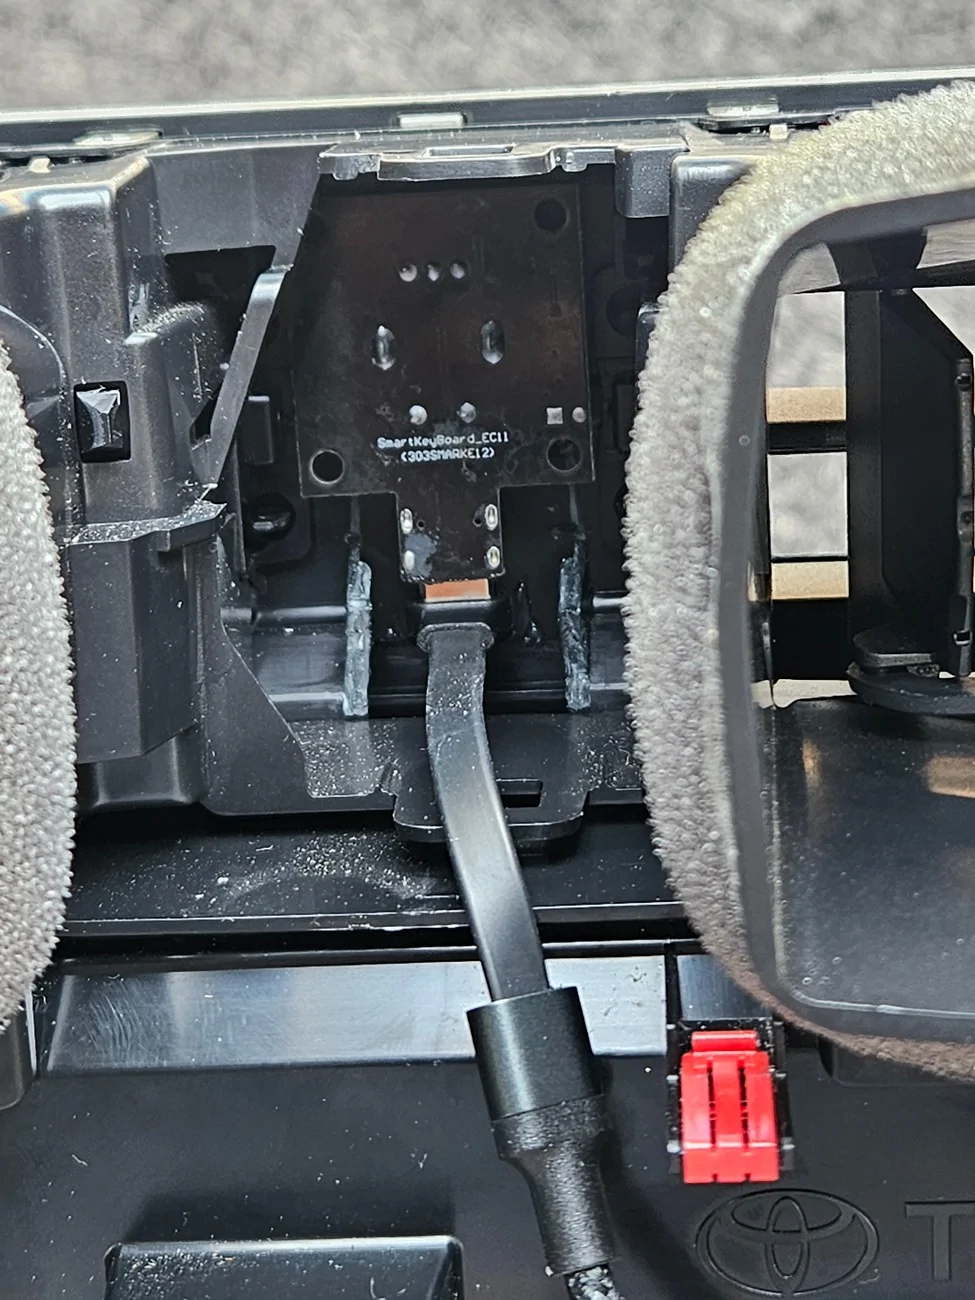
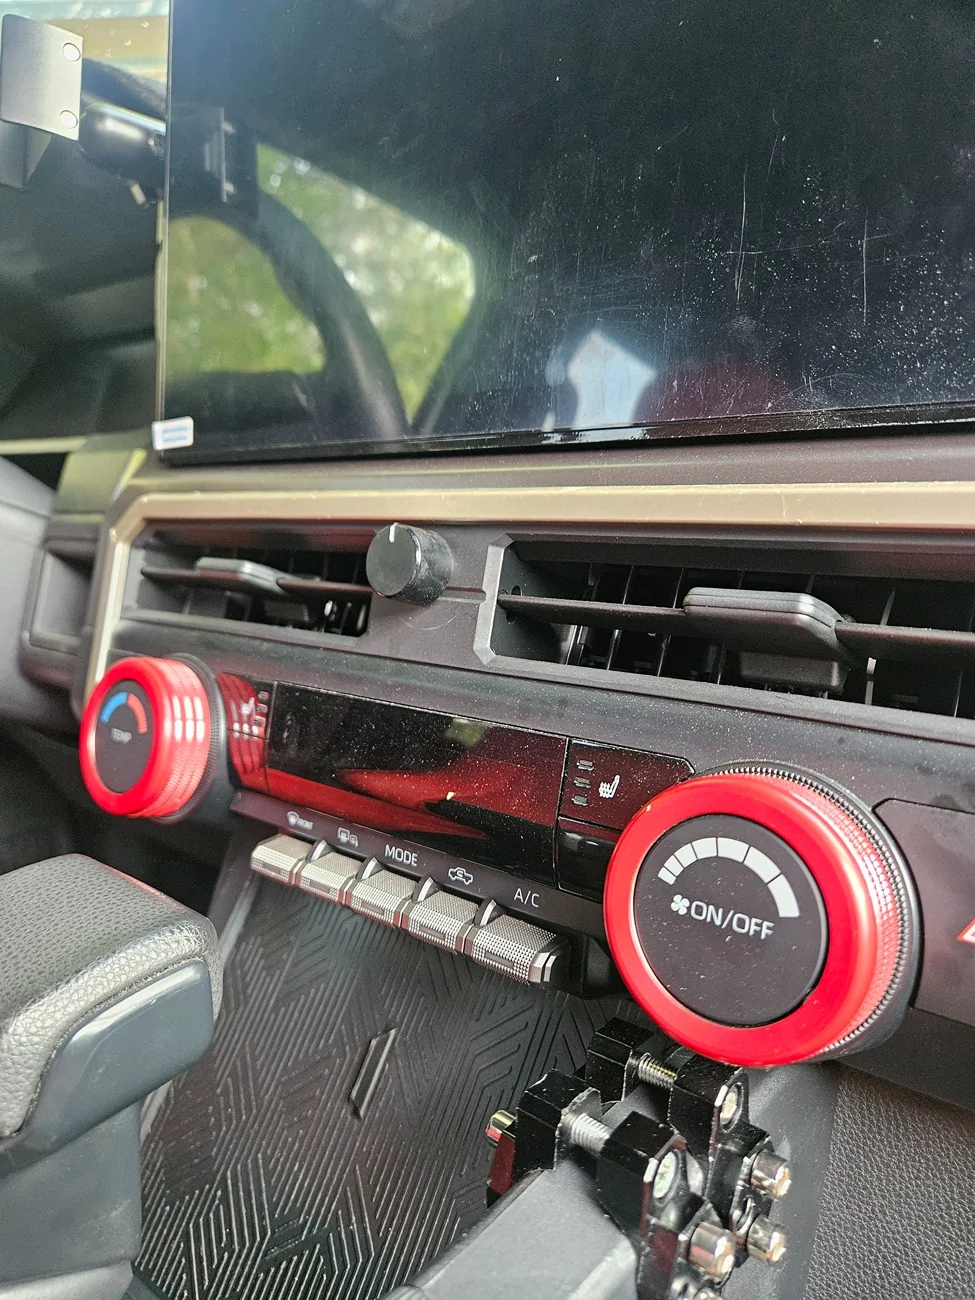
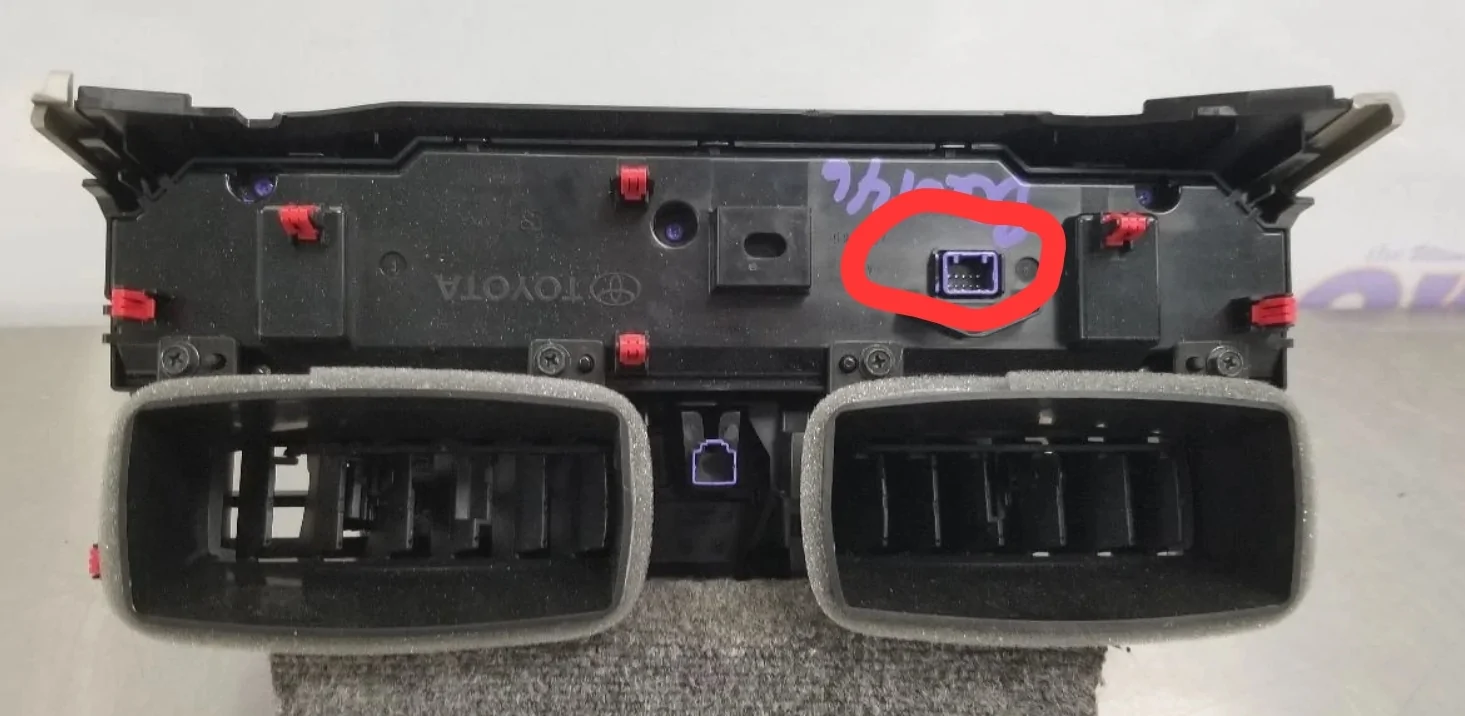
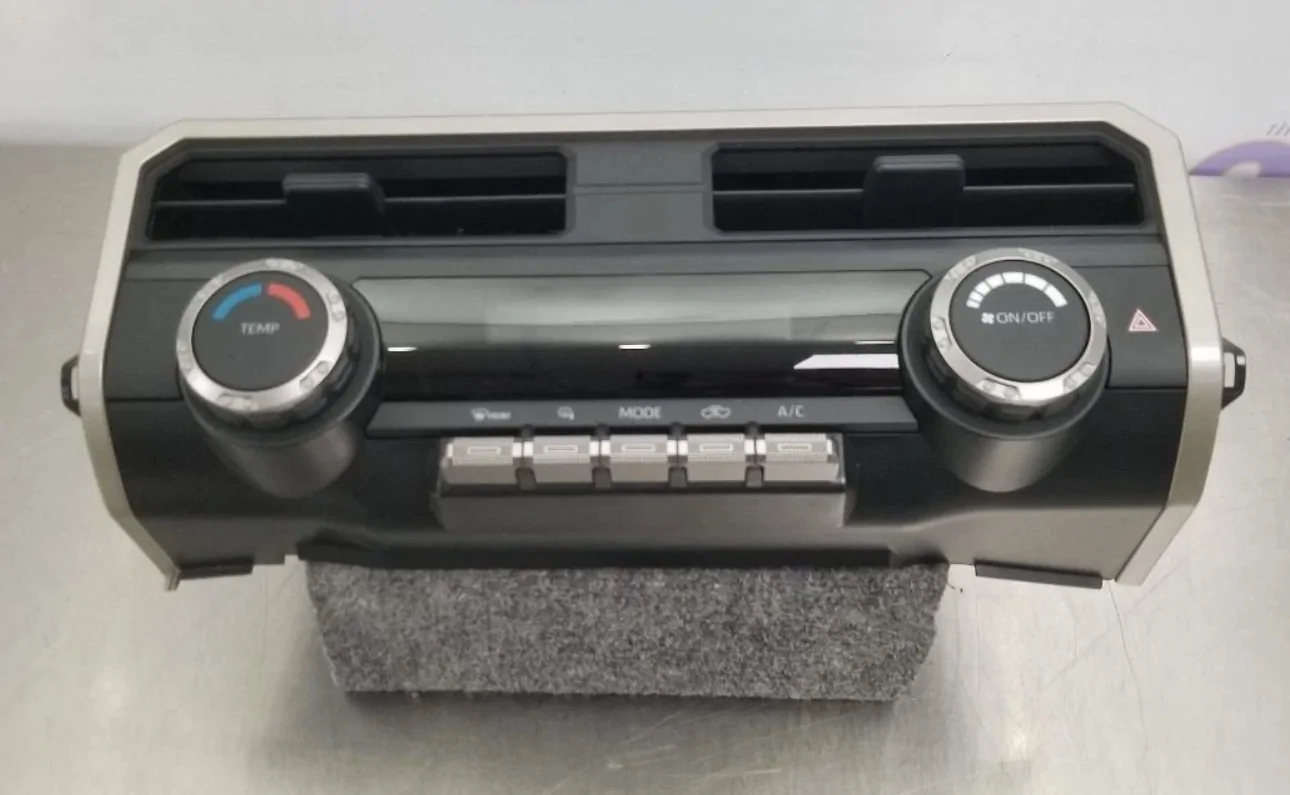
5. Carefully pull TEMPERATURE A/C CLIMATE CONTROL console with integrated vents. AVOID PULLING FROM THE SMALL TRIM surrounding the panel, tabs can break easily. Squeeze and disconnect rear electric/data plug.
Follow reverse order to reassemble when ready.
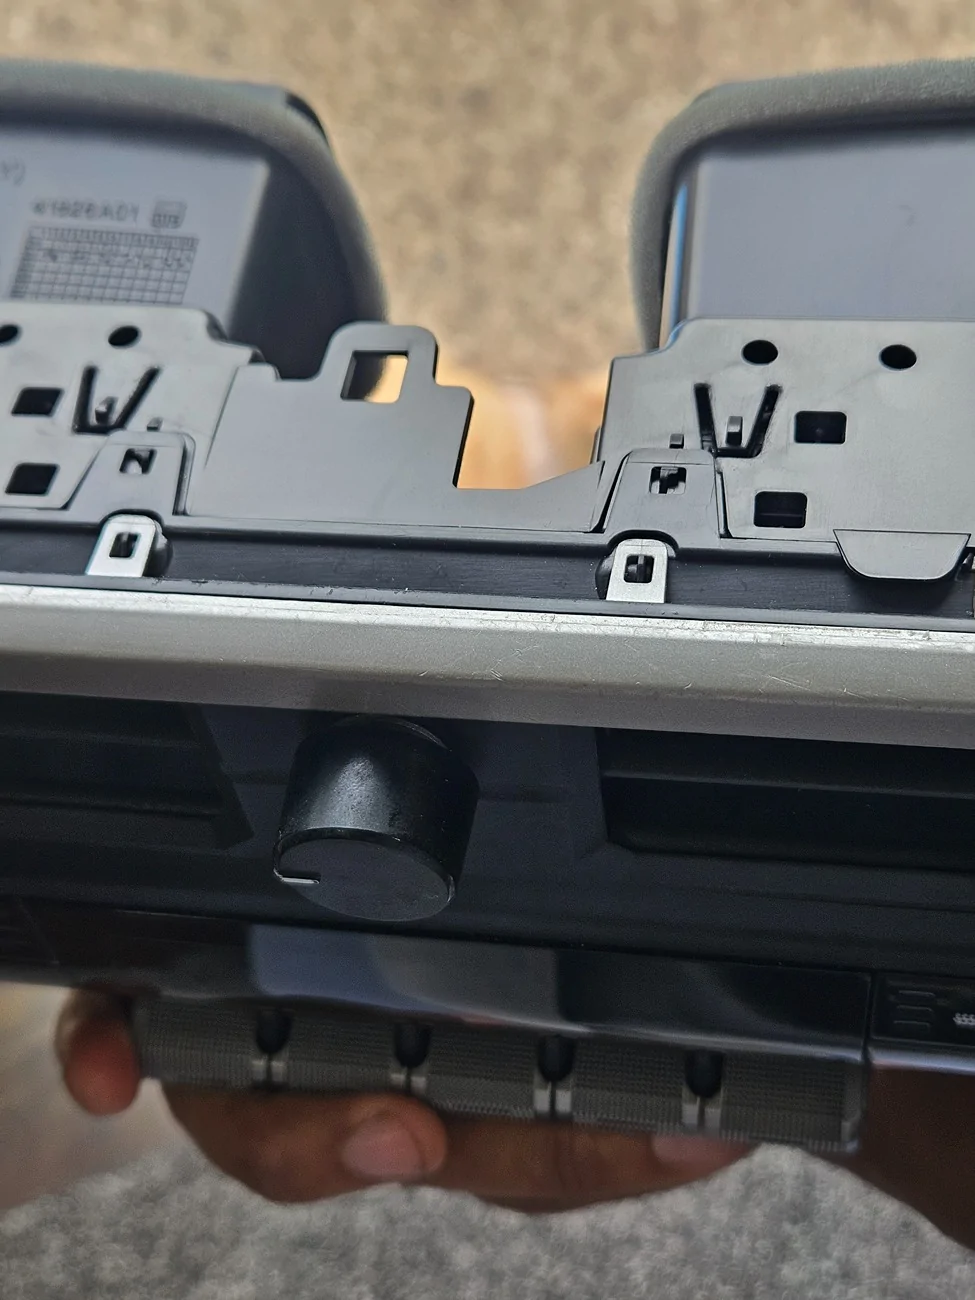
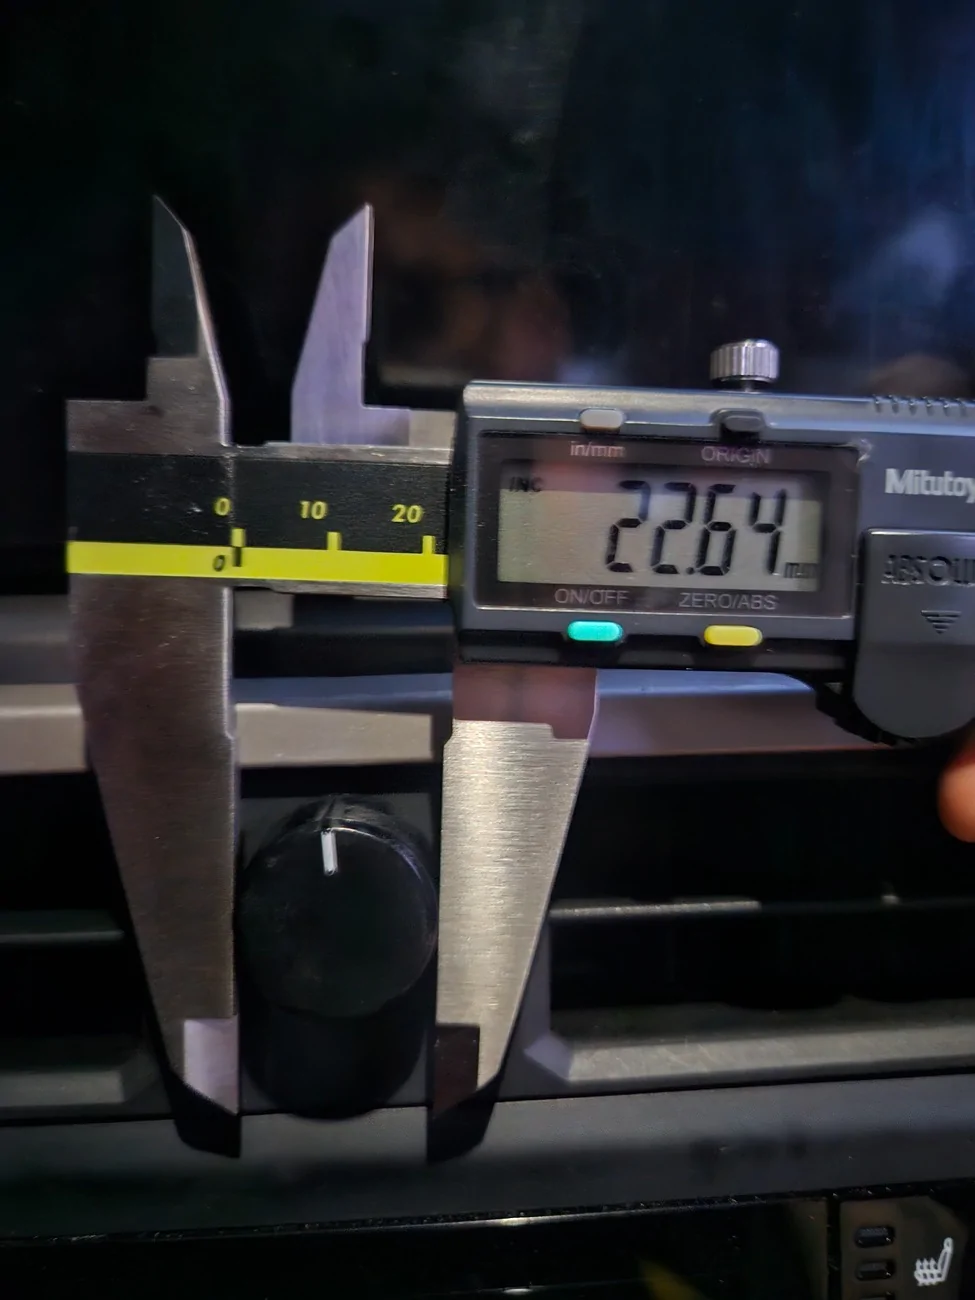
6. Test/prop your preferred position for the Pot mounting hole, about 1.5 inches from the top/1 inch side to side and mark the drilling position.
7. Drill mounting hole, starting with a small drill bit and make it bigger as you check the position again with the Pot/hat.
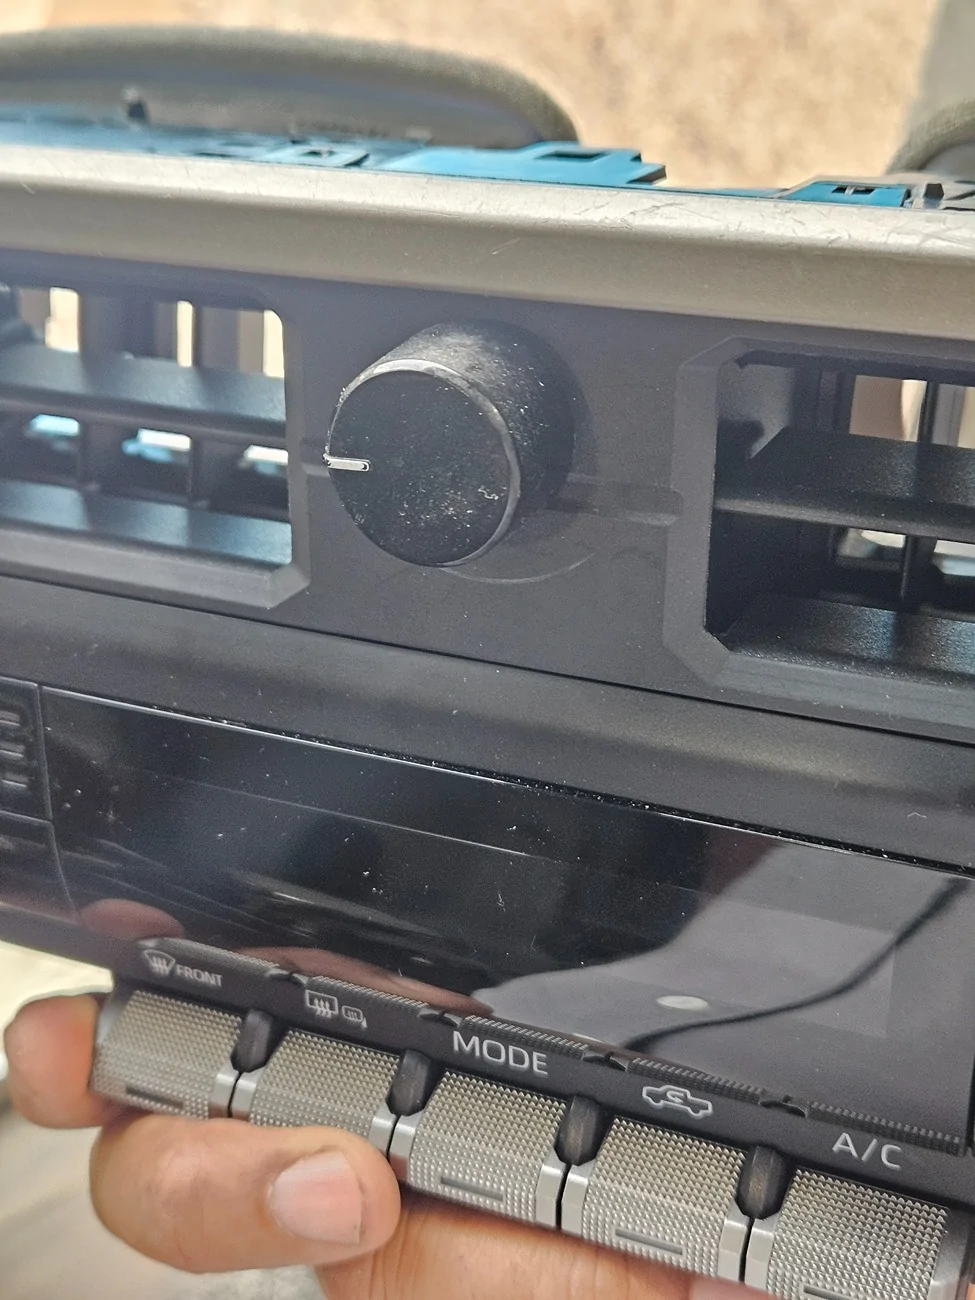
Mounting the Knob:
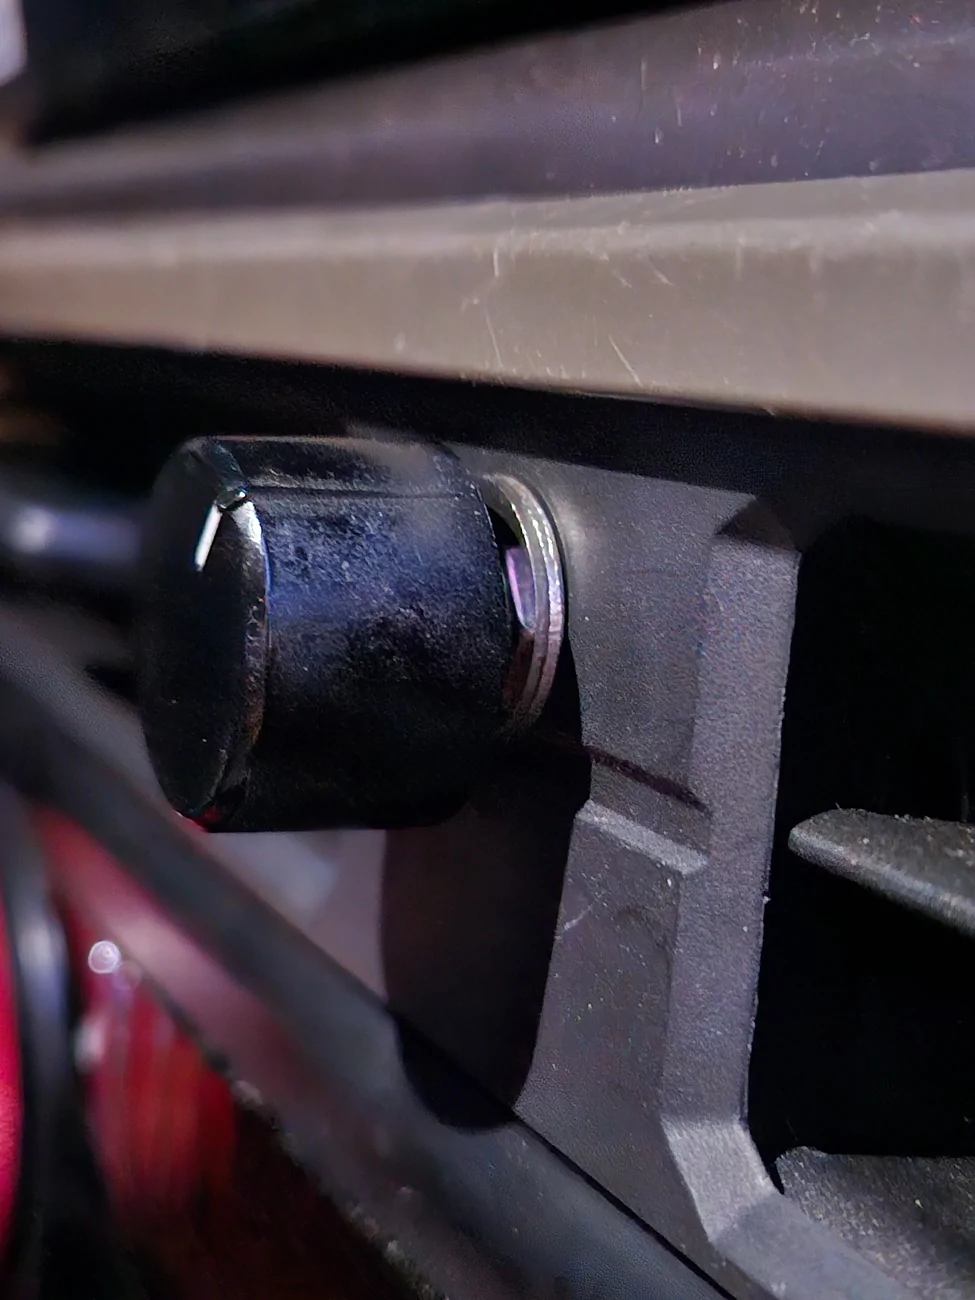
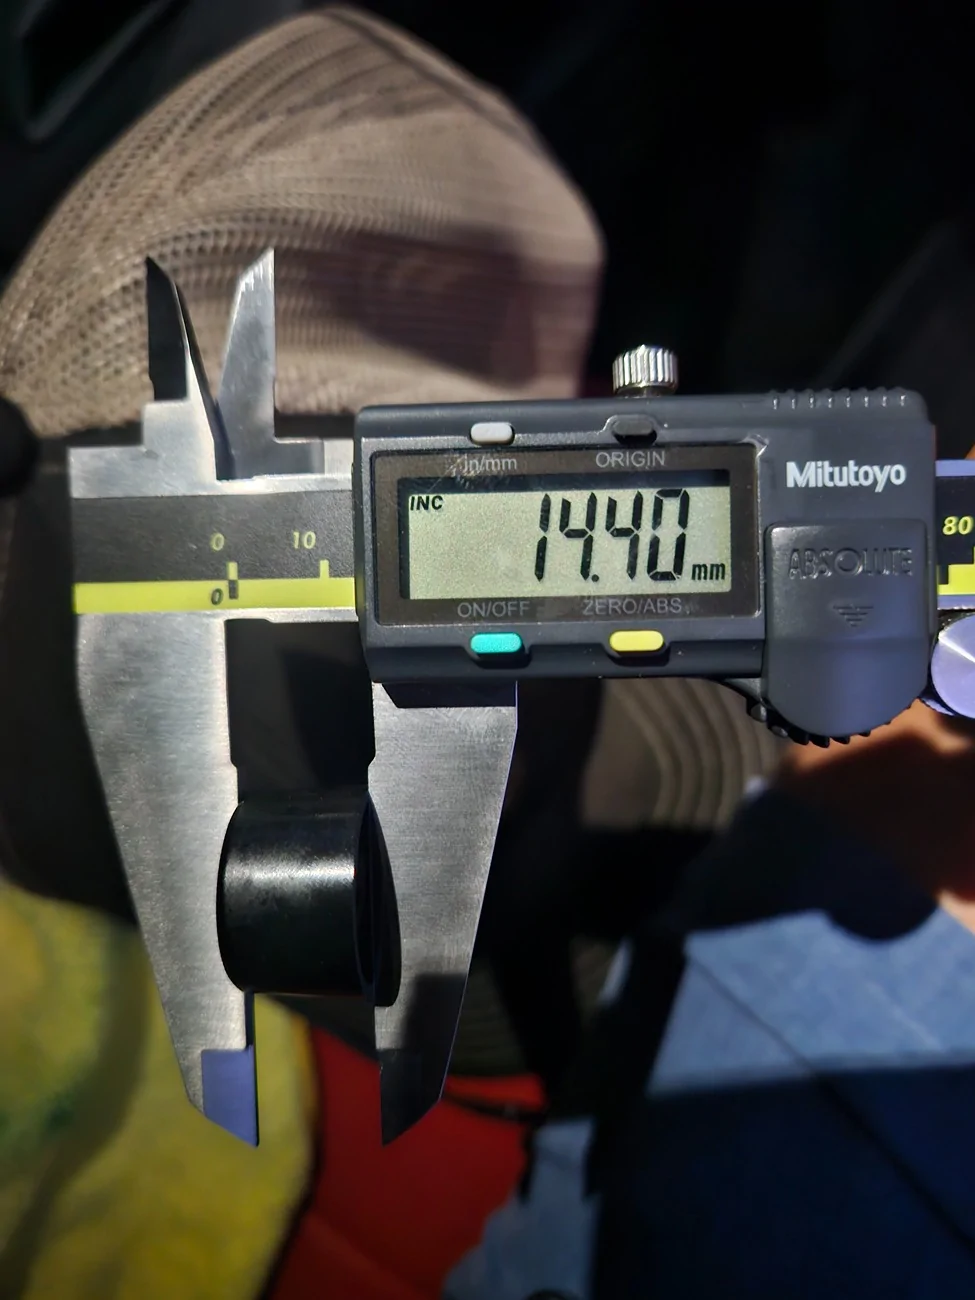
A. Insert the Pot from the back and secure it with 1 Pot Nut and one Washer. Test functionality by installing your Knob/hat and pushing/turning. If it is too far from the surface of the Temperature console, add a an inside washer.
B. Install and run to radio the USB cable.
C. Reinstall everything, the Large TRIM PIECE FIRST and its little pieces, followed by the temperature console (don't forget to plug the cable!), and finally plug and install the radio, 4 screws and the screws cover plastic piece.


Note #1: This project is subject to availability of a USB plug to connect the knob. An adapter may be needed for factory radio, I did this with my aftermarket 15.6" Android radio in mind. Read all instructions and see all attached pictures before starting.
Note #2: I remember seen somewhere another project that utilized a factory 14.6' volume knob adapted to our vehicles that didn'tcome factory with one.
Note #3: I ended not using an included 1.5 inch metal control knob due to space constraints. An old radio volume knob with round spine known as Plum (knobs with half moon hole in the back may also with a bit more force but not recommended). 6mm or 1/4 hole (guitar) knobs with an allen screw may also work, plus you can easily adjust the height.
Note #4: The volume control knob should have included metric Pot Nut and Washer, if not... https://a.co/d/0cENIVti
Note #5: On the AliExpress basic knob option (cheapest), funtions includes volume up/down, center push for mute or pause, if command is accepted by app by default. There are other kits that by factory design, may have more functionality. Look around, the only constraint is the board size to fit inside de aprox 2"x3" space between the vents to mount the project.
Note #6: round 1 inch (25mm) wide by 3/4 (16 to 19mm) height Control knobs are available in most online marketplaces:
AliExpress https://a.aliexpress.com/_mK7nbI7 here https://a.aliexpress.com/_mrD2Hab and here https://a.aliexpress.com/_mtFnKDd
eBay
https://ebay.io/m/56DviN
Amazon
This one may work but further mounting positioning steps may be required https://a.co/d/0dHKB9zm also this https://a.co/d/0bWKH5qT and this one https://a.co/d/05SZ0PHZ
Parts:
1. USB Type-C Volume knob with mute (here's an economic version, but any other with the same size/characteristics should be fine, the RGB LED function, is not used)
2. USB A to 90 degree Type-C one foot cable: https://a.co/d/06TiNeiQ (a data cable, not only charging). The AliExpress volume knob comes with one but the space is very limited and a 90 degree Type C plug is required.
3. Volume control knob, also known as a Pot (potentiometer) Hat.
Tools:
- 10mm deep socket or regular with short extension/rachet to remove radio.
- Pry tool to remove plastic parts. Plastic pry tool is preferable but metallic could work as long you understand that marring may occur if not done carefully.
- #2 Phillips screw driver to remove the knob factory casing shell.
- Multi step drill bits or Multi size bits set. Wood or metal would work to make the mounting hole.
Steps:
Note: all parts are attached by plastic clips except the radio that is secured with four 10mm screws under the plastic trim cover, behind the screen.
1. Lift plastic trim cover behind the screen with pry tool to expose screws securing radio. Very easy, just take your time to avoid creating any markings with the tool.
2. Remove four 10mm screws.
3. Carefully pull radio and unplug/secure it. Again, just red plastic clips holding the radio after the 4 screws are removed.
4. Pull long (gray on my SR5) trim cover that starts under the radio and expands all the way to the "Tacoma" (or TRD) logo. Just pull carefully toward you, only plastic clips here too.
5. Carefully pull TEMPERATURE A/C CLIMATE CONTROL console with integrated vents. AVOID PULLING FROM THE SMALL TRIM surrounding the panel, tabs can break easily. Squeeze and disconnect rear electric/data plug.
Follow reverse order to reassemble when ready.
6. Test/prop your preferred position for the Pot mounting hole, about 1.5 inches from the top/1 inch side to side and mark the drilling position.
7. Drill mounting hole, starting with a small drill bit and make it bigger as you check the position again with the Pot/hat.
Mounting the Knob:
A. Insert the Pot from the back and secure it with 1 Pot Nut and one Washer. Test functionality by installing your Knob/hat and pushing/turning. If it is too far from the surface of the Temperature console, add a an inside washer.
B. Install and run to radio the USB cable.
C. Reinstall everything, the Large TRIM PIECE FIRST and its little pieces, followed by the temperature console (don't forget to plug the cable!), and finally plug and install the radio, 4 screws and the screws cover plastic piece.

Sponsored
Last edited:

