
- Thread starter
- #1
Hey all,
Finally finished up the bed work to put the cover on and mod the sport bar to fit. It's been sub zero most nights for the past 6 weeks. Happy to share some tips and tricks I learned along the way. I'm super pleased with how it came out, but there were a few quirks to work.
Extra tools/supplies: 1/4" ratchet with hex drives, a 2-3" cut from a 2x4, loctite, M8x13 316SS BHSCS, M8 t-nuts for the Bak t-slots, plastic sheeting or heavy garbage bags, blue painter's tape, grinder with high quality cutoff wheels (at least 2) and a flap disc for shaping, rattle can spray on bed liner, scissors, combination square, center punch, center drill, 21/64" drill bit. Save the washers from the bar removal.
Cover Install:
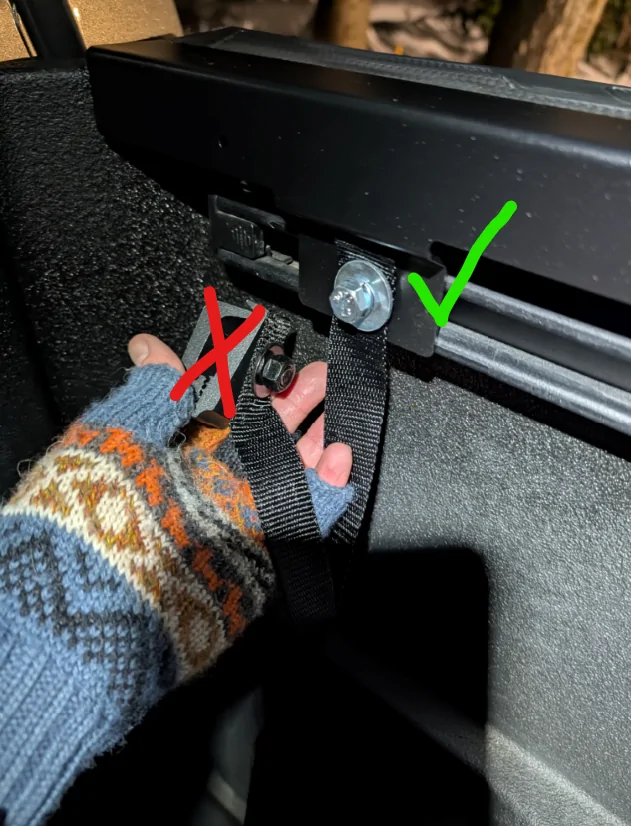
Okay, so there was one thing almost immediately that threw me off from the instructions from Bak/RT, and that's the straps. It's the first thing you actually attach, and I had to call them. The instructions show in their tiny detailless picture that there's a bracket/clamp attached to the strap that attaches to the mounting rail. When you open the box, and find the straps, there's a heavy pinch clamp already attached to the strap. So I'm like, wtf am I supposed to do with this, it doesn't make sense. Took them a minute to figure it out when I called, and they're like oh yeah, you don't use the clamp, just take it off, and you're left with the grommet in the strap that you secure it to. Now I know, and now you know.

The next detail they don't really describe clear enough, which makes a difference so you don't have to undo and readjust a pile of screws, is the positioning of the long side mounting brackets. They say the front edge should be "approximately a half inch from the cab." Well, it's a 45' angle to where it hits if you slide it all the way forward, so I measured 1/2" to where it hits and secured. What they should have said, is make the rear edge one pube shy of hitting your tailgate when it's closed. I have the spray on bedliner, so it tweaked that "approx 1/2" into hitting territory, and had to loosen everything once completely installed and the tailgate bumped it ever so slightly...
Other than that, clean everything first, and follow the instructions.
Something else to note: They give you two weather strippings, a thick, and a thin. You use the thick, but save the thinner one for part 2.....
PART 2: The Sport Bar
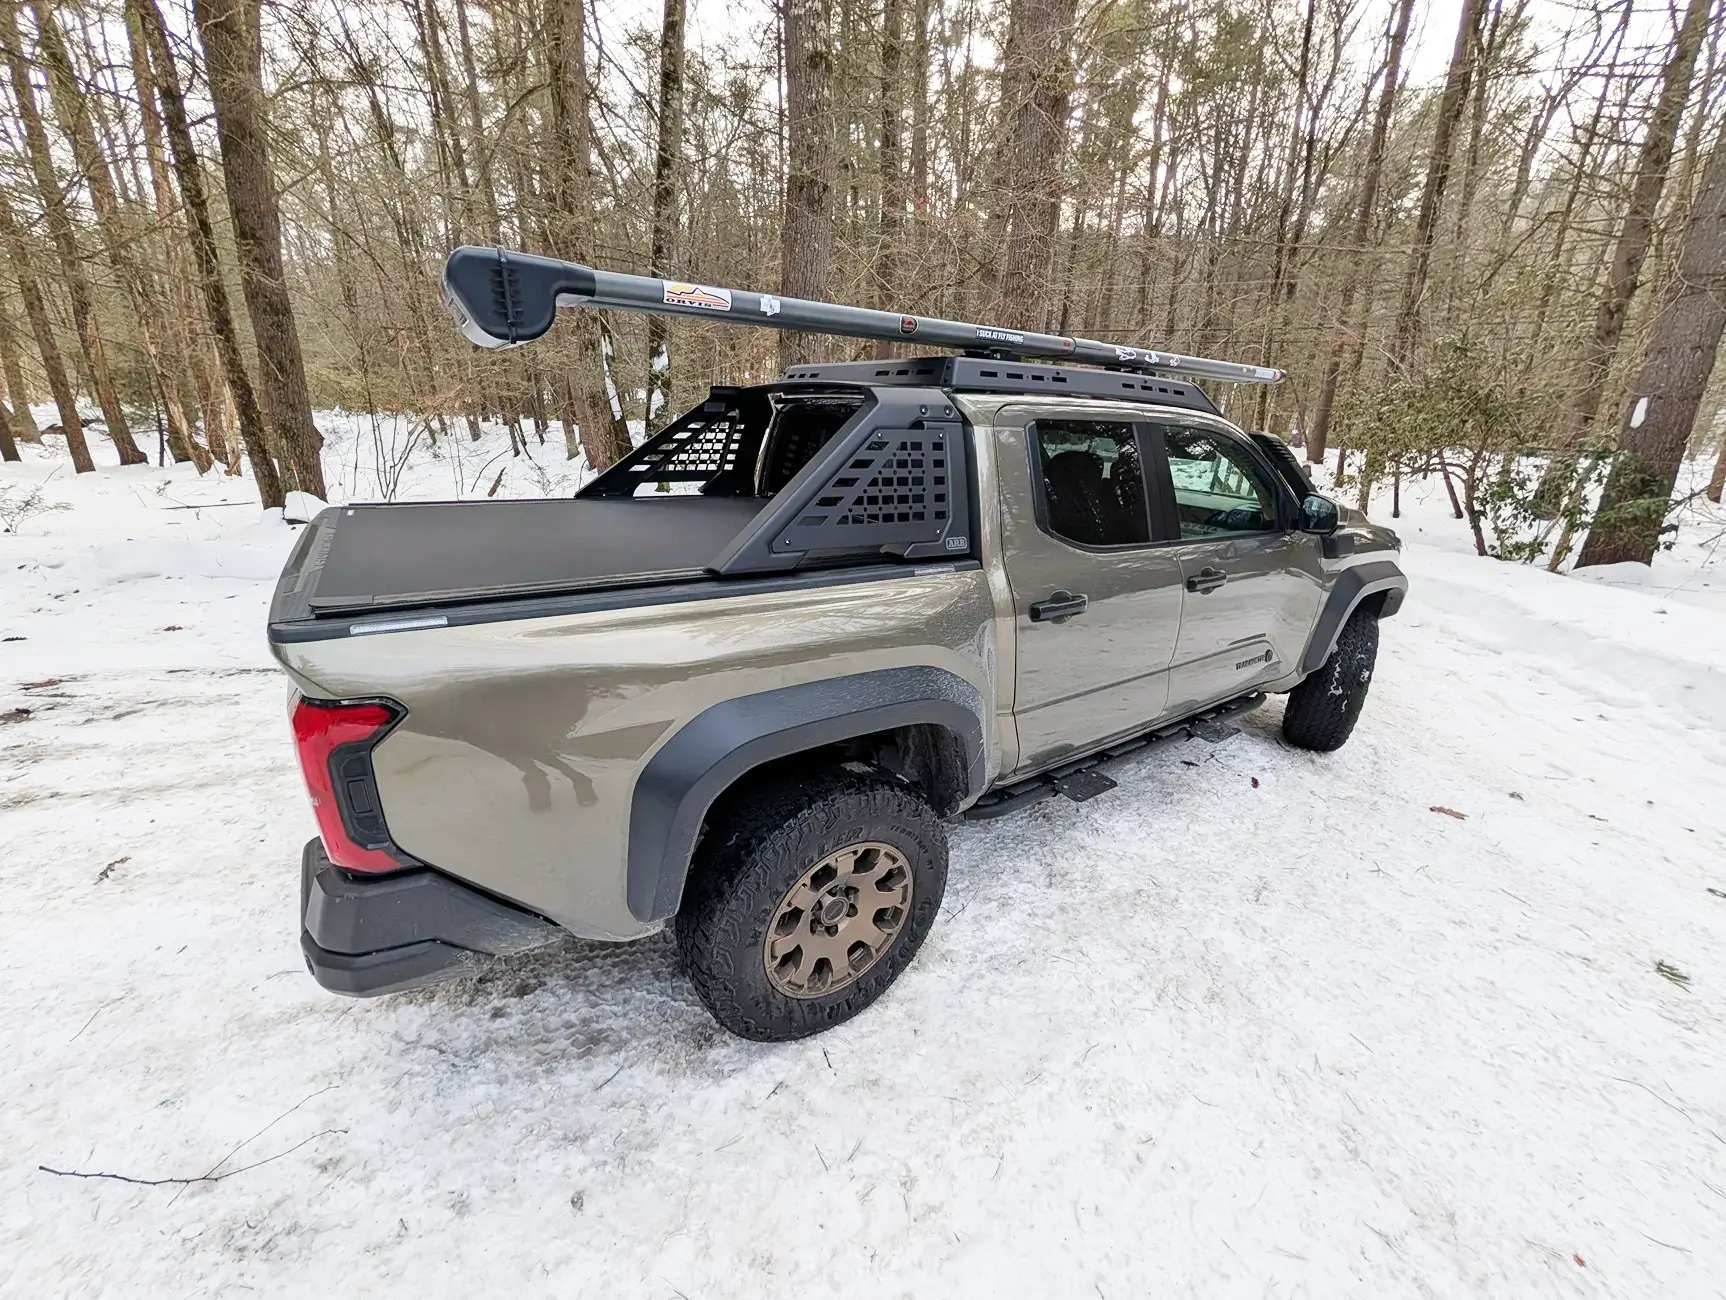
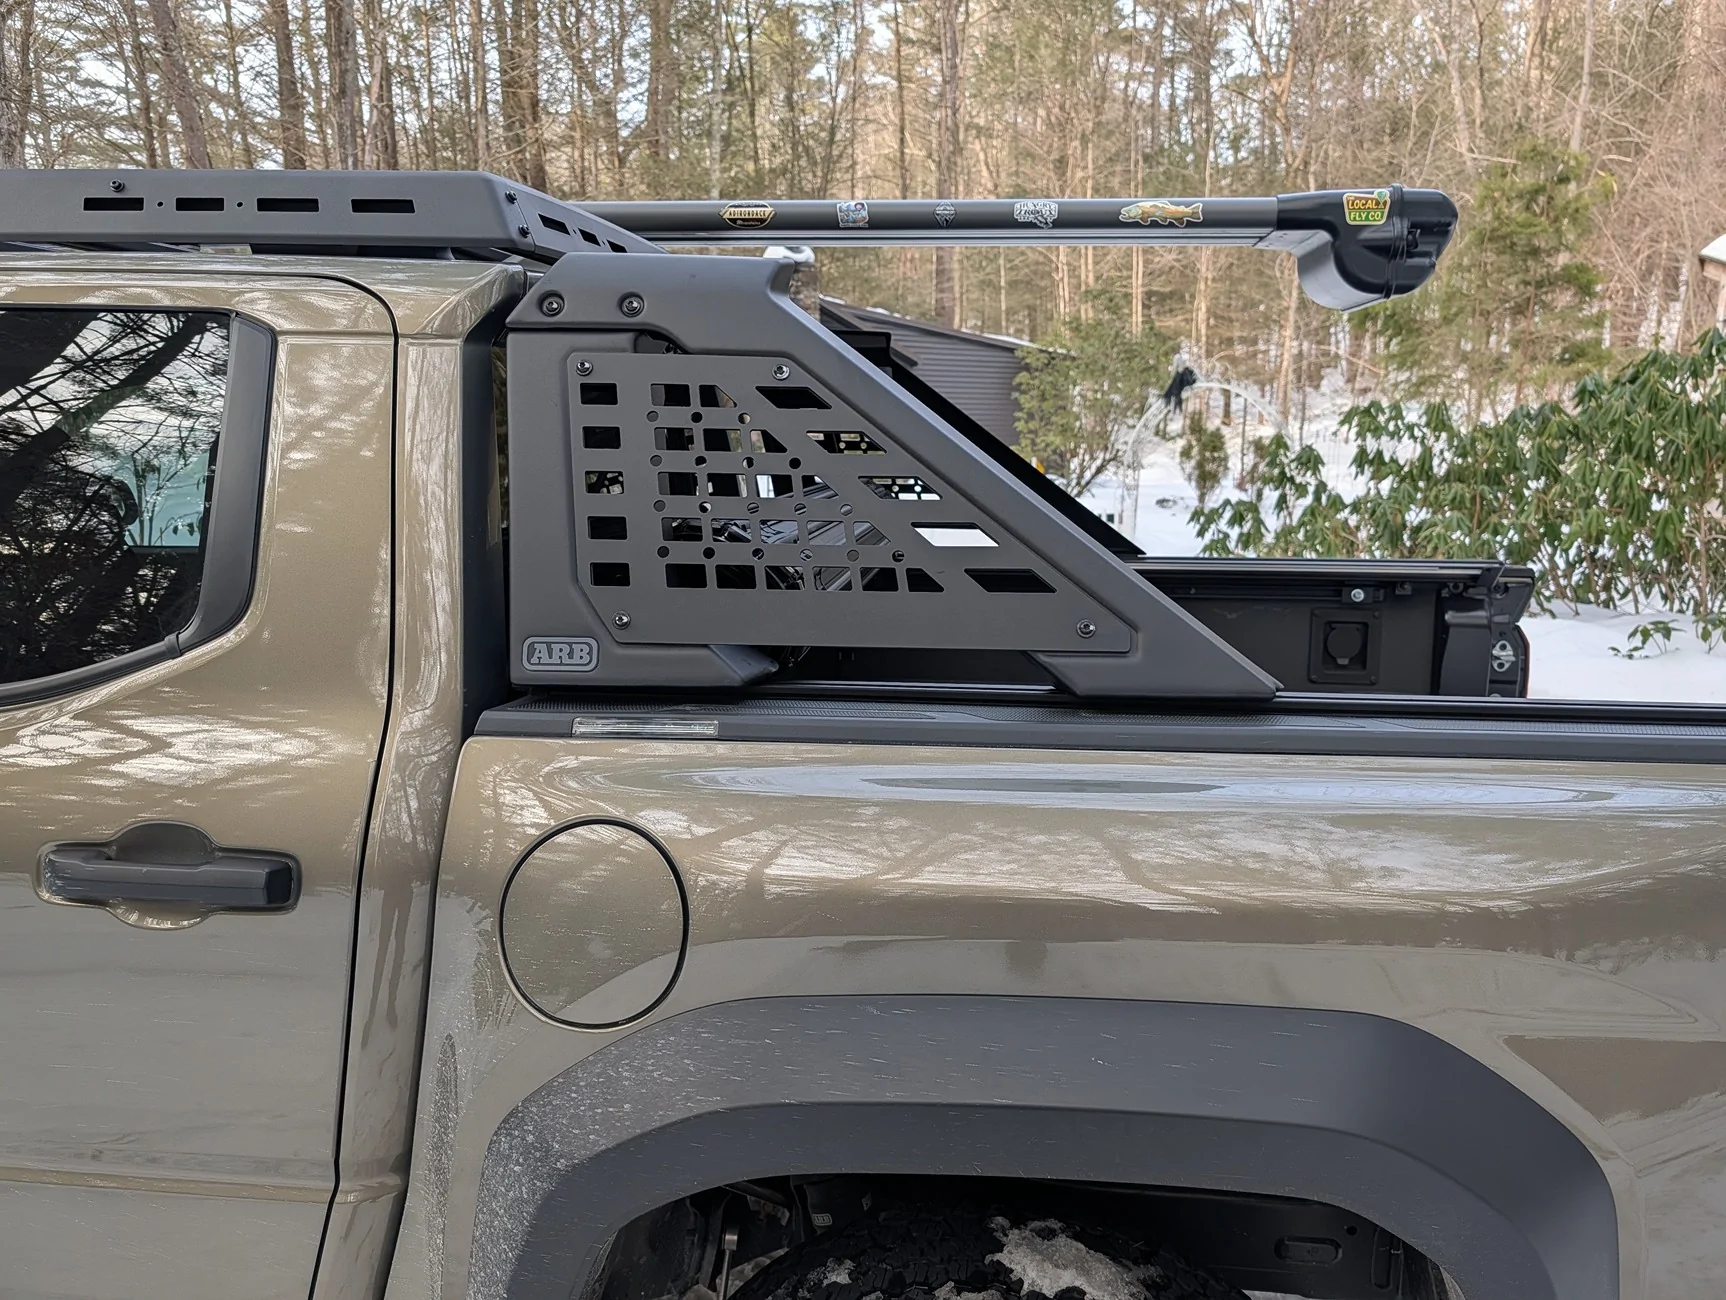
So the sport bar has grown on me. I really dig that it's unique to the trim, and heavy as fuk compared to the just for show ones. Now that it's modded I'll probably not hang anything heavy on it anyway, but I wanted to keep it, so I took the plunge and hacked it up.

The hacking part:
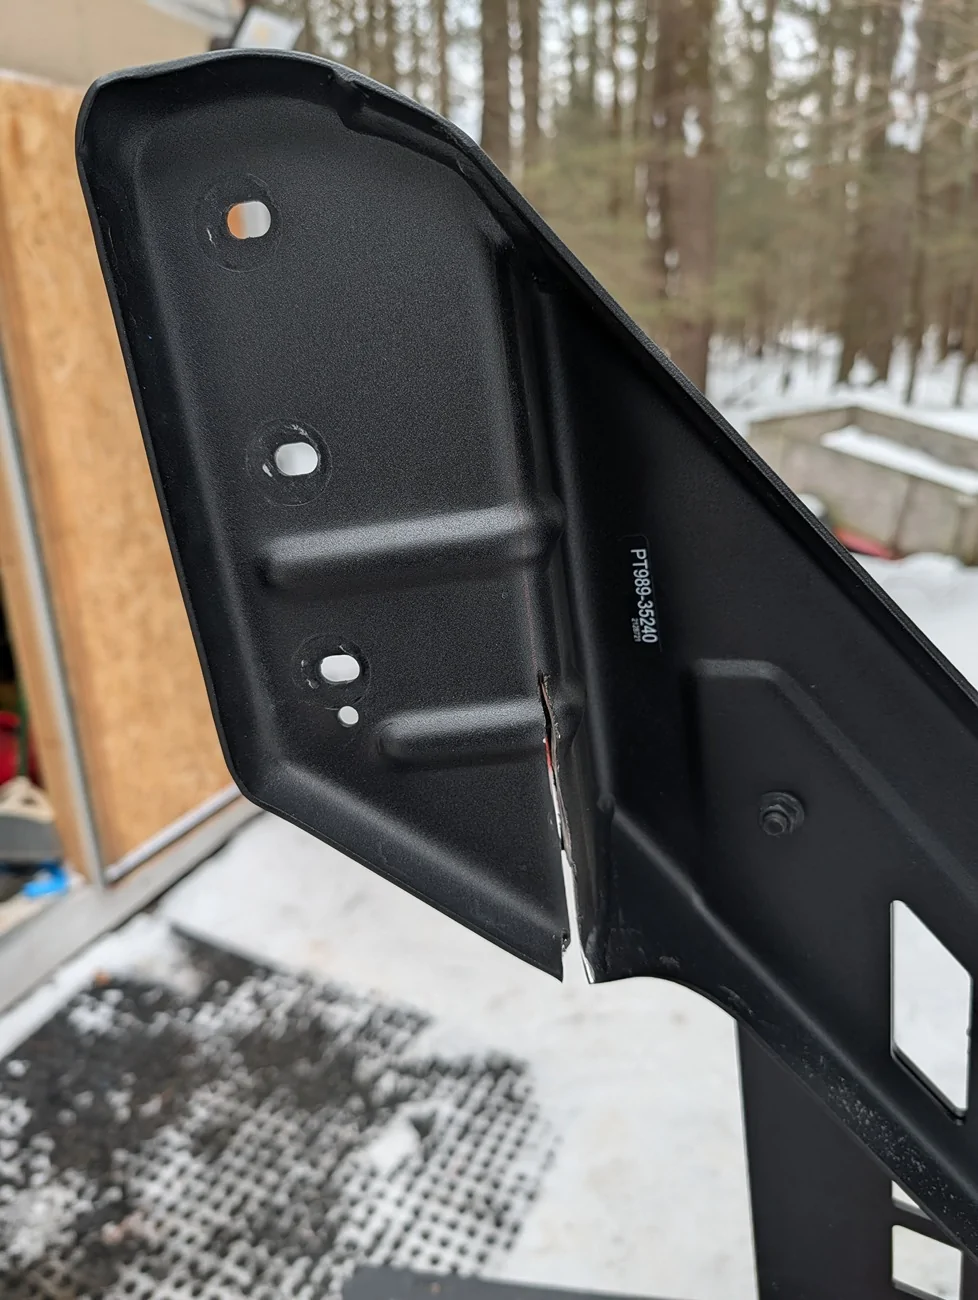
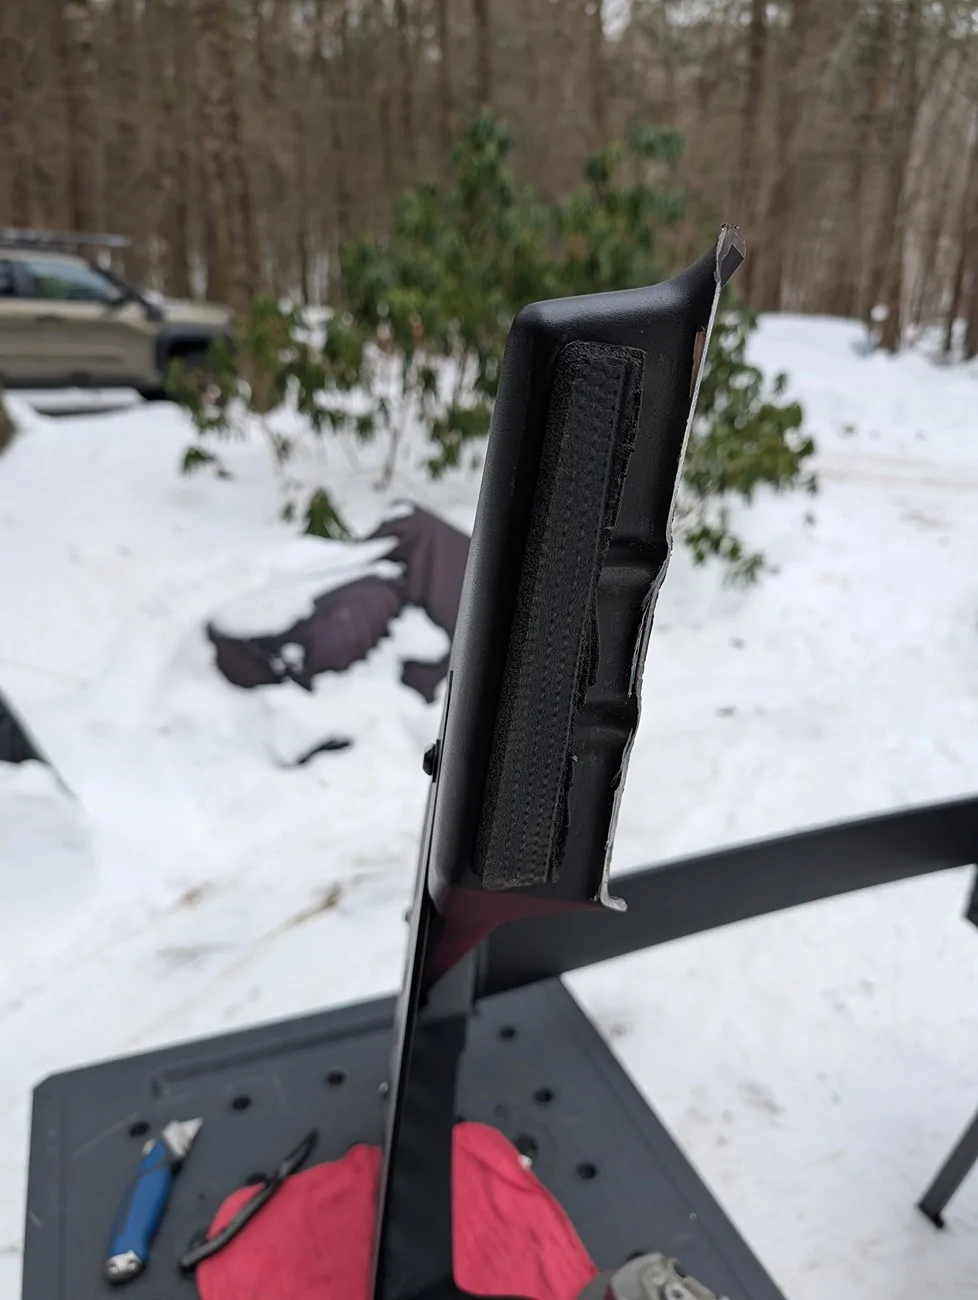
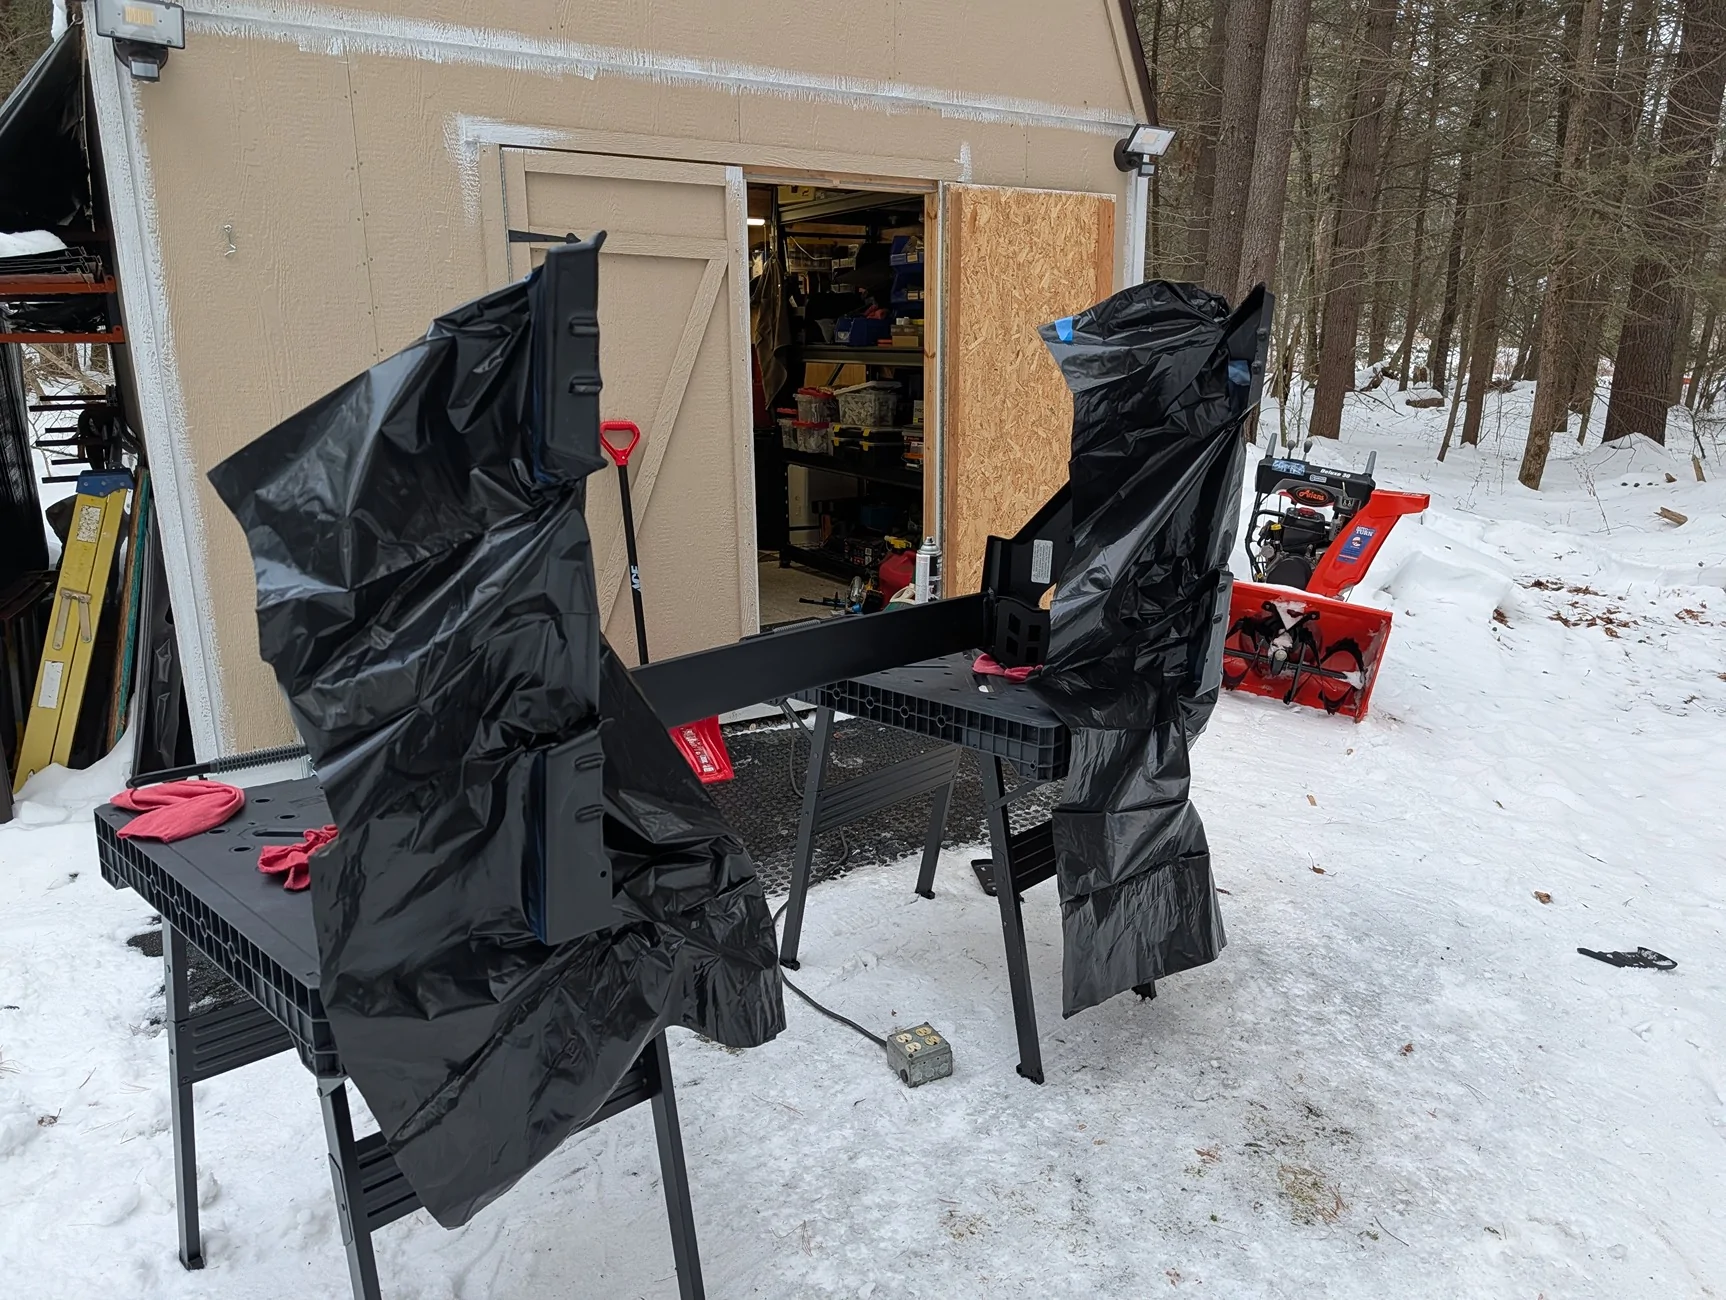
Make sure you have the bar in a comfortable place and secure from wiggling around. It's 1/8" steel, it's a lot to cut. The flip out Dewalt tables might be my favorite shop thing. I can drop dog clamps in from my router table to hold anything, and they are rock solid. First things first, peel the old weather stripping off the bottom cleanly, you won't need it anymore. You need to cut it to leave as much meat on them as possible, because the mounting holes are going to be very close to the edge. So cut on a 45 or so into the bend, and use the shaper to flatten it and take out any sharps.
Once you've got it flat and shaped, now we need to add the mounting holes. I wish I could have fit more, it had a lot before, but at this point, it's for looks. Now you need to measure the t-rail spacing. Be exact. Hook the tape on the inside edge on the far slot, and measure on the inside edge of the close slot, where it is going to mount. Write that down. Now, pick the ideal locations for mounting holes on the bar feet that have the most meat. Use the tape, and hold it across to rough in the spots using that measurement, it may not be obvious.

Use your combination square and mark it from the bottom first. Set the distance you want, and make a line across L-R, and make it the same on the other side. Do the same for the top feet.
Next, measure the outsides of the bar feet where those lines are. Take that number, minus the track distance, divide by 2, and now you have the distance from the outside of the feet on the line where the holes need to be. Use your combination square to set that distance, put it against the outside where you measured on the line, and mark your holes. Center punch them, and use the center drill to drill your pilot holes. Then use the 21/64 drill to go the next size up from 8mm. Deburr them.
At this point, it's good to have a friend help you dry fit it, making sure you don't drop it or scratch anything, it's awkward, unless you've got a good ape factor.
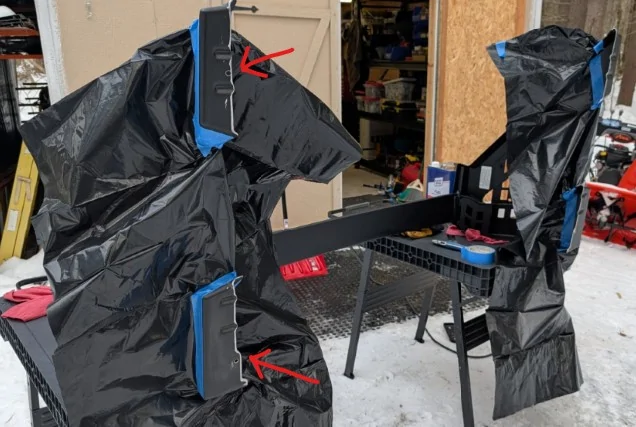
If it's all good, time to prep for paint. Mask it all up, trying to limit the spray to the bottoms where you won't see it. The spray on bed liner is nearly an exact match to the oem paint texture, with one caveat. DO NOT OVER SPRAY. I learned the hard way on one. It's not bad, it just gets shiny and looses that matte finish. Do 3-4 light coats instead. It'll dry to the touch in just a few minutes, so doesn't take long to do the next coat. Let it cure for a day or two. Then remove maskings and get ready to install.

Install:
Have a friend help you, it's easier and more fun. Slide in your t-nuts and get them near their homes. Get your fasteners ready with washers. Use one of the xtra heavy washers from the original install per screw. I used M8x15mm screws because I had them, but needed a regular washer under it so it didn't bottom out in the t-track. You might need that too if you can't get M8x13mm.
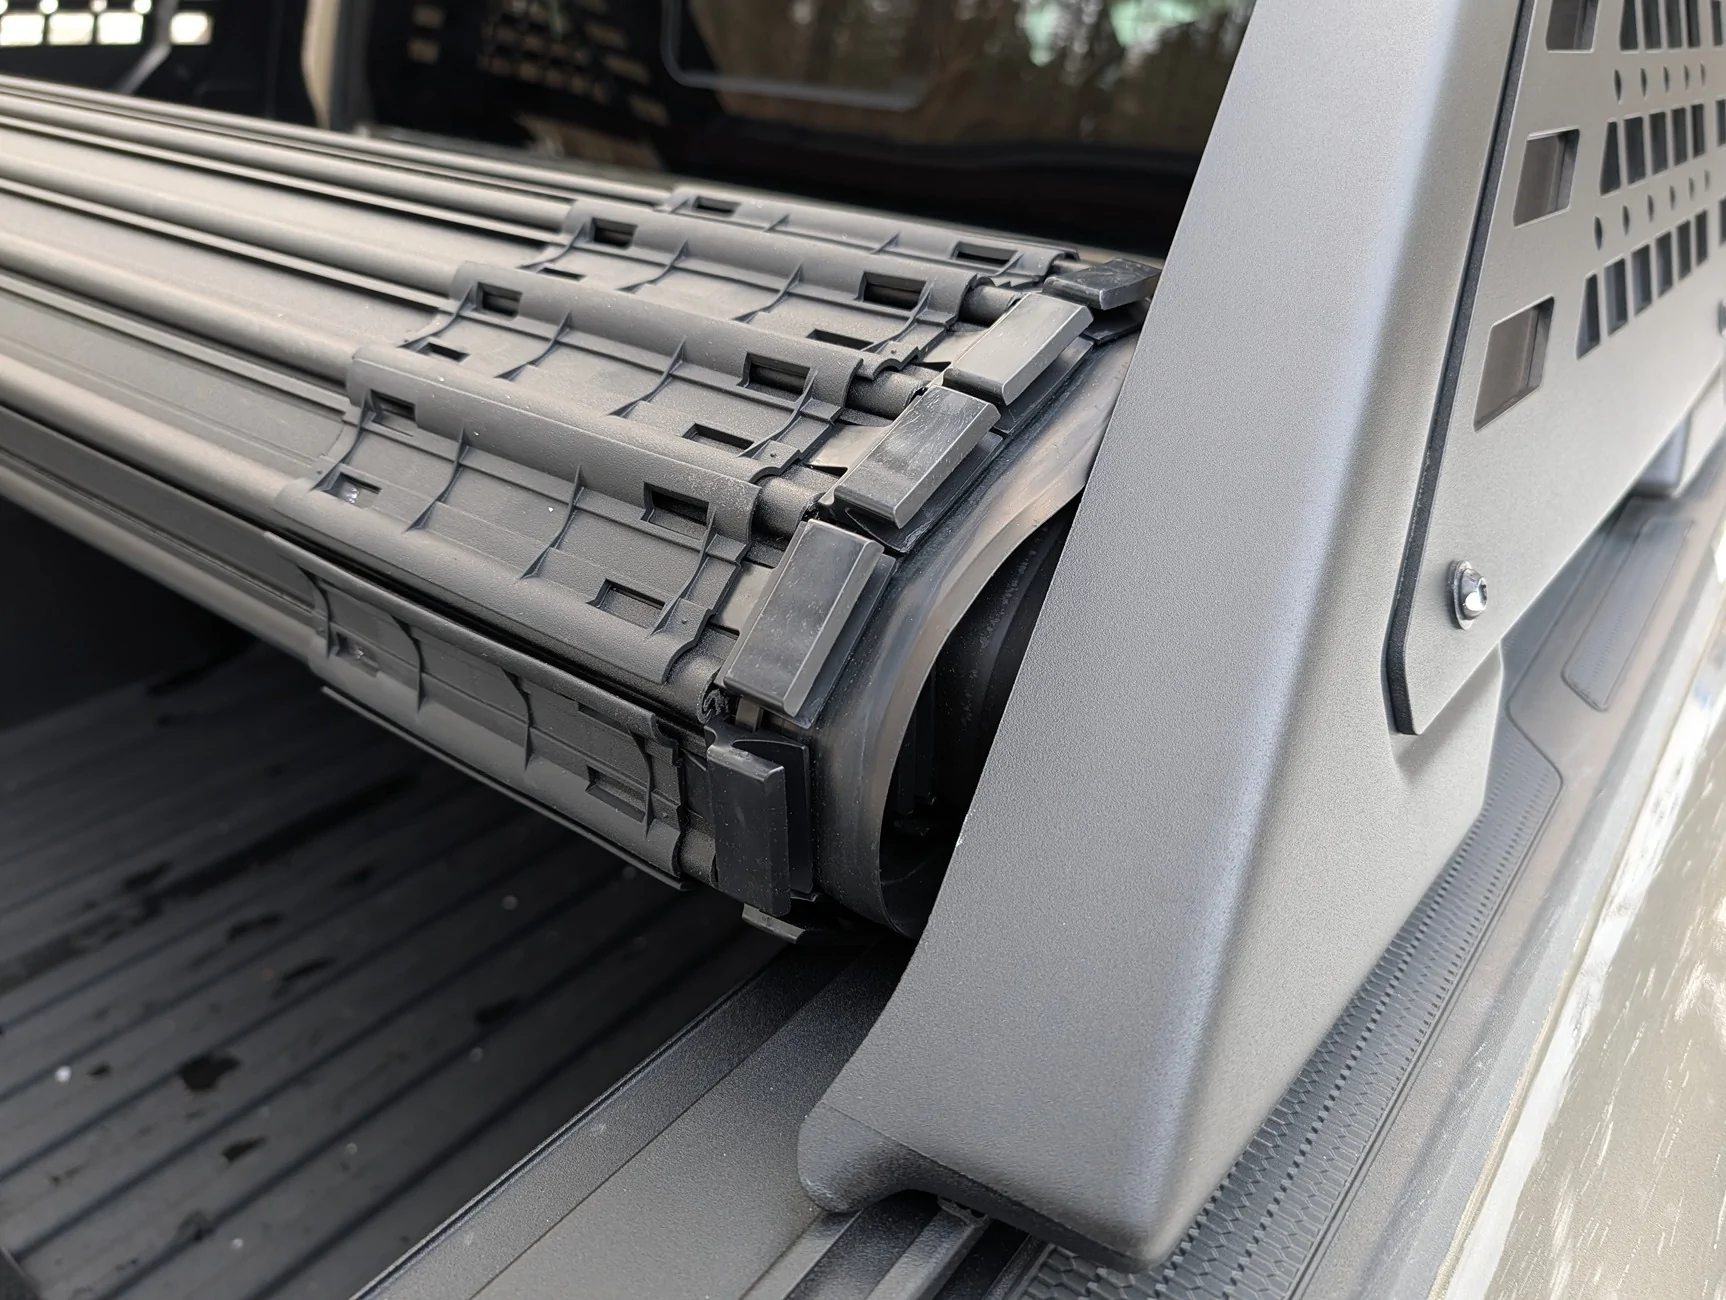
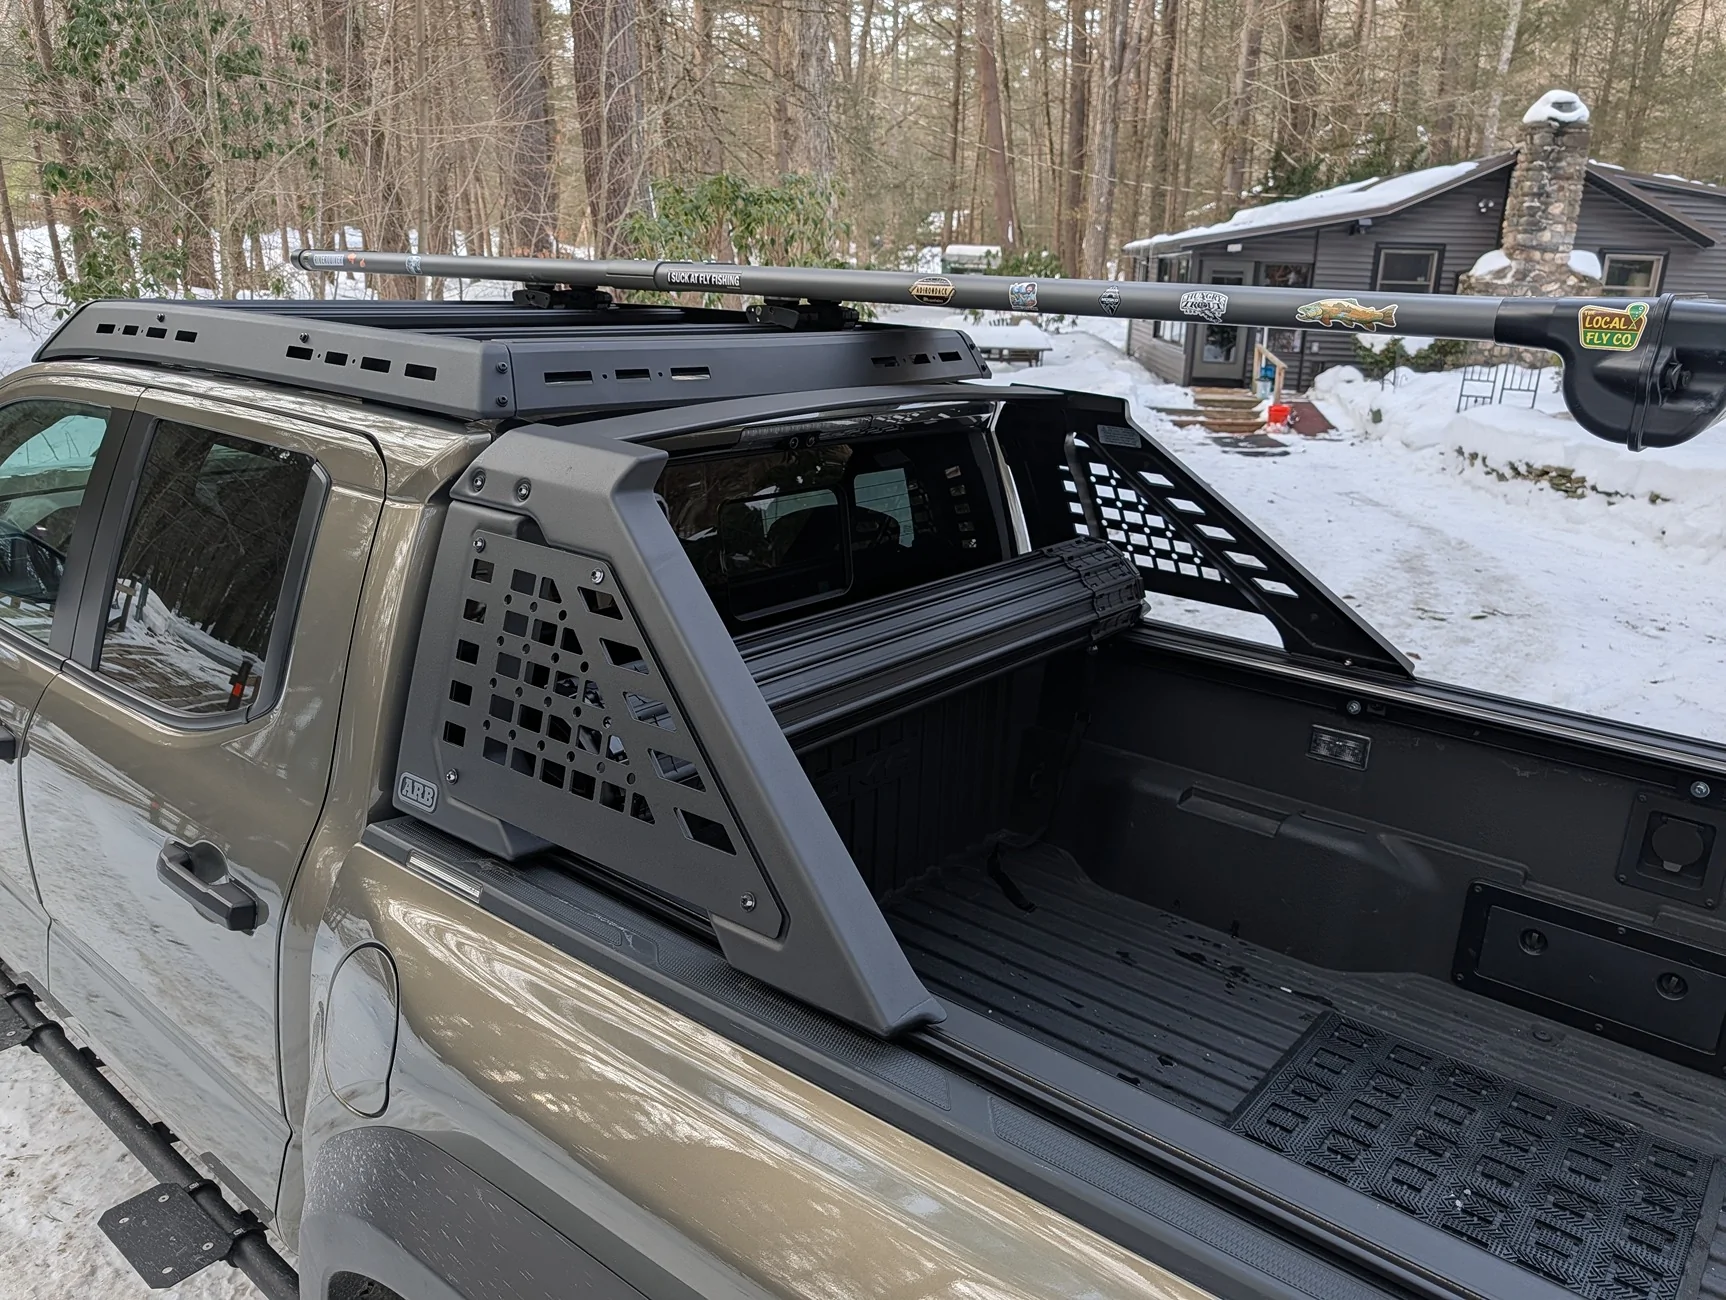
Place the bar in position and use your buddy to hold it while getting the t-nuts into position for the final location. It was pretty obv where it looks right. Put the fastners in loose on one side. Then, on the other side, use that 2" block of wood, and prop it up under the cab foot. Then, get that thin weather stripping you saved from Part 1. It's the style where you can peel it down the middle into two strips. Measure out enough to go the length of the first foot on the raised side and cut it with the scissors. Peel it in half, and then stick each strip on the top of each side of the t-track so that the bar feet rest on it when lowered. Do that for the other one on that side. Then lower it back down, and add some loctite to the screws before installing those loosely. Repeat for the other side. Once it's all together, tighten everything down. The weather stripping will protect it, ensure it doesn't rattle at all, and help it to never loosen even if flexes off road a little.
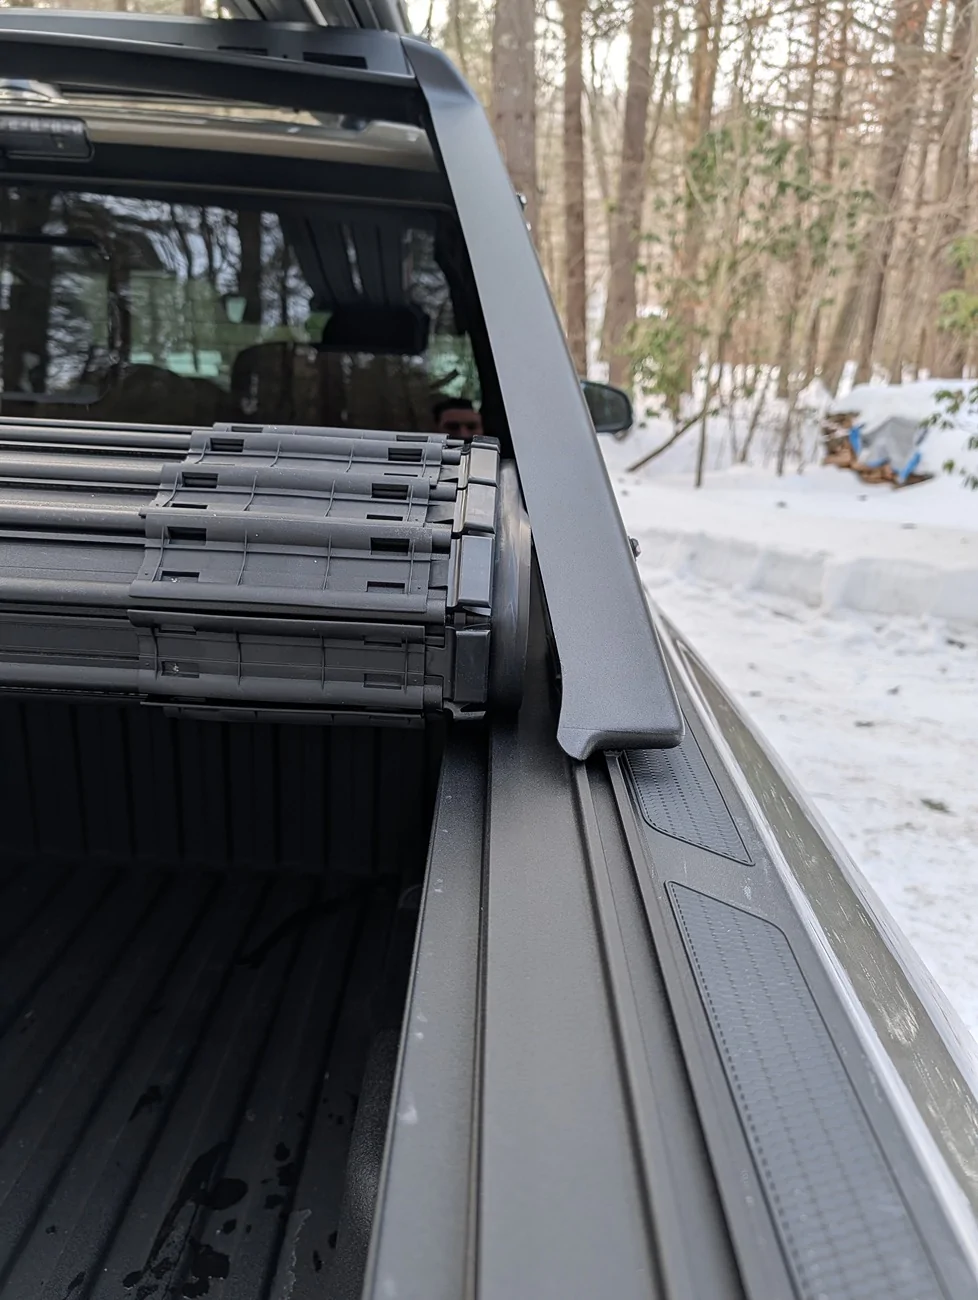
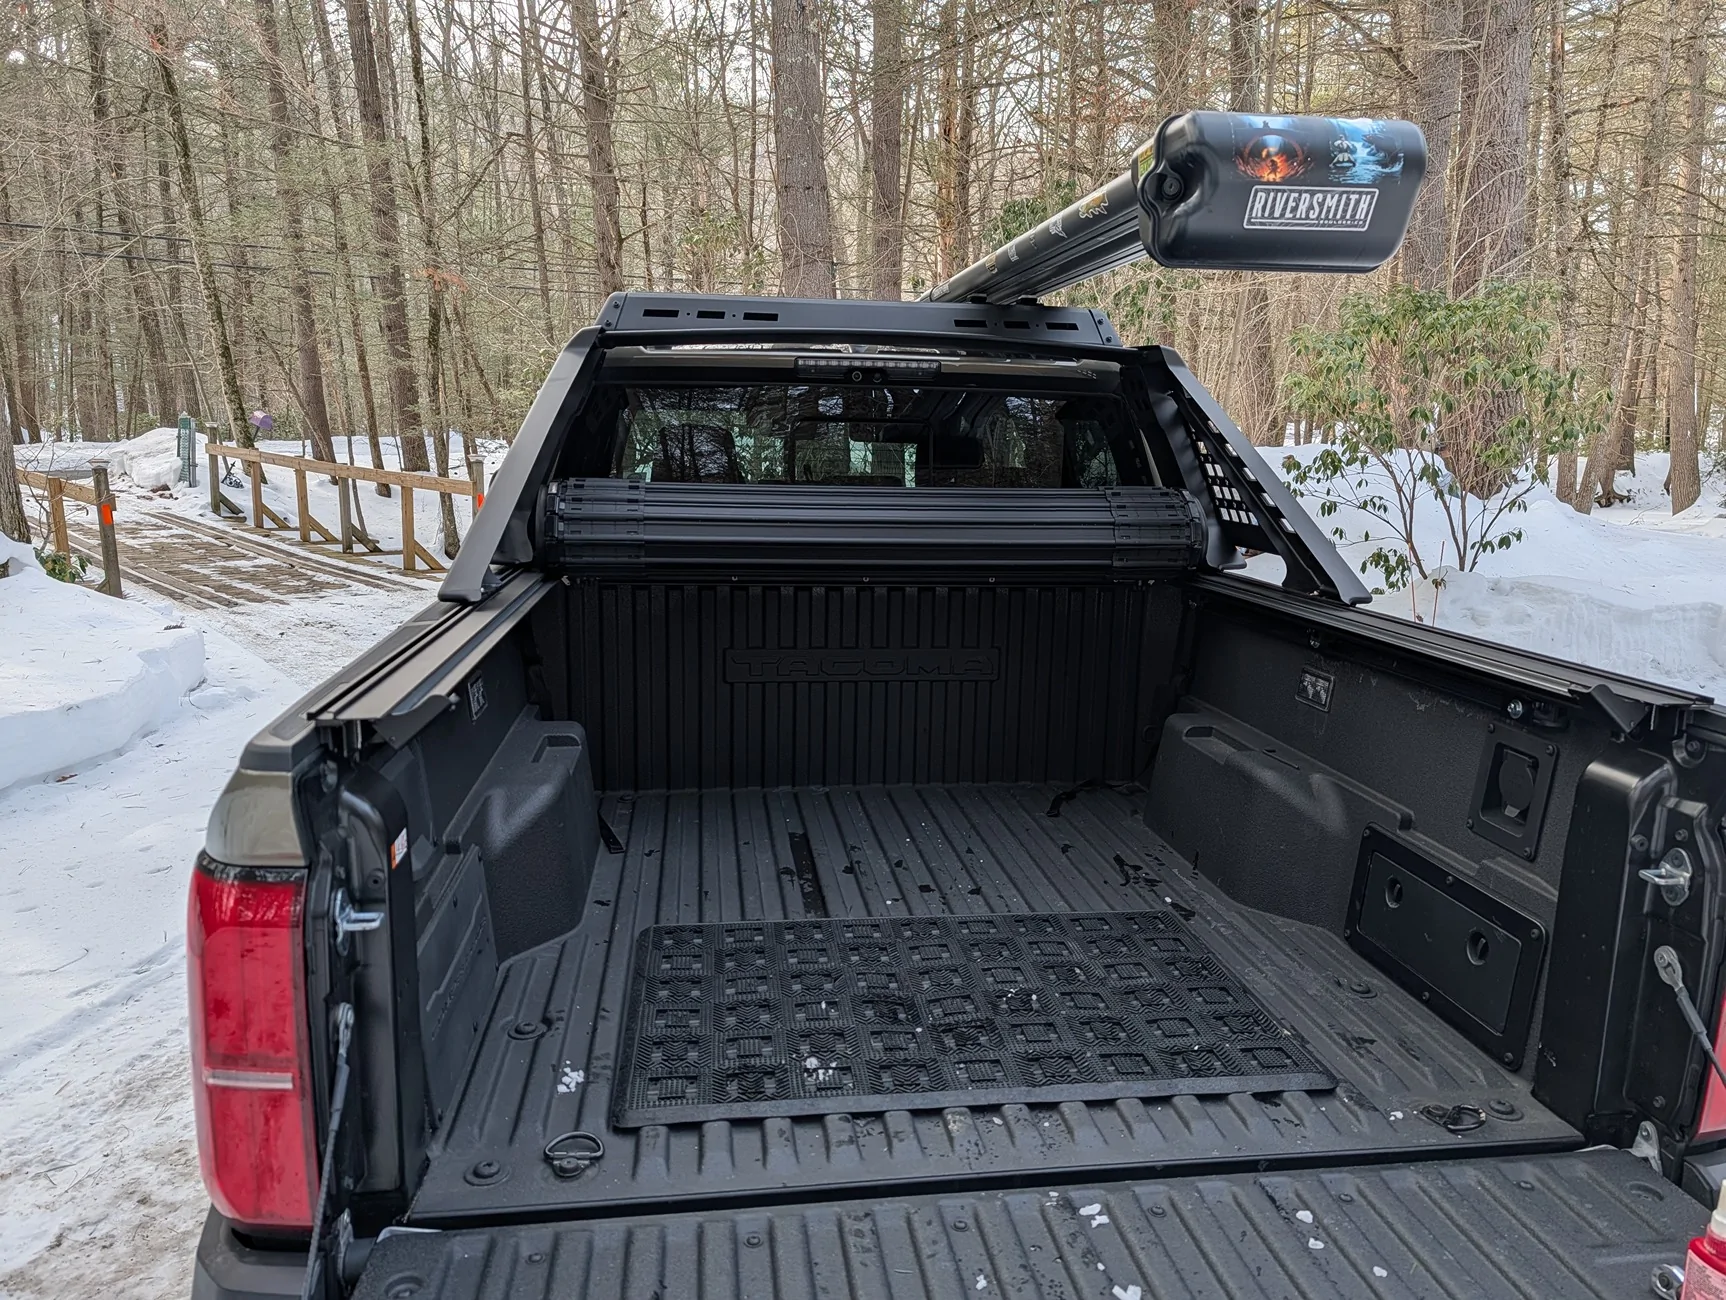
Another thing to note, is that the flexible rubber edge seal does squish to get it past the bar to roll it all the way up. NBD, it does that, so it works just fine, but you'll want to be gentle and not let your little kid play with it if you value its longevity.
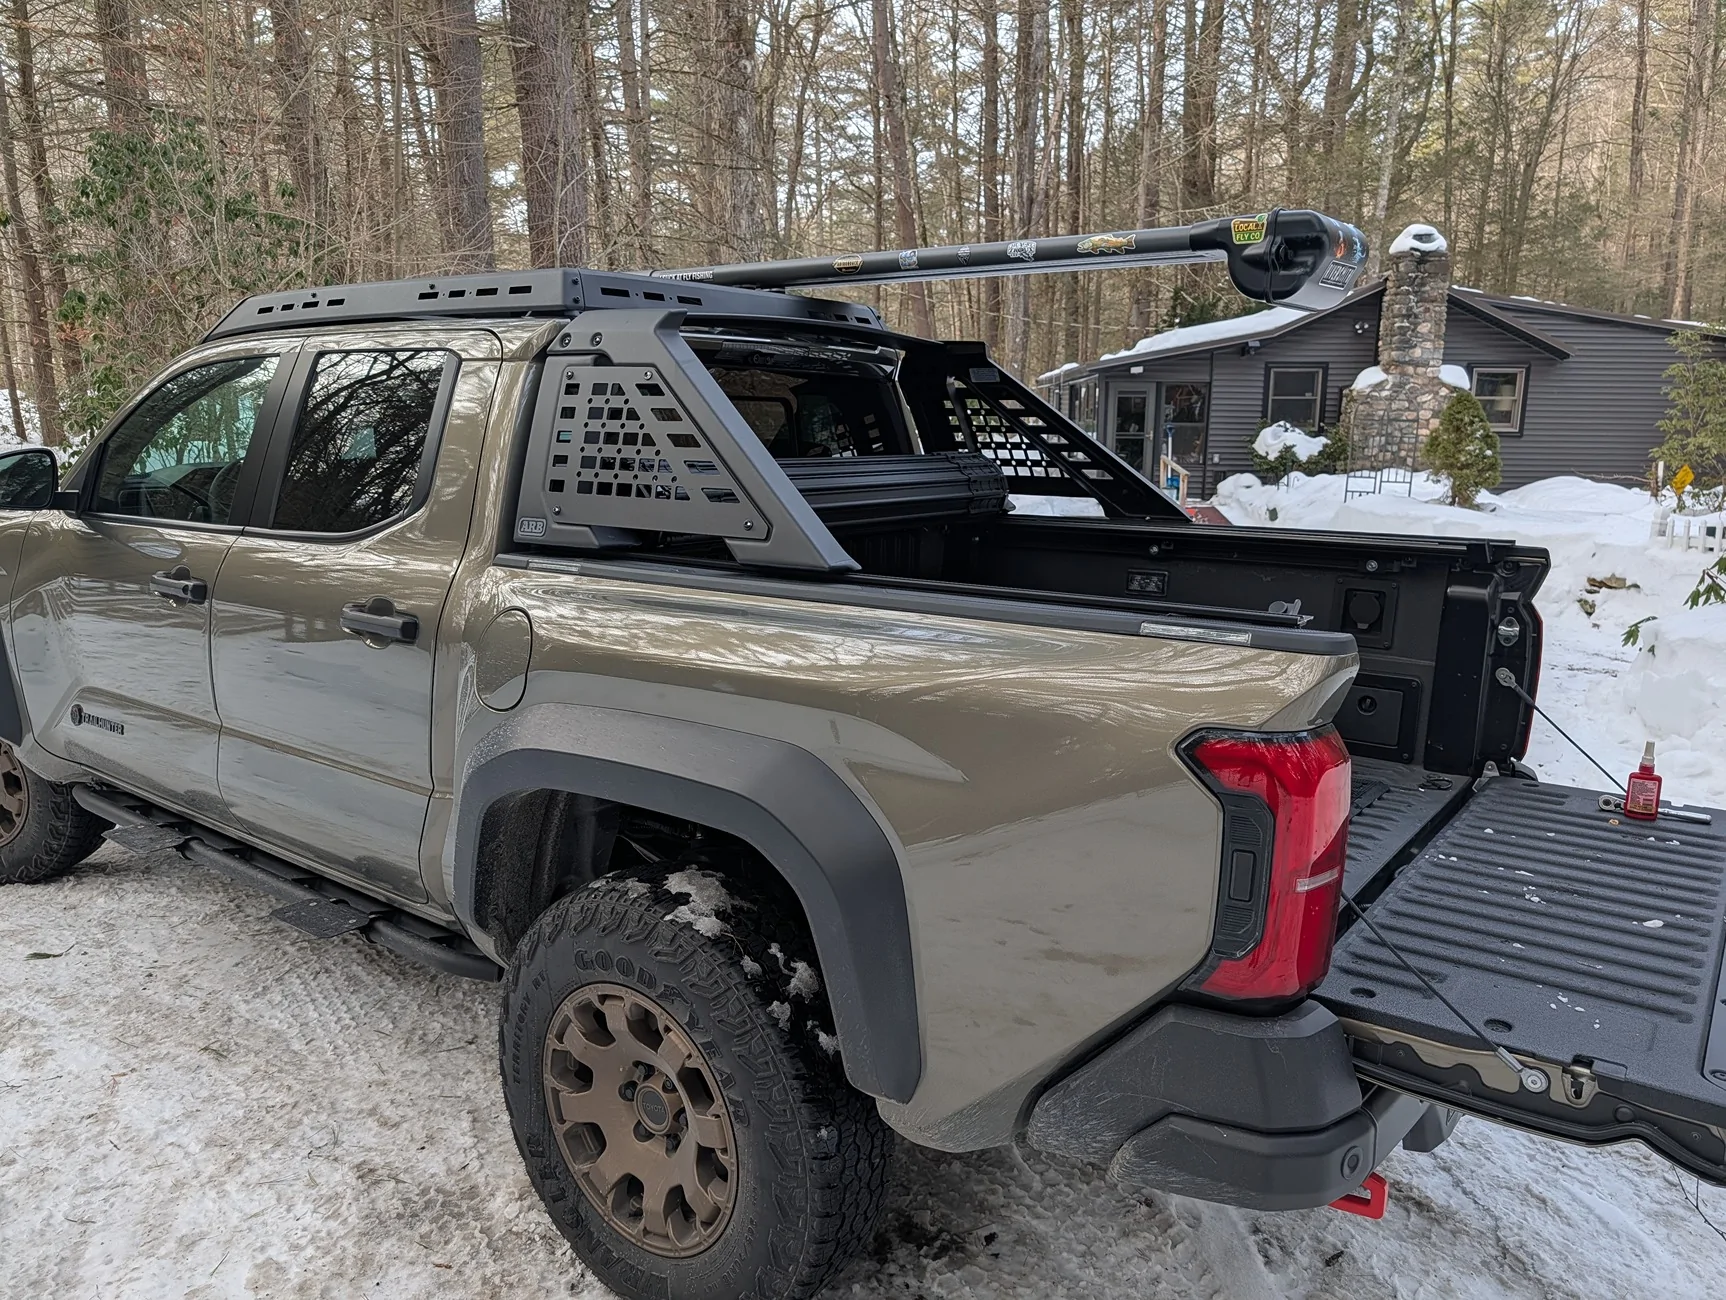
All done, and time for pics...


Finally finished up the bed work to put the cover on and mod the sport bar to fit. It's been sub zero most nights for the past 6 weeks. Happy to share some tips and tricks I learned along the way. I'm super pleased with how it came out, but there were a few quirks to work.
Extra tools/supplies: 1/4" ratchet with hex drives, a 2-3" cut from a 2x4, loctite, M8x13 316SS BHSCS, M8 t-nuts for the Bak t-slots, plastic sheeting or heavy garbage bags, blue painter's tape, grinder with high quality cutoff wheels (at least 2) and a flap disc for shaping, rattle can spray on bed liner, scissors, combination square, center punch, center drill, 21/64" drill bit. Save the washers from the bar removal.
Cover Install:
Okay, so there was one thing almost immediately that threw me off from the instructions from Bak/RT, and that's the straps. It's the first thing you actually attach, and I had to call them. The instructions show in their tiny detailless picture that there's a bracket/clamp attached to the strap that attaches to the mounting rail. When you open the box, and find the straps, there's a heavy pinch clamp already attached to the strap. So I'm like, wtf am I supposed to do with this, it doesn't make sense. Took them a minute to figure it out when I called, and they're like oh yeah, you don't use the clamp, just take it off, and you're left with the grommet in the strap that you secure it to. Now I know, and now you know.
The next detail they don't really describe clear enough, which makes a difference so you don't have to undo and readjust a pile of screws, is the positioning of the long side mounting brackets. They say the front edge should be "approximately a half inch from the cab." Well, it's a 45' angle to where it hits if you slide it all the way forward, so I measured 1/2" to where it hits and secured. What they should have said, is make the rear edge one pube shy of hitting your tailgate when it's closed. I have the spray on bedliner, so it tweaked that "approx 1/2" into hitting territory, and had to loosen everything once completely installed and the tailgate bumped it ever so slightly...
Other than that, clean everything first, and follow the instructions.
Something else to note: They give you two weather strippings, a thick, and a thin. You use the thick, but save the thinner one for part 2.....
PART 2: The Sport Bar
So the sport bar has grown on me. I really dig that it's unique to the trim, and heavy as fuk compared to the just for show ones. Now that it's modded I'll probably not hang anything heavy on it anyway, but I wanted to keep it, so I took the plunge and hacked it up.

The hacking part:
Make sure you have the bar in a comfortable place and secure from wiggling around. It's 1/8" steel, it's a lot to cut. The flip out Dewalt tables might be my favorite shop thing. I can drop dog clamps in from my router table to hold anything, and they are rock solid. First things first, peel the old weather stripping off the bottom cleanly, you won't need it anymore. You need to cut it to leave as much meat on them as possible, because the mounting holes are going to be very close to the edge. So cut on a 45 or so into the bend, and use the shaper to flatten it and take out any sharps.
Once you've got it flat and shaped, now we need to add the mounting holes. I wish I could have fit more, it had a lot before, but at this point, it's for looks. Now you need to measure the t-rail spacing. Be exact. Hook the tape on the inside edge on the far slot, and measure on the inside edge of the close slot, where it is going to mount. Write that down. Now, pick the ideal locations for mounting holes on the bar feet that have the most meat. Use the tape, and hold it across to rough in the spots using that measurement, it may not be obvious.
Use your combination square and mark it from the bottom first. Set the distance you want, and make a line across L-R, and make it the same on the other side. Do the same for the top feet.
Next, measure the outsides of the bar feet where those lines are. Take that number, minus the track distance, divide by 2, and now you have the distance from the outside of the feet on the line where the holes need to be. Use your combination square to set that distance, put it against the outside where you measured on the line, and mark your holes. Center punch them, and use the center drill to drill your pilot holes. Then use the 21/64 drill to go the next size up from 8mm. Deburr them.
At this point, it's good to have a friend help you dry fit it, making sure you don't drop it or scratch anything, it's awkward, unless you've got a good ape factor.
If it's all good, time to prep for paint. Mask it all up, trying to limit the spray to the bottoms where you won't see it. The spray on bed liner is nearly an exact match to the oem paint texture, with one caveat. DO NOT OVER SPRAY. I learned the hard way on one. It's not bad, it just gets shiny and looses that matte finish. Do 3-4 light coats instead. It'll dry to the touch in just a few minutes, so doesn't take long to do the next coat. Let it cure for a day or two. Then remove maskings and get ready to install.
Install:
Have a friend help you, it's easier and more fun. Slide in your t-nuts and get them near their homes. Get your fasteners ready with washers. Use one of the xtra heavy washers from the original install per screw. I used M8x15mm screws because I had them, but needed a regular washer under it so it didn't bottom out in the t-track. You might need that too if you can't get M8x13mm.
Place the bar in position and use your buddy to hold it while getting the t-nuts into position for the final location. It was pretty obv where it looks right. Put the fastners in loose on one side. Then, on the other side, use that 2" block of wood, and prop it up under the cab foot. Then, get that thin weather stripping you saved from Part 1. It's the style where you can peel it down the middle into two strips. Measure out enough to go the length of the first foot on the raised side and cut it with the scissors. Peel it in half, and then stick each strip on the top of each side of the t-track so that the bar feet rest on it when lowered. Do that for the other one on that side. Then lower it back down, and add some loctite to the screws before installing those loosely. Repeat for the other side. Once it's all together, tighten everything down. The weather stripping will protect it, ensure it doesn't rattle at all, and help it to never loosen even if flexes off road a little.
Another thing to note, is that the flexible rubber edge seal does squish to get it past the bar to roll it all the way up. NBD, it does that, so it works just fine, but you'll want to be gentle and not let your little kid play with it if you value its longevity.
All done, and time for pics...


Sponsored
