
- Joined
- Aug 8, 2024
- Threads
- 32
- Messages
- 649
- Reaction score
- 823
- Location
- California
- Vehicle(s)
- Tacoma TRD OR Premium Plus
- Thread starter
- #1
Hi folks
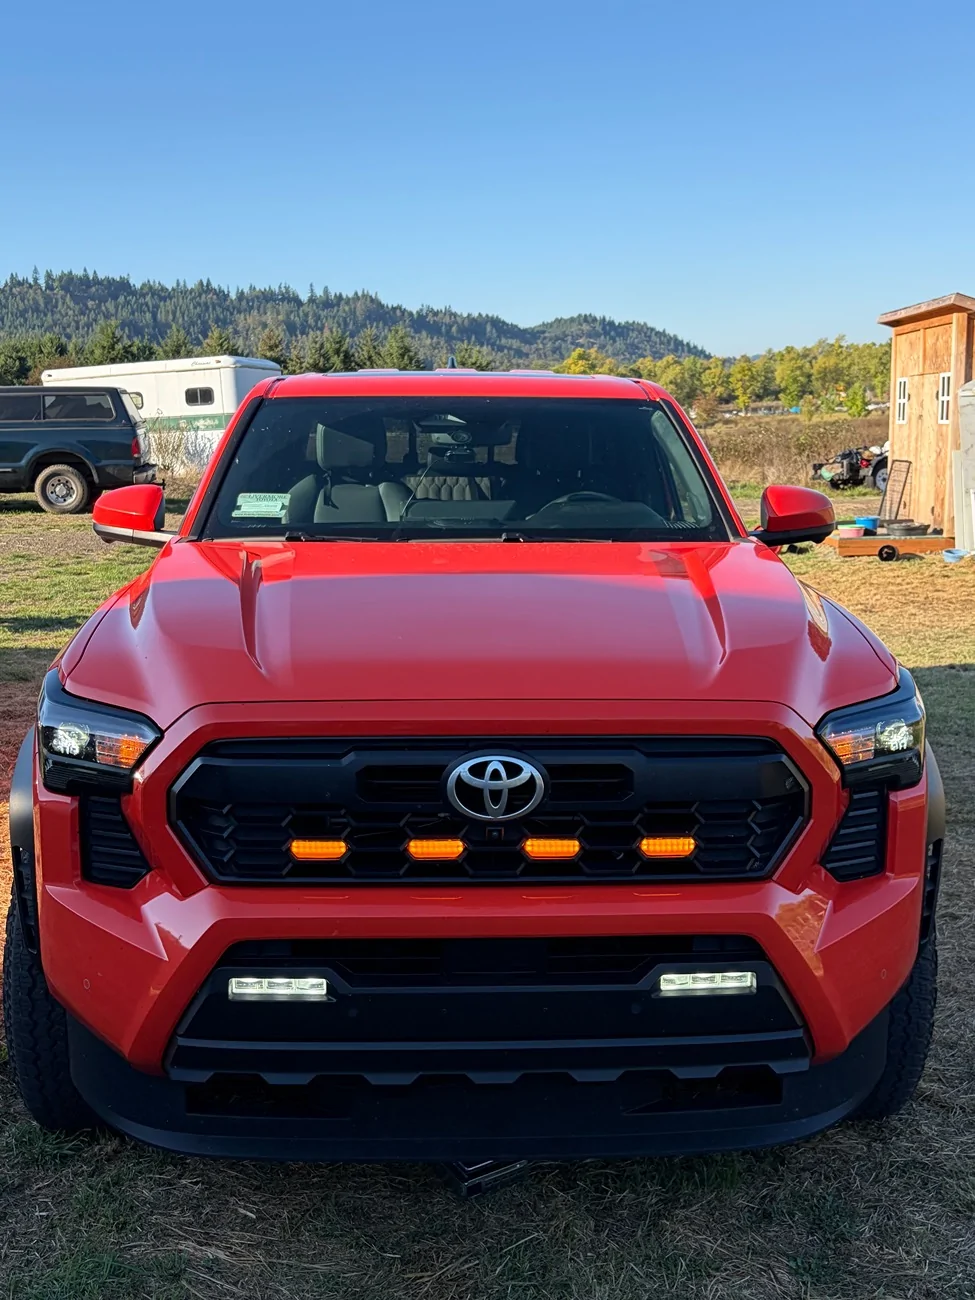
Mabett recently asked me to install and review their Amber Grille Lights. I received the kit for free.
Overall, I think the kit adds an attractive ornamental set of lights to the front grille of my Tacoma. Installation was straightforward but there are some things to watch out for along the way that I already provided as feedback to Mabett. Rather than installing the lights using the provided fuse tap, I decided to run the lights through one of the built in aux switches that came with my Tacoma. This was relatively easy to do but required a few extra parts.
Upon opening the box, the product presentation was neatly organized in the box. The instructions are easy to read and follow.

I unpacked the lights and ran the harness through the opening in the center top of my grille in the engine bay and then out each of the openings I wanted the lights to go in.
Note that there's a shutter system just behind this area so I used extra zip ties to take up the slack in the wiring so the wiring wouldn't interfere with the shutter system.
Also note that there's really only one way to install the lights that results in a horizontal line of lights. Be careful to line them all up. Note the ones I had to rerun on the left side.
If you install a light in the wrong hole, it's easy to use a pointed object, like a knife to pop it out again.

My Tacoma came with 2 pigtails for the aux switches. One is a bypass allowing you to use front and rear powered items, such as lights. As I only want front lights, I used the simpler of the two pigtails. You need to remove the aux switch cap on the built in wiring and then It's a simple plug and play adapter.
After installing the factory pigtail, I ran the Mabett kit wiring to the right where the factory aux harness is located and I used a few zip ties to secure it along the way.
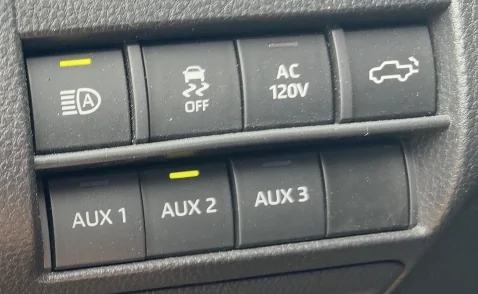
Note that the 3 wires have different amps. I used the green wire(10A), center button in the cab.
After cutting off the end and stripping the Mabett ground wire, I connected it using a shrink wrap barrel connector to the White ground off the factory pigtail.
I then tested the switch and it worked as expected to activate and deactivate the lights. I'll add a photo tonight of how they look in the dark.


Overall, a nice product with a low effort and complexity installation. Thanks Mabett for sending me the light kit to install and review.
I have a video, but it seems it's too large to upload. I'll try and figure that out.
Mabett recently asked me to install and review their Amber Grille Lights. I received the kit for free.
Overall, I think the kit adds an attractive ornamental set of lights to the front grille of my Tacoma. Installation was straightforward but there are some things to watch out for along the way that I already provided as feedback to Mabett. Rather than installing the lights using the provided fuse tap, I decided to run the lights through one of the built in aux switches that came with my Tacoma. This was relatively easy to do but required a few extra parts.
Upon opening the box, the product presentation was neatly organized in the box. The instructions are easy to read and follow.
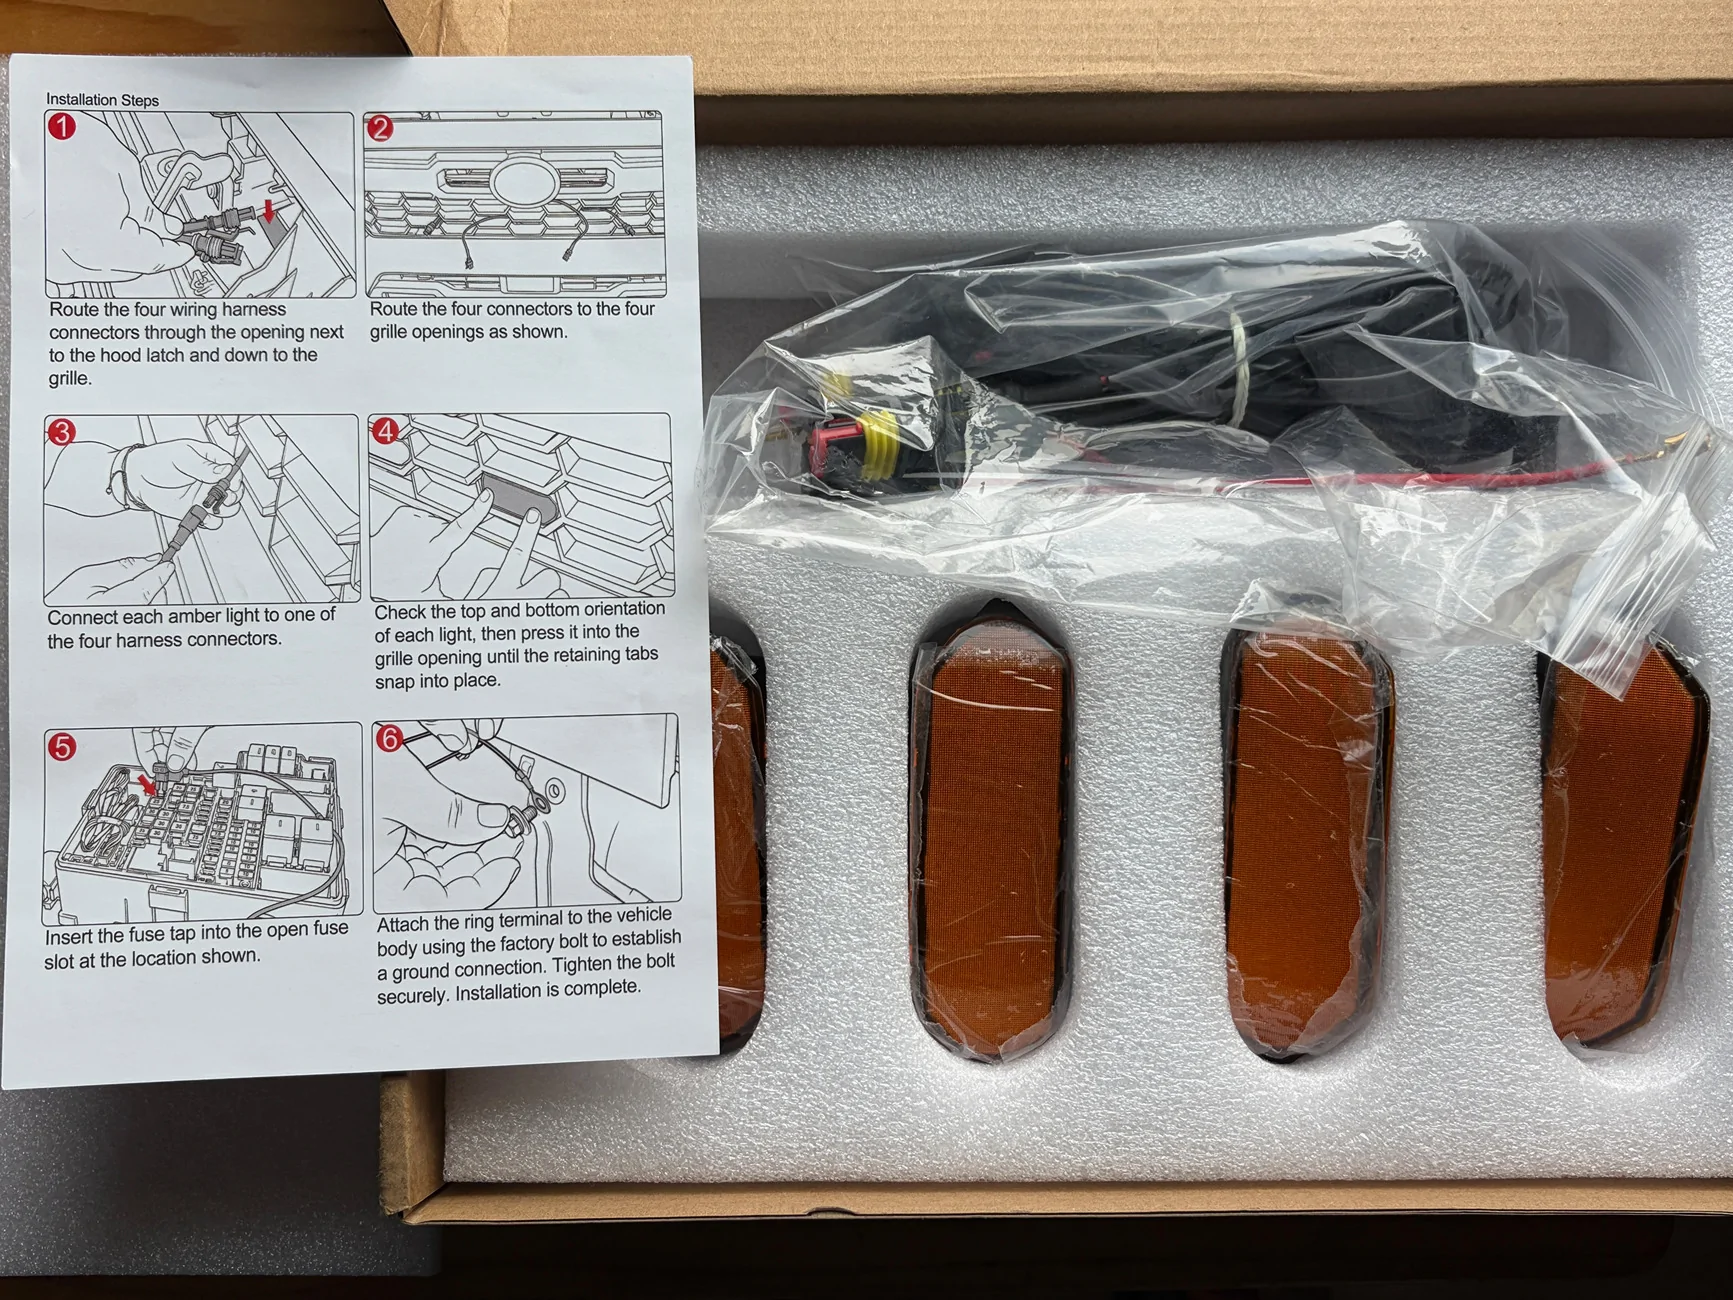
I unpacked the lights and ran the harness through the opening in the center top of my grille in the engine bay and then out each of the openings I wanted the lights to go in.
Note that there's a shutter system just behind this area so I used extra zip ties to take up the slack in the wiring so the wiring wouldn't interfere with the shutter system.
Also note that there's really only one way to install the lights that results in a horizontal line of lights. Be careful to line them all up. Note the ones I had to rerun on the left side.
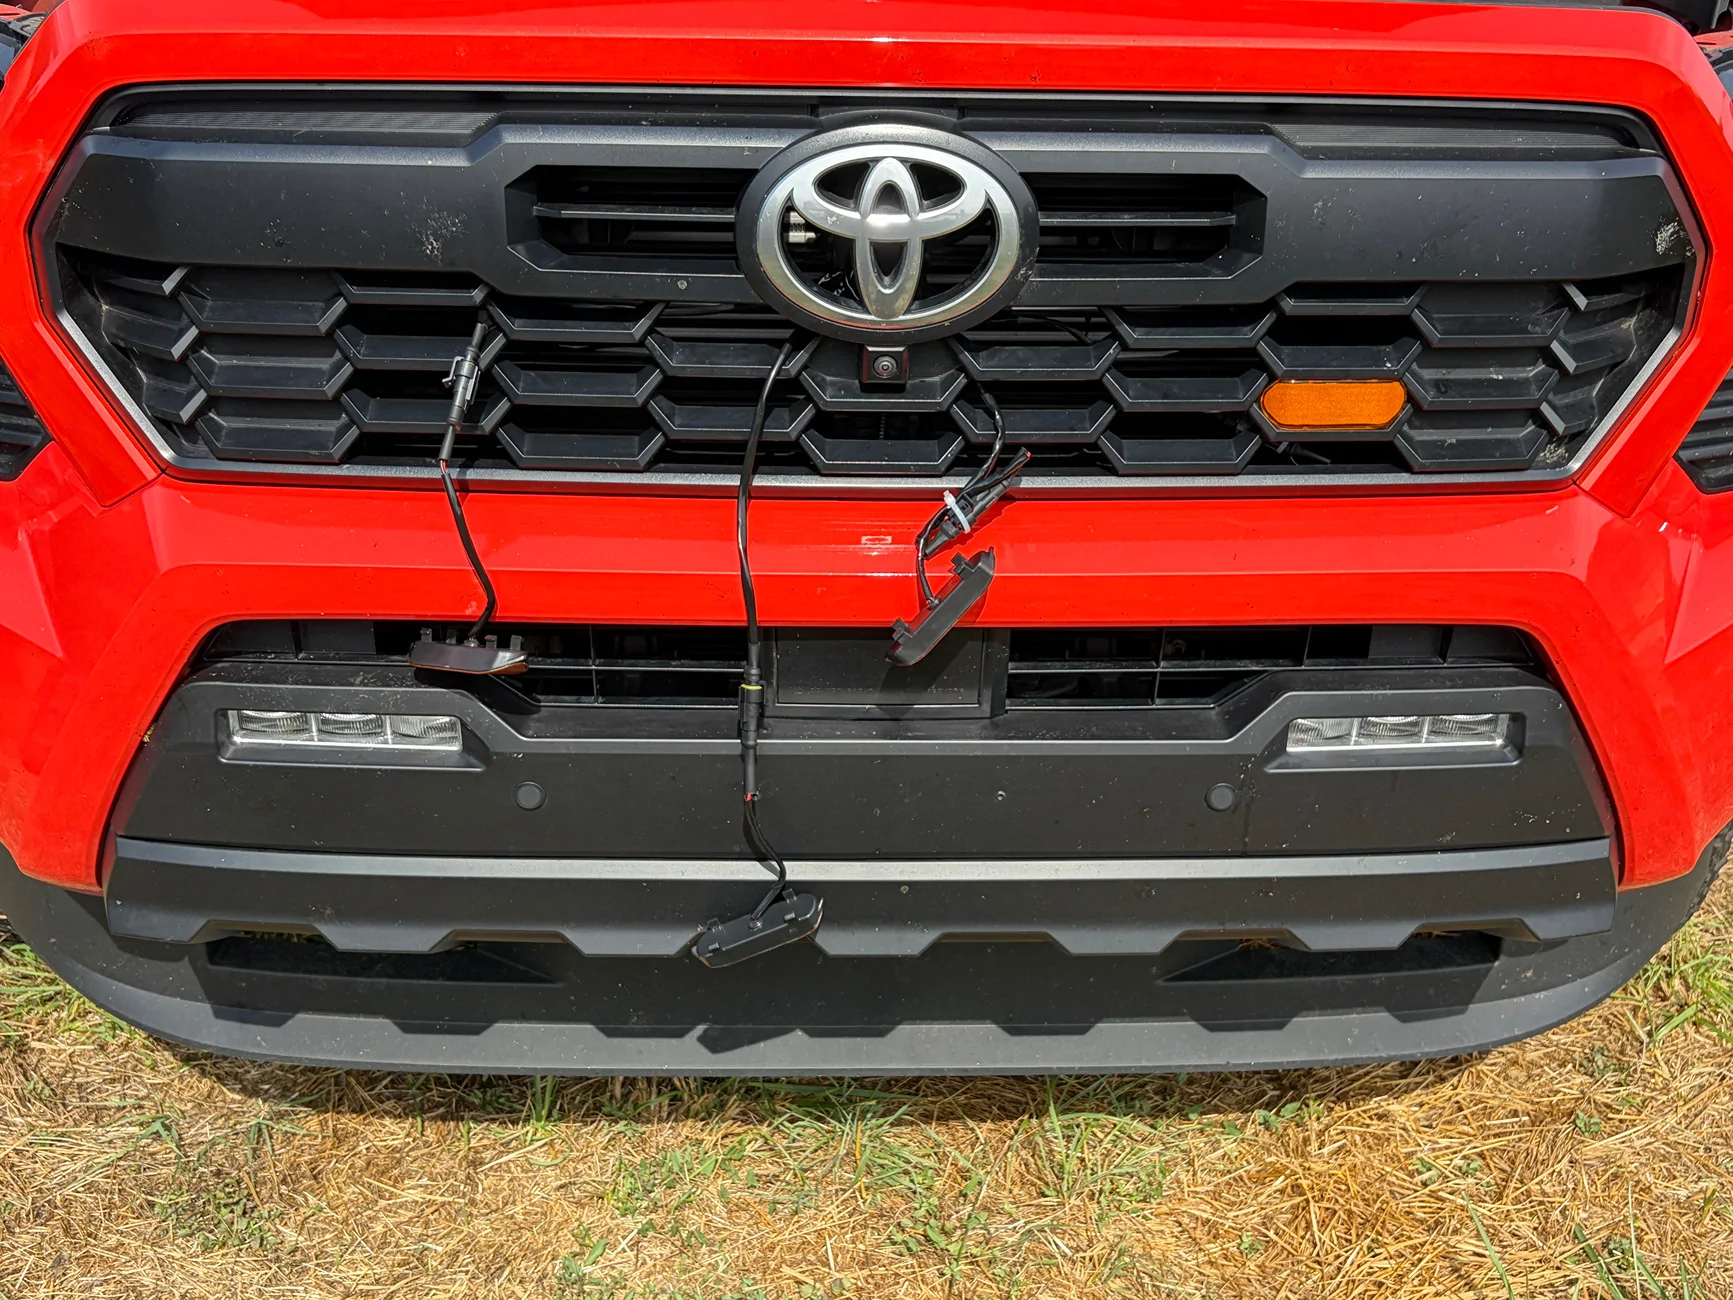
If you install a light in the wrong hole, it's easy to use a pointed object, like a knife to pop it out again.
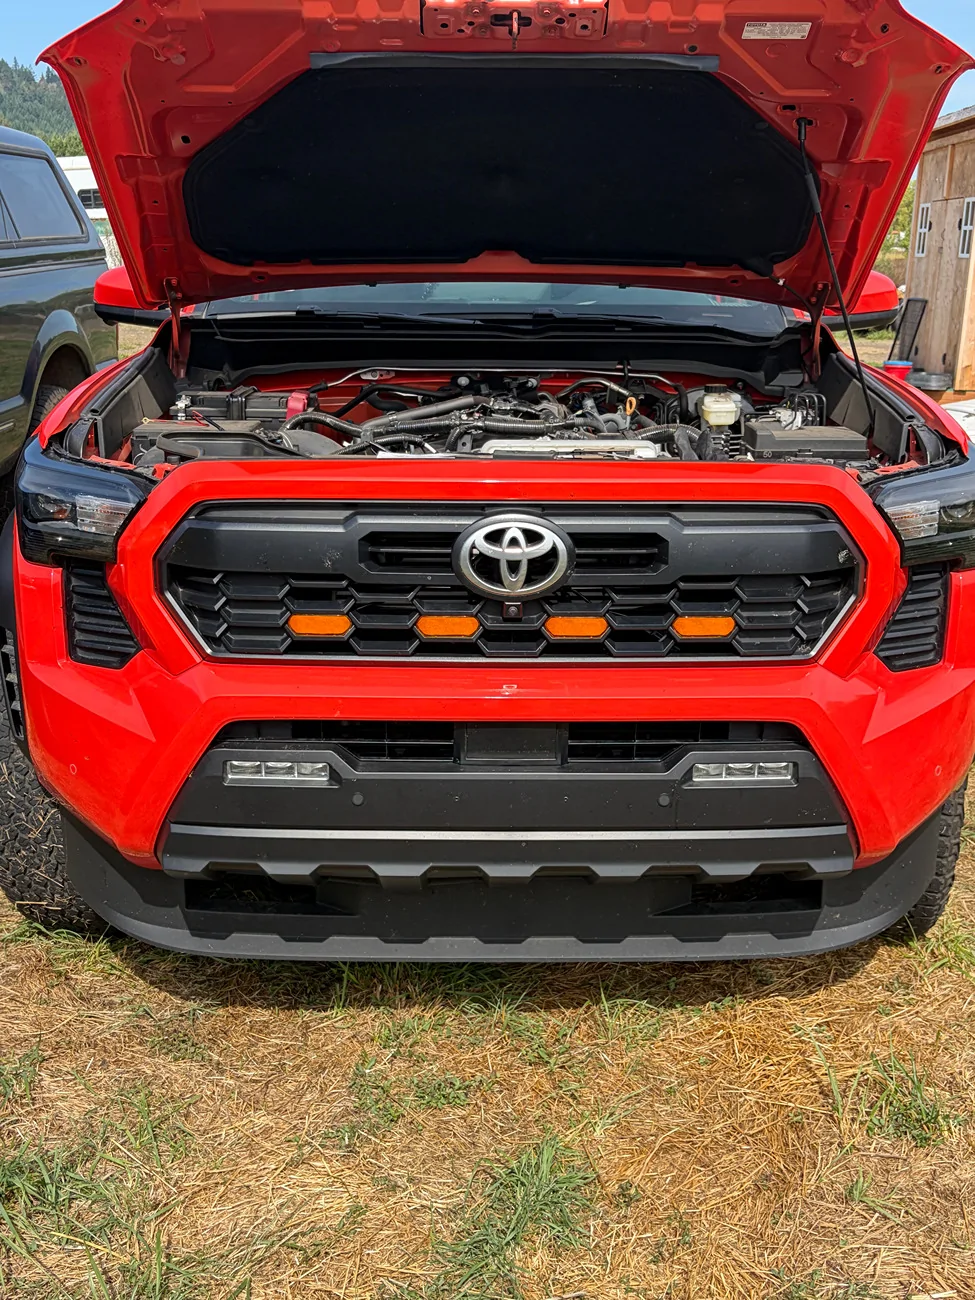
My Tacoma came with 2 pigtails for the aux switches. One is a bypass allowing you to use front and rear powered items, such as lights. As I only want front lights, I used the simpler of the two pigtails. You need to remove the aux switch cap on the built in wiring and then It's a simple plug and play adapter.
After installing the factory pigtail, I ran the Mabett kit wiring to the right where the factory aux harness is located and I used a few zip ties to secure it along the way.
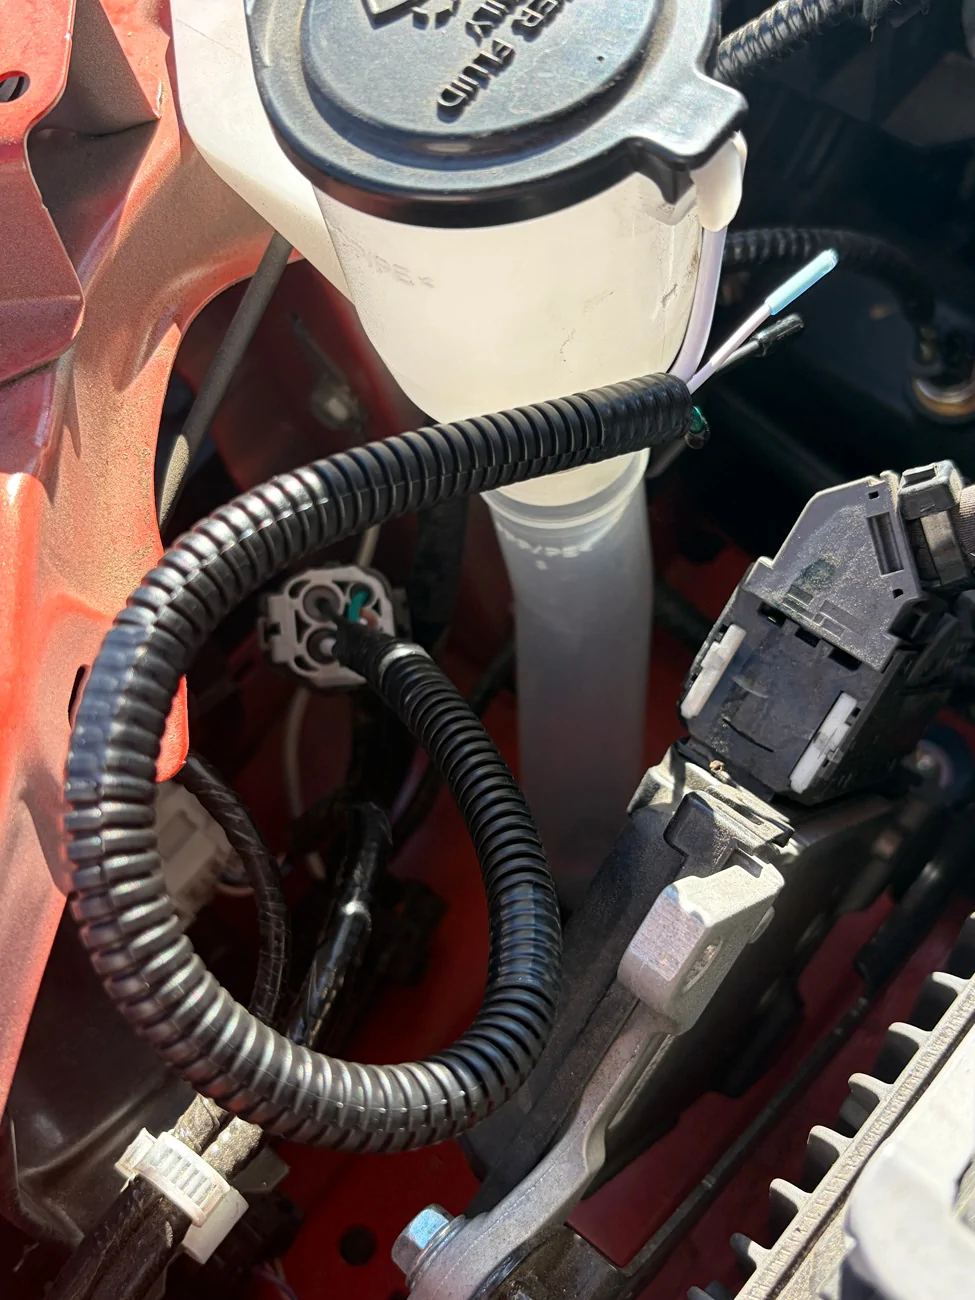
Note that the 3 wires have different amps. I used the green wire(10A), center button in the cab.
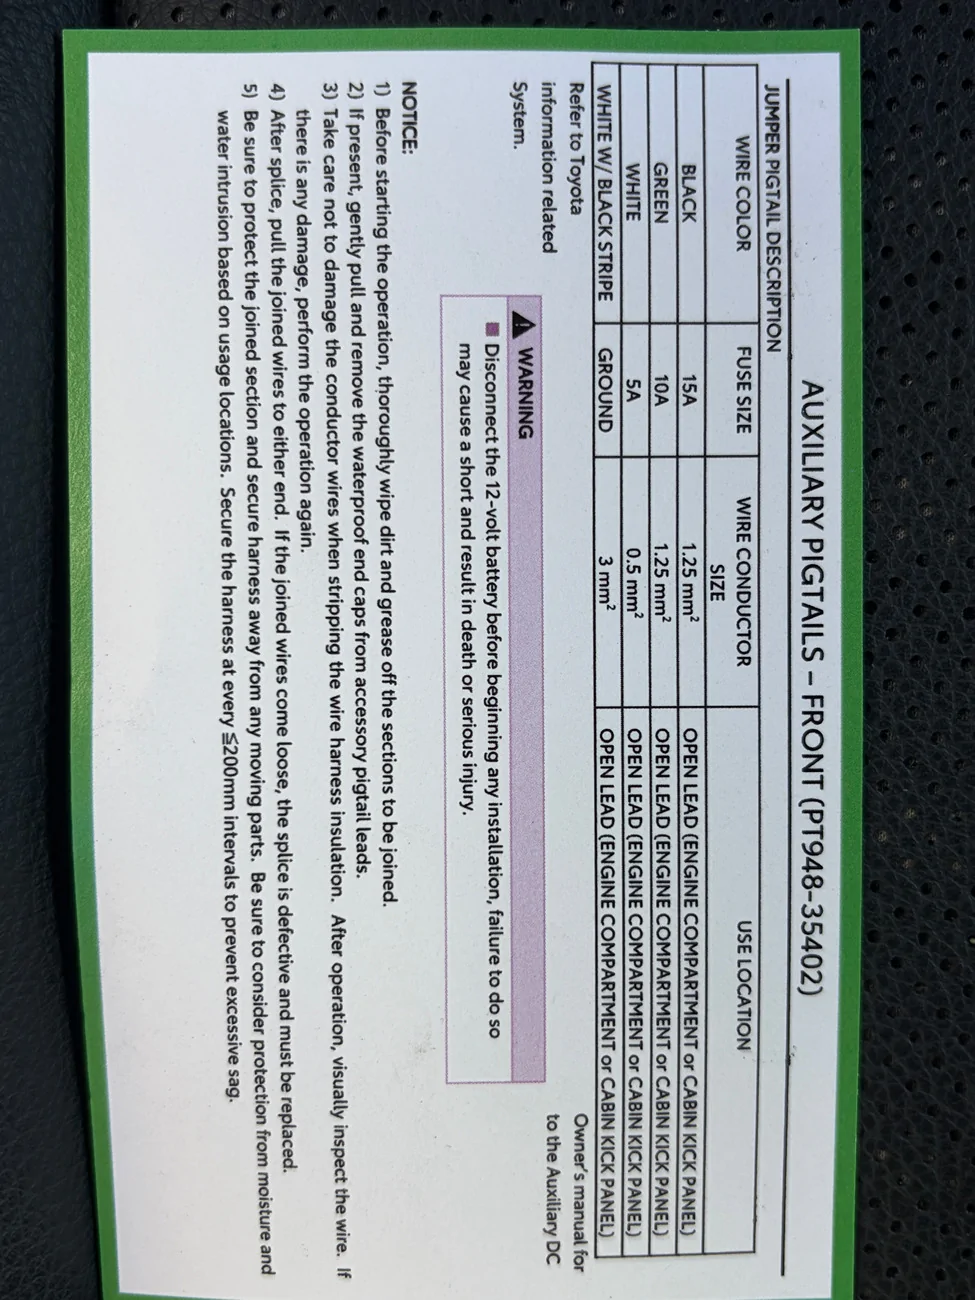
After cutting off the end and stripping the Mabett ground wire, I connected it using a shrink wrap barrel connector to the White ground off the factory pigtail.
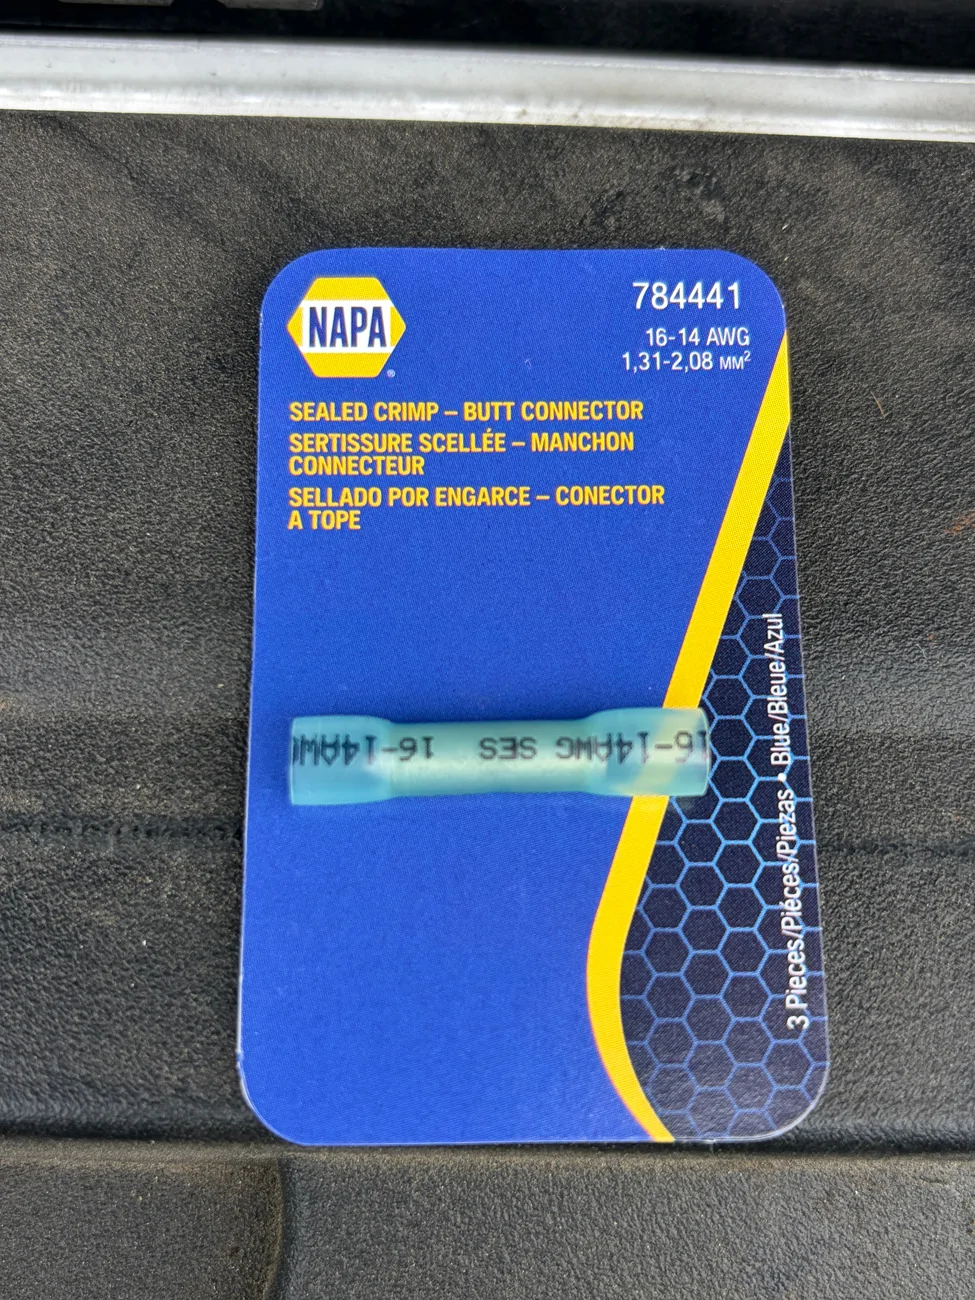
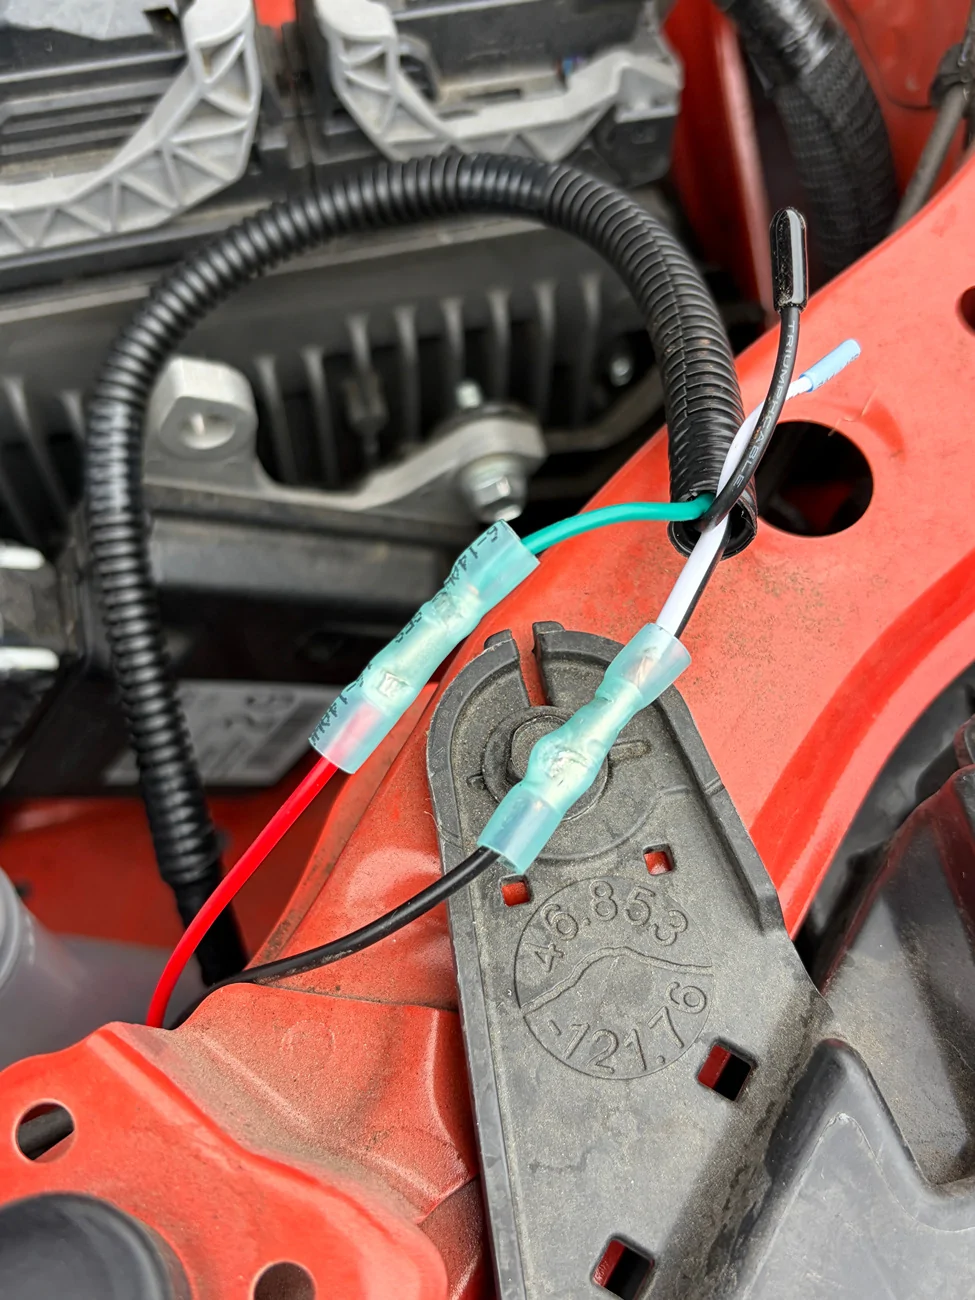
I then tested the switch and it worked as expected to activate and deactivate the lights. I'll add a photo tonight of how they look in the dark.
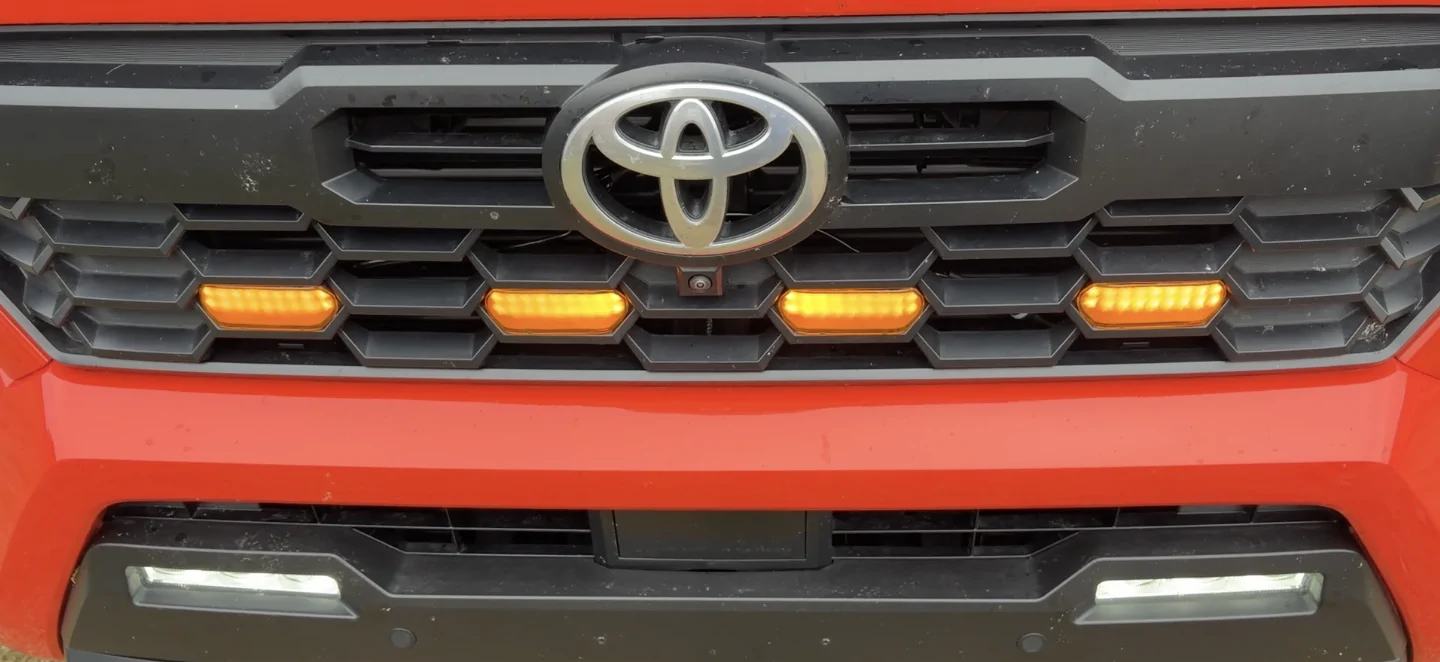
Overall, a nice product with a low effort and complexity installation. Thanks Mabett for sending me the light kit to install and review.
I have a video, but it seems it's too large to upload. I'll try and figure that out.
Sponsored
Last edited: