
Sponsored

toothpaste22

Trailhunter
Member
First Name
Ryan
Joined
Aug 31, 2025
Threads
2
Messages
13
Reaction score
11
Location
Dallas
Vehicle(s)
6G4R, 4GTaco
Hi all,

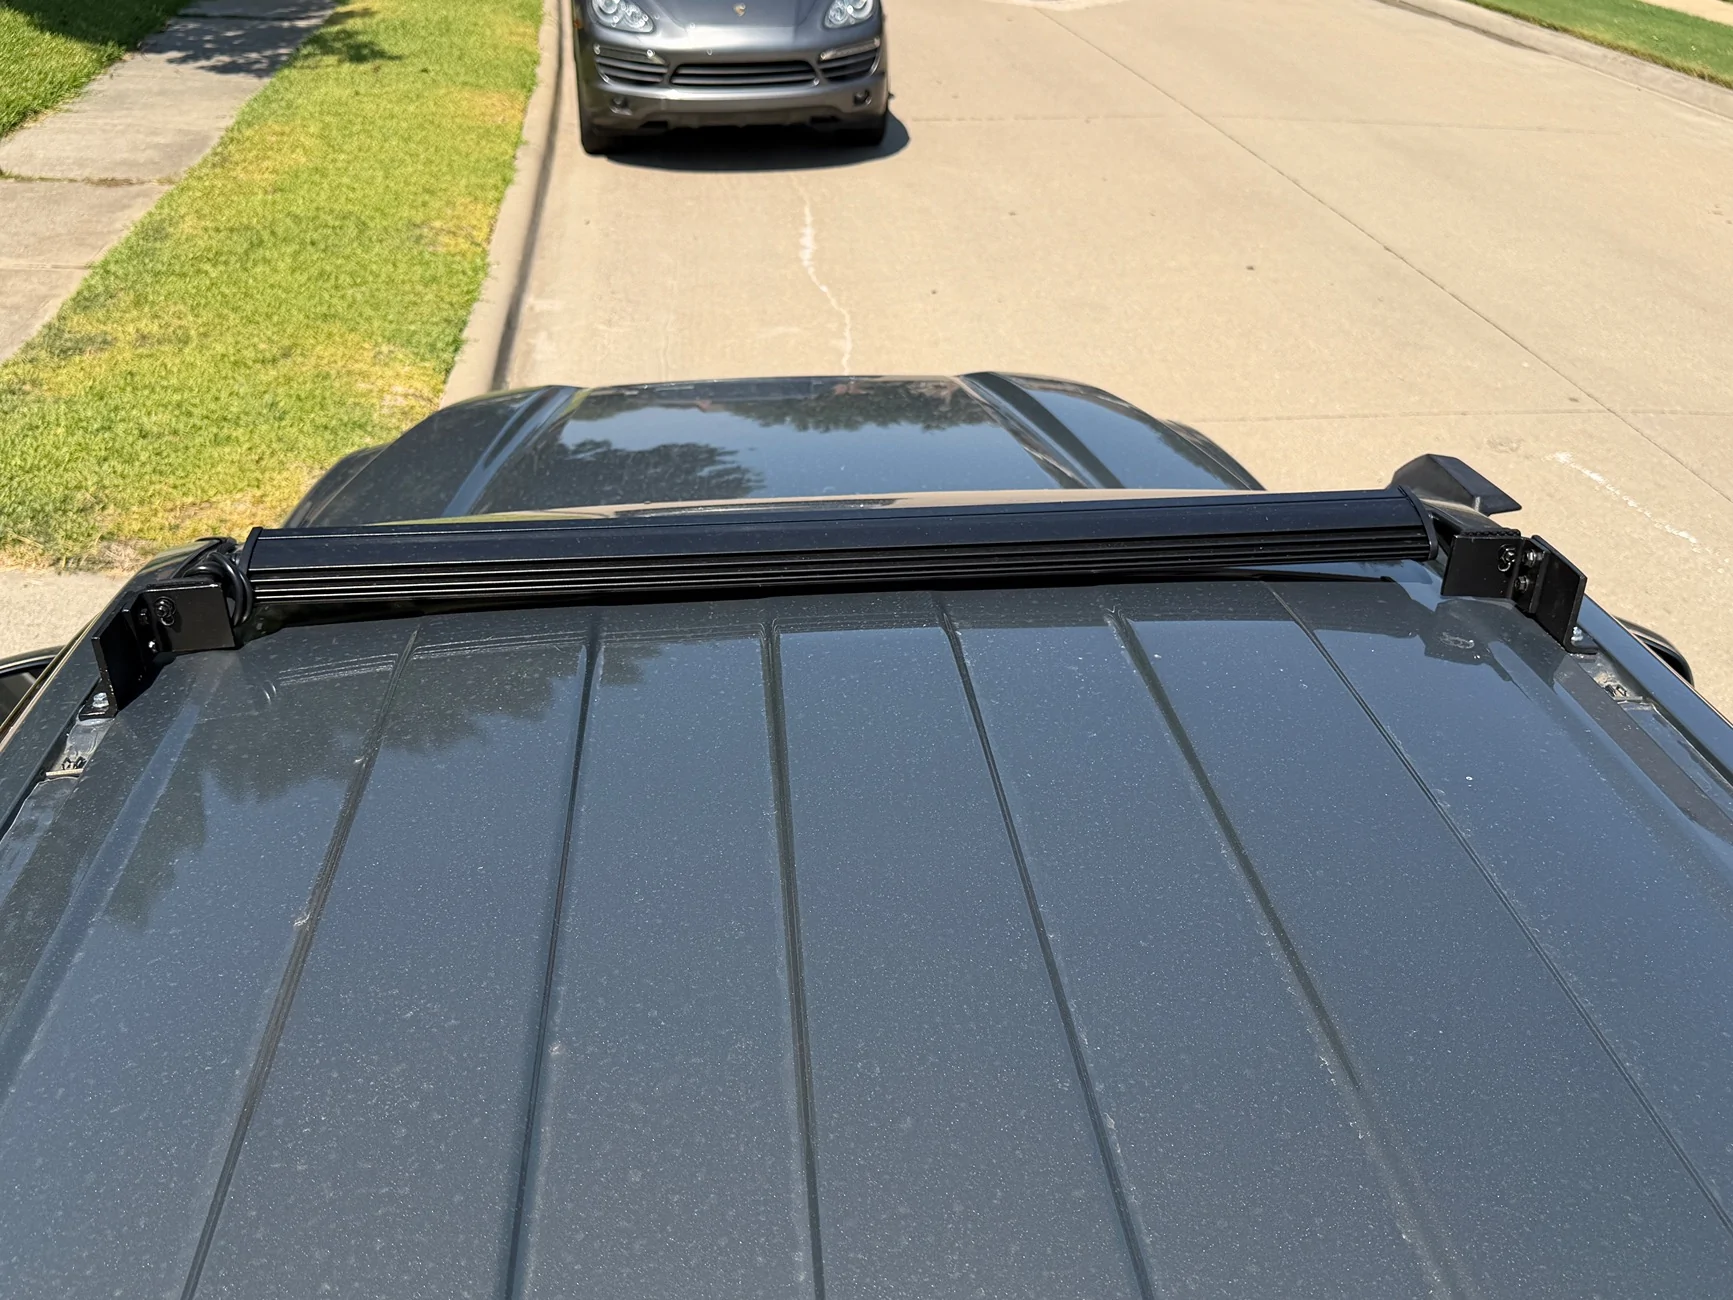
Previously I posted and asked if any manufacturer has come up with a solution just to use the mounting holes for light bar mounting brackets, and couldnt really find one. Most people recommended mounting light bars to roof rack, which is the traditional approach.

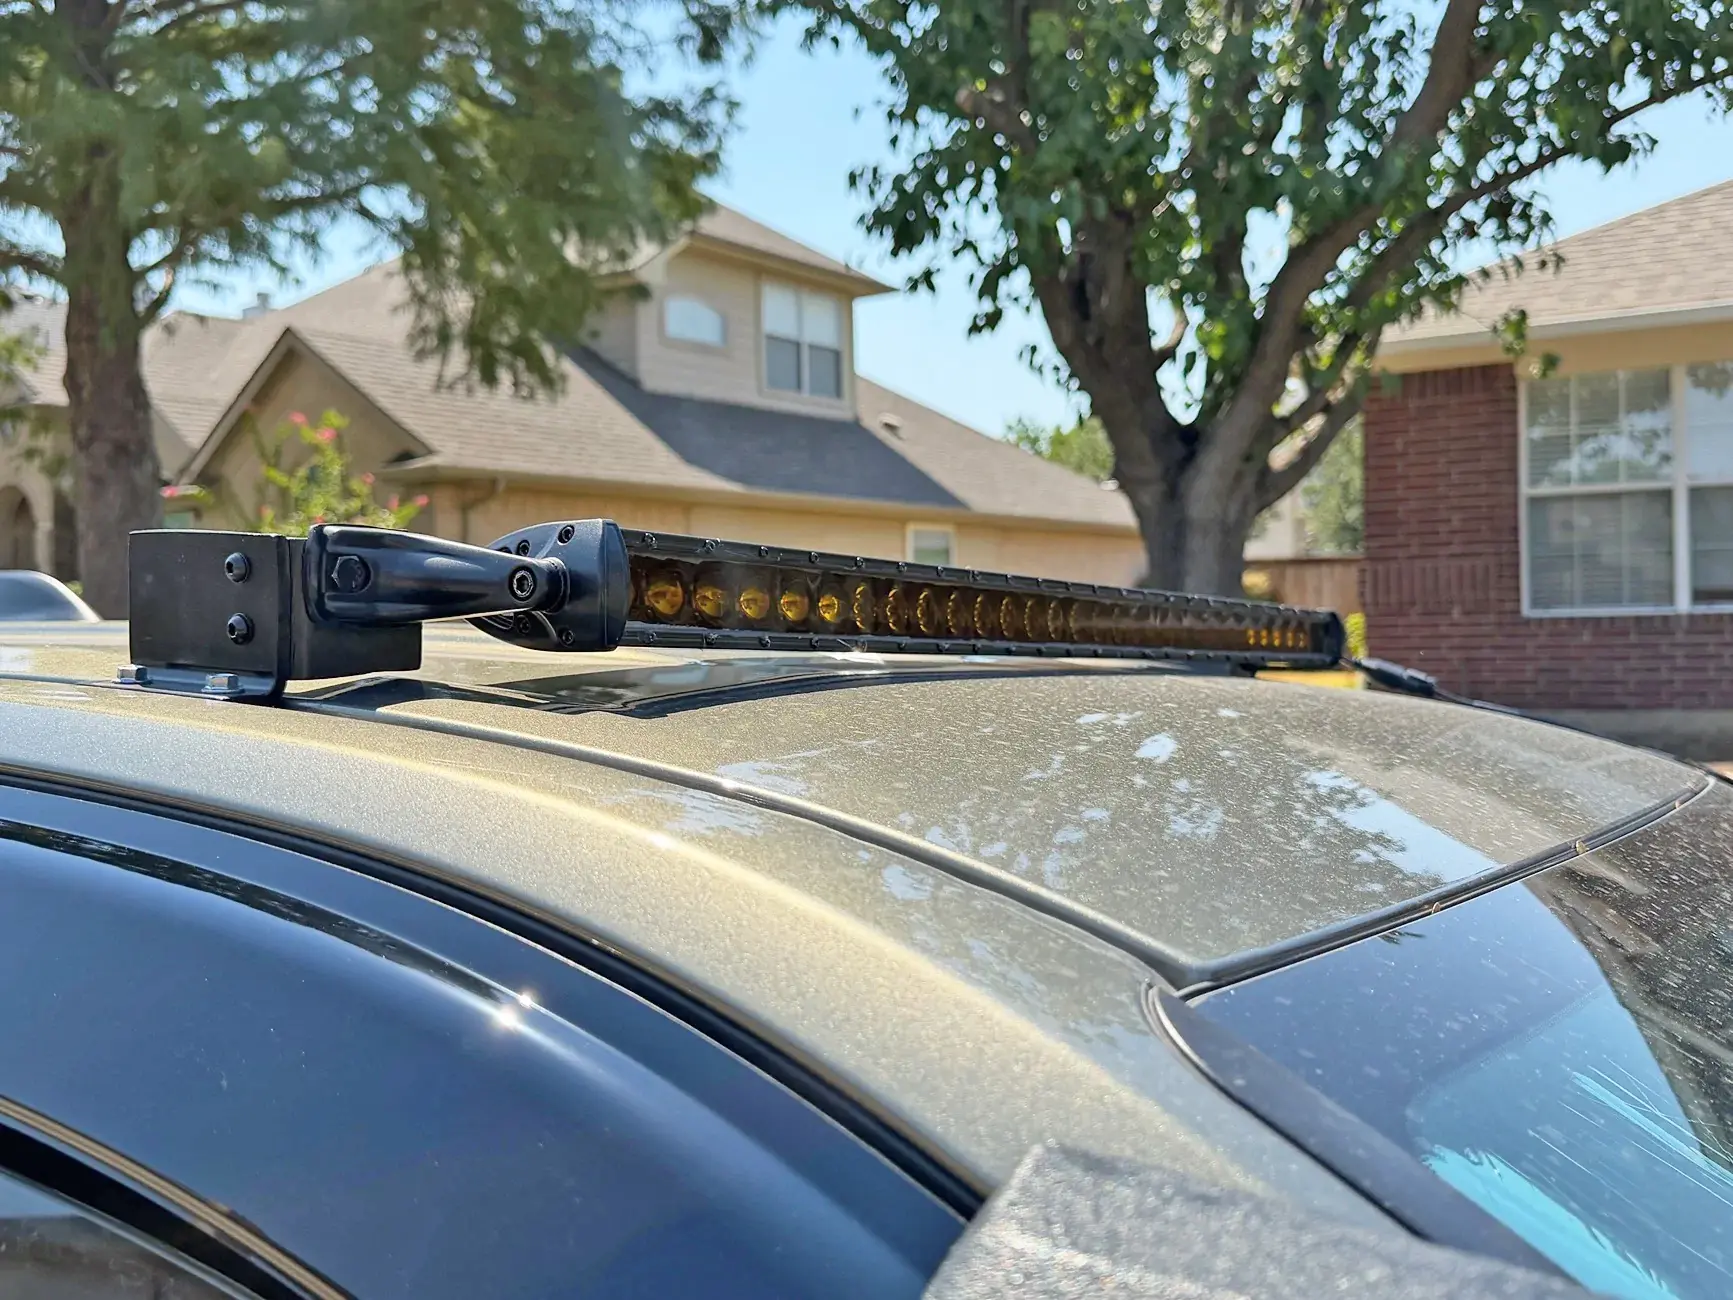
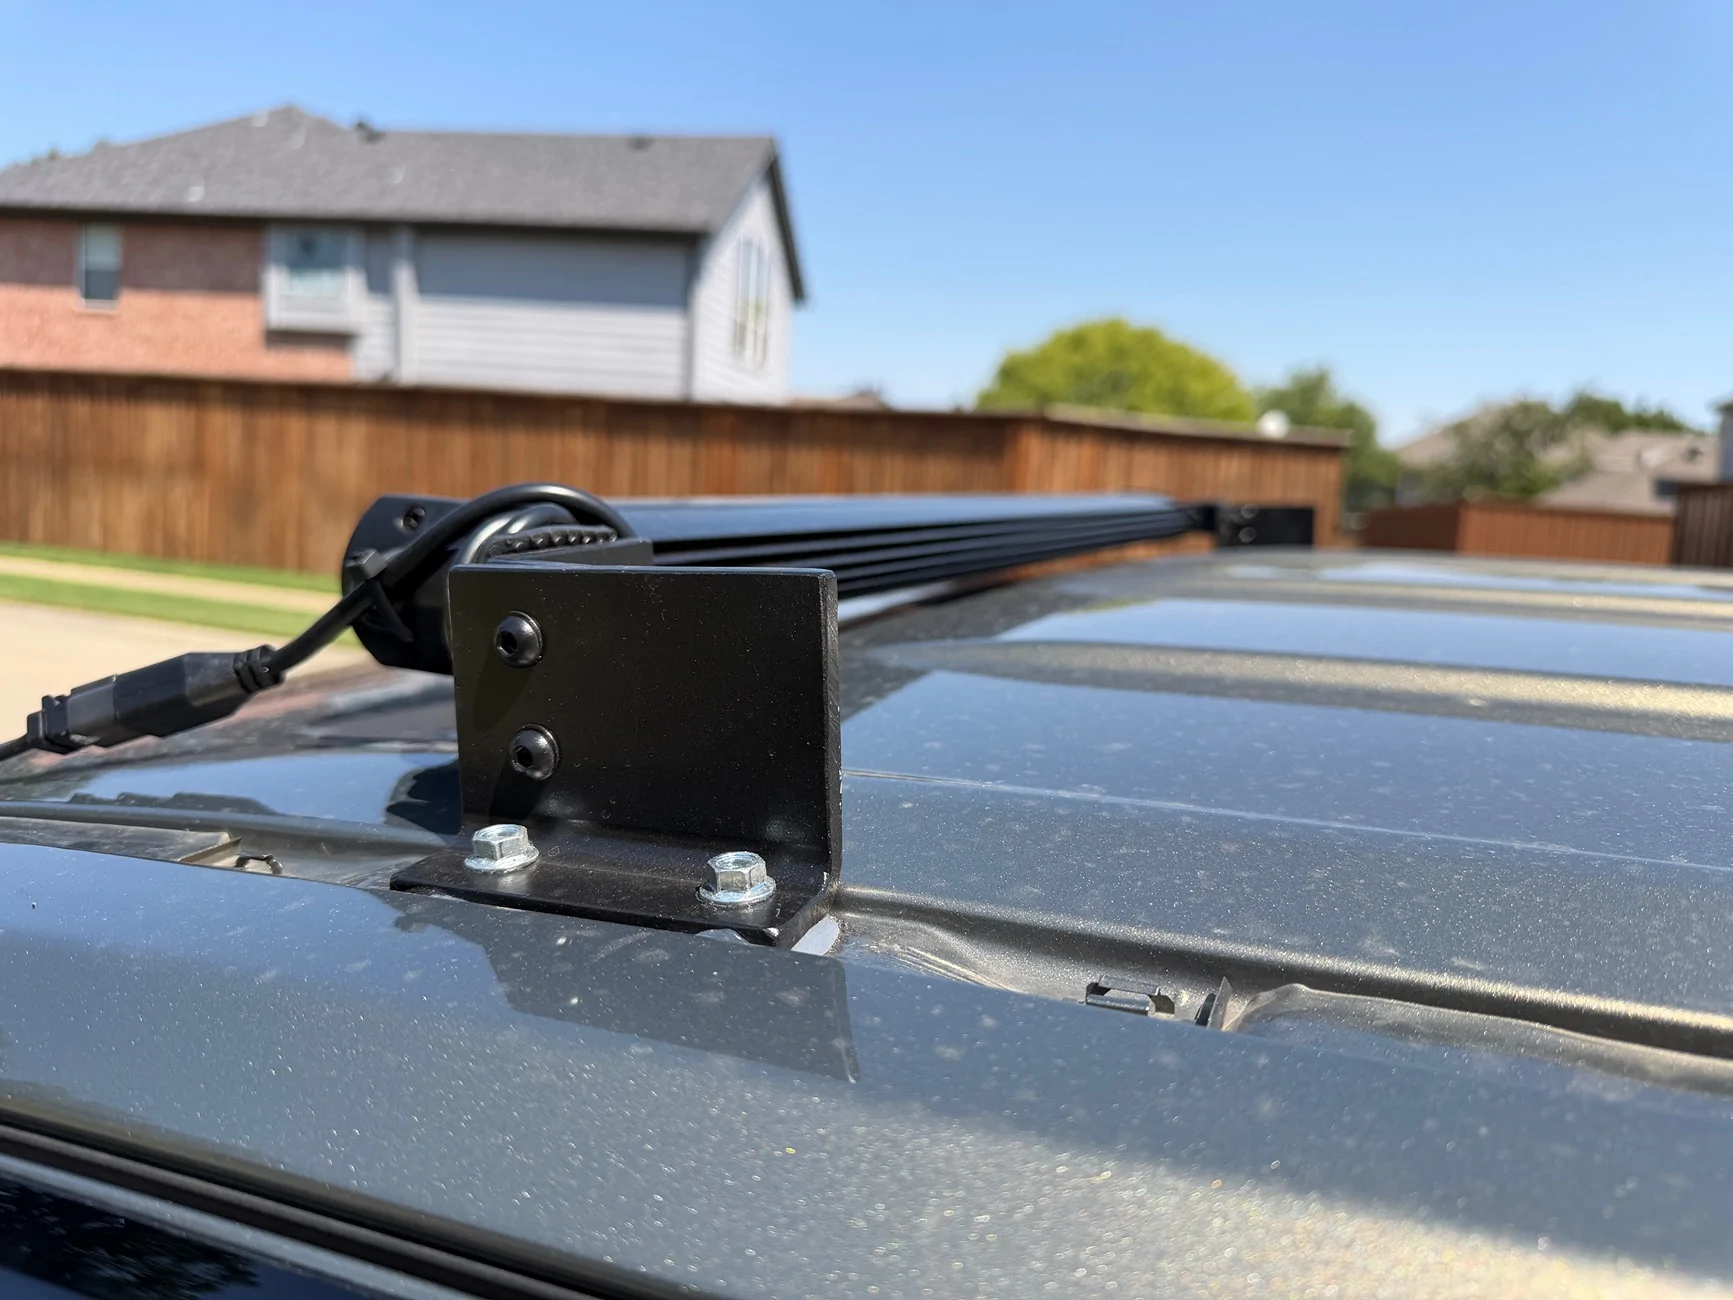
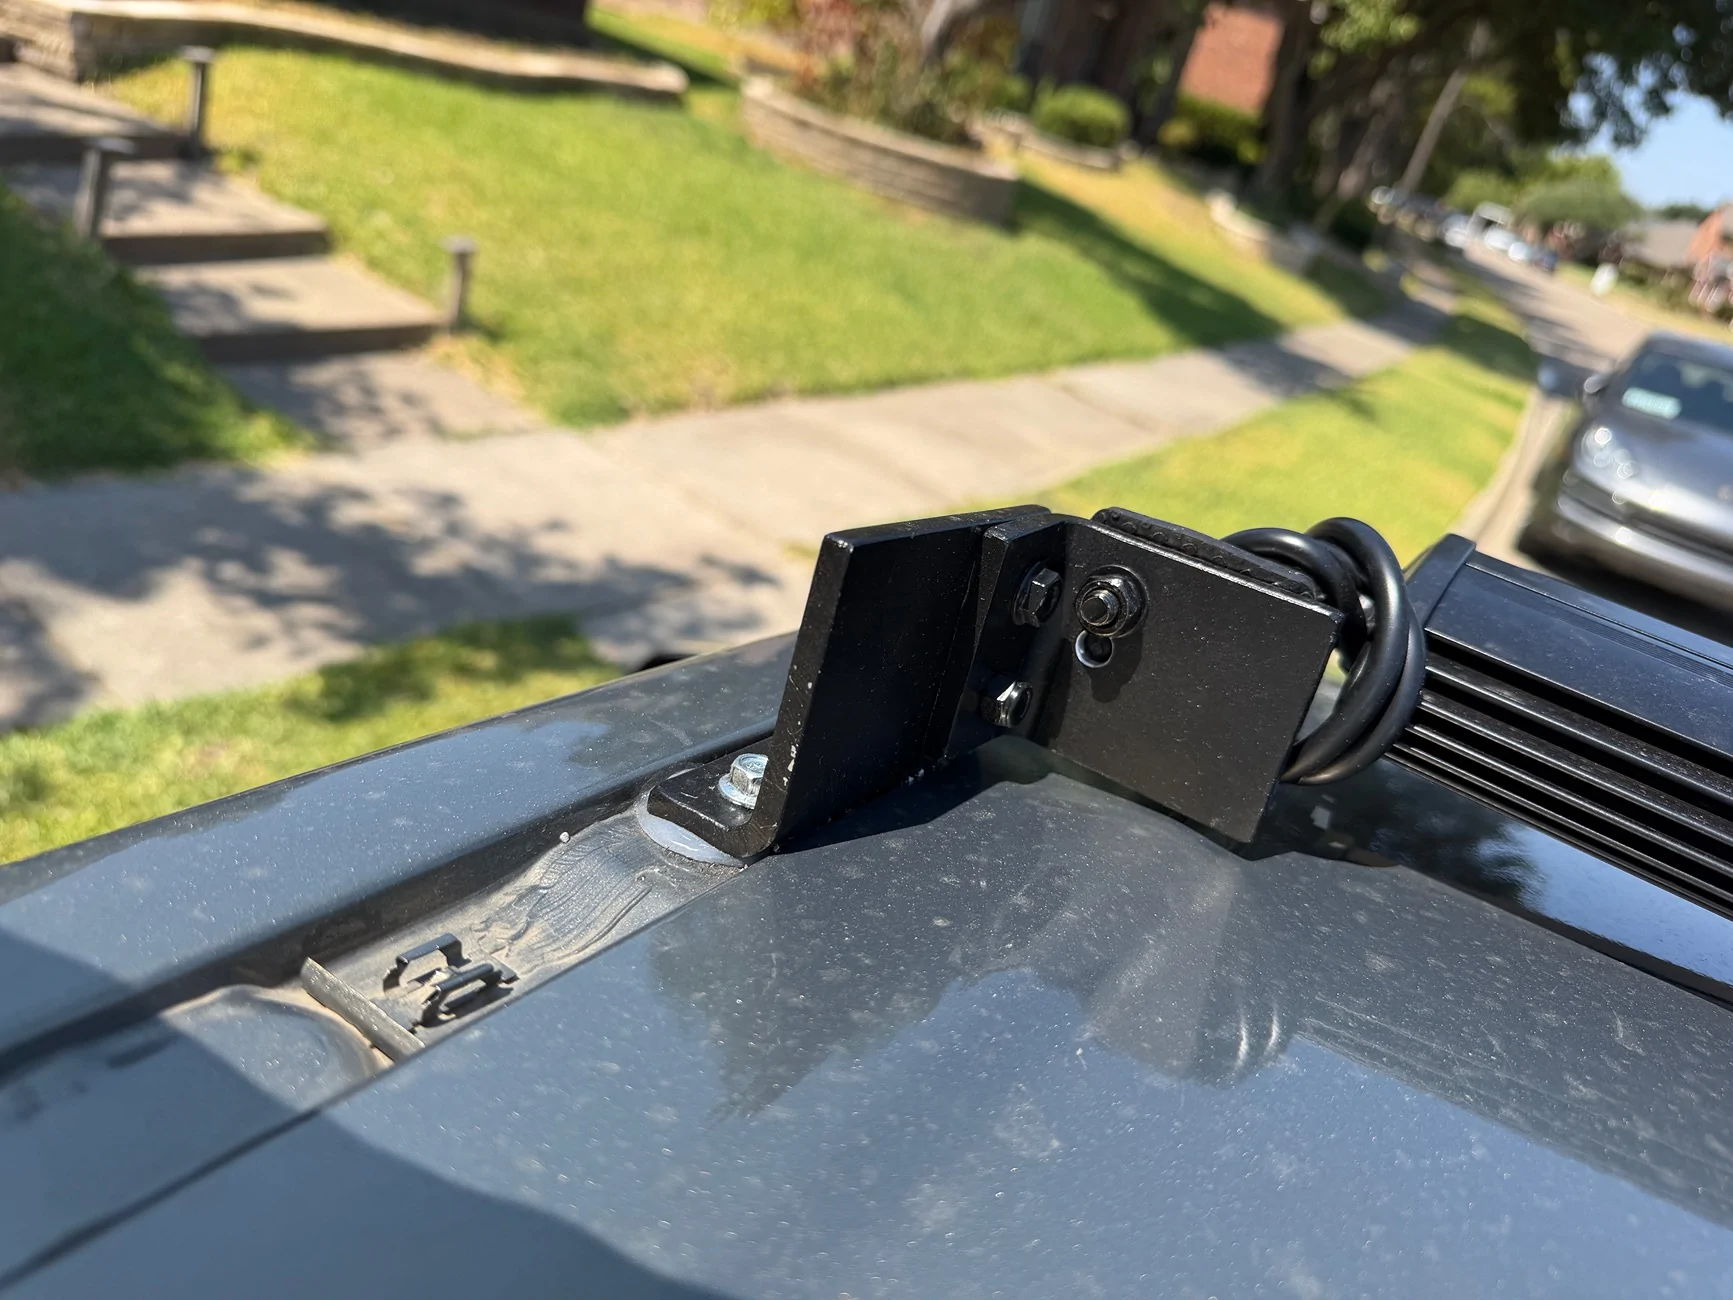
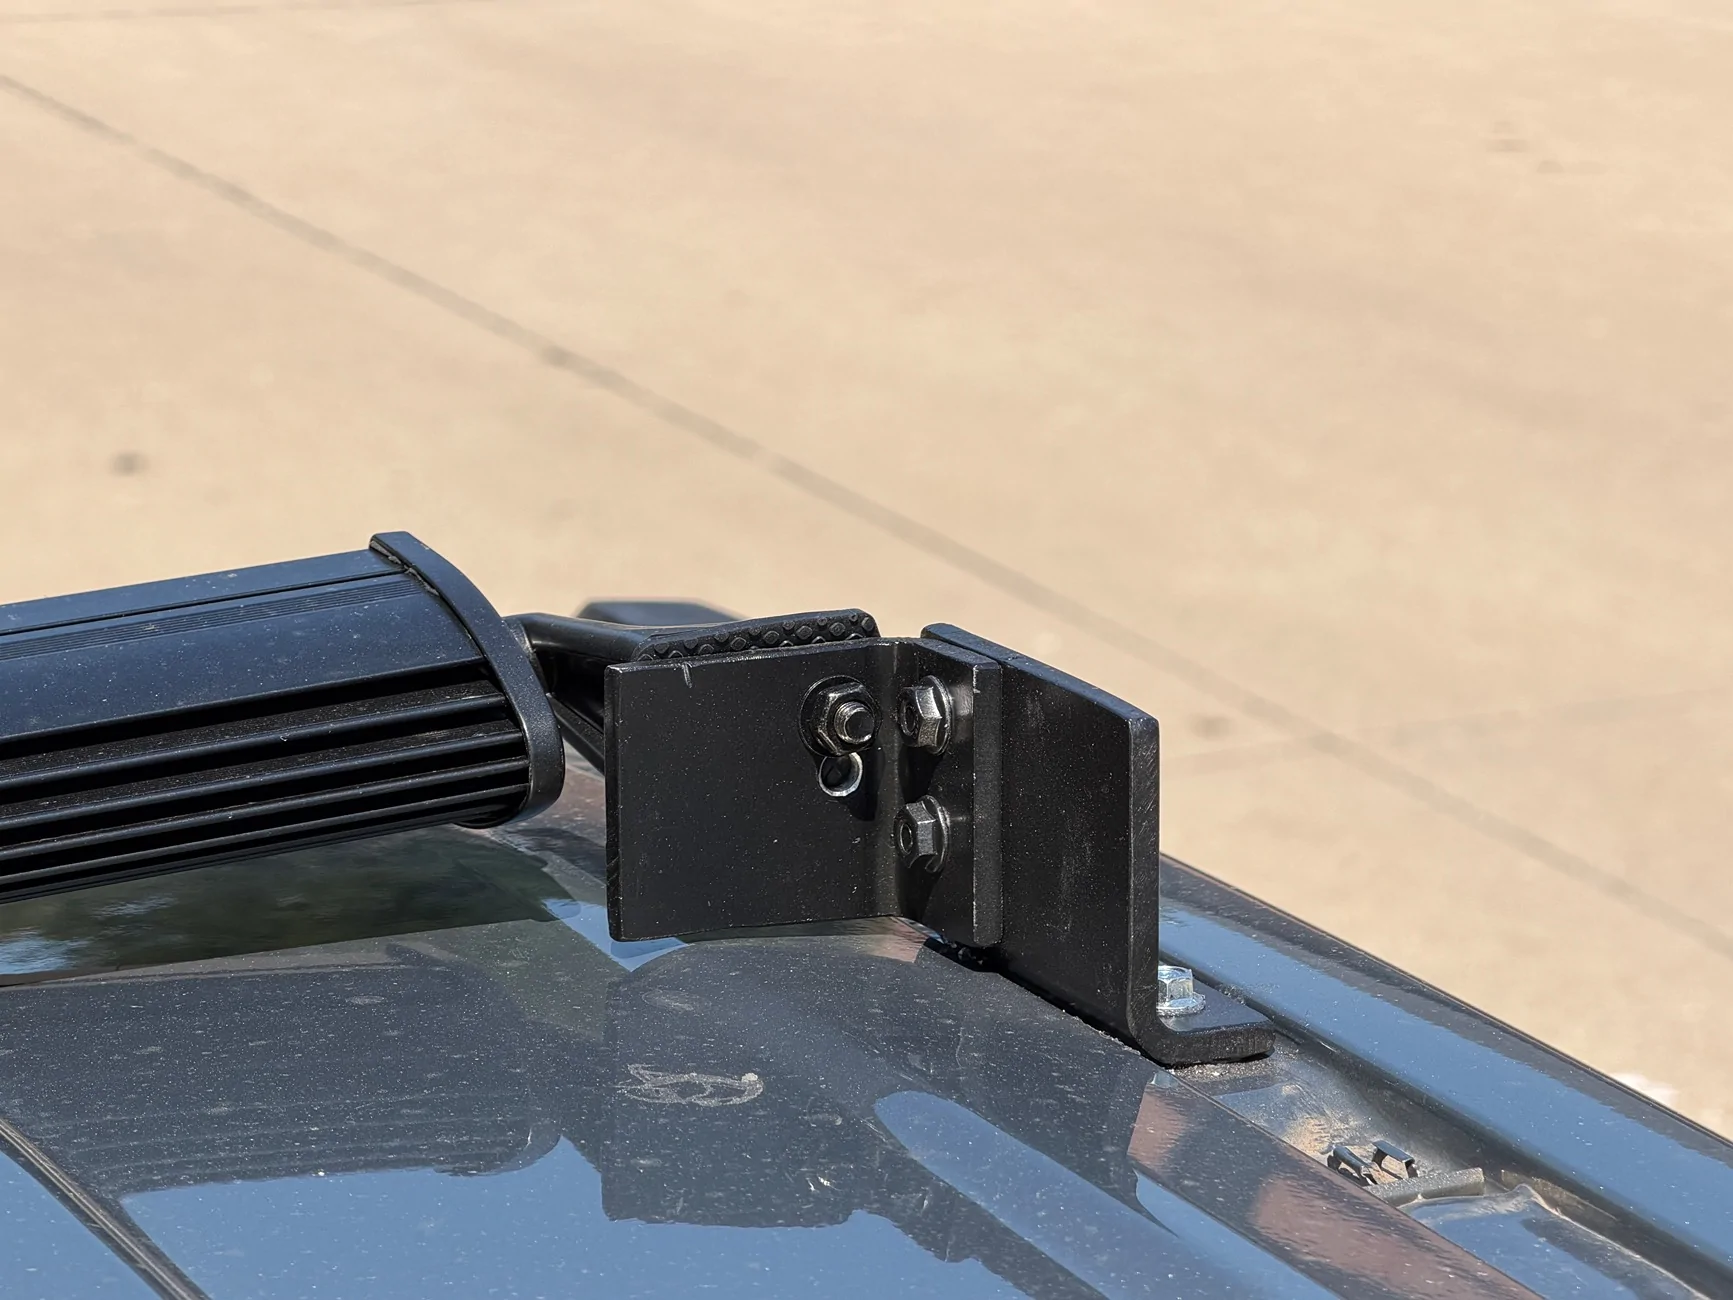
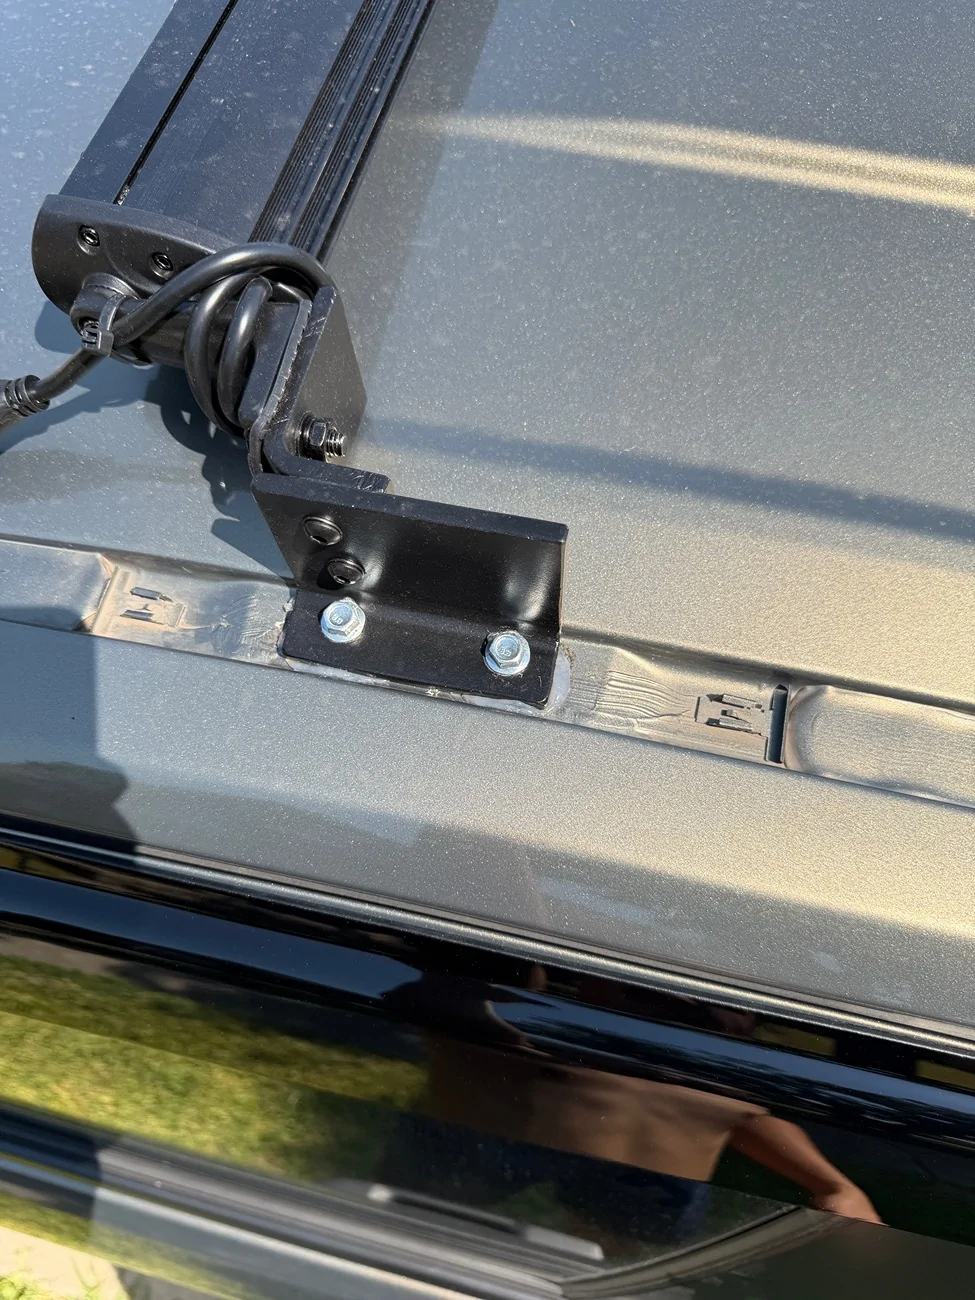
I measured and came up with some simple design. Got some 1/4” aluminum 90degree angles, cut, filed, and drilled mounting holes.

Here are some measurements. Roof mounting hole thread is M6-1.0 , it depth/bottoms out (without any mount) is about 17mm. Roof channel width is 1-1/4”, the holes are centered and 2-1/8” apart.

For my set up (you should measure yours prior to making them), roof mounting angle was raised 3-1/4” , side angle is 2-1/8” to provide mounting holes for my light bar mounting style.
The whole set up is pretty solid, cleared the roof about 3/8”. Yes, wind noise increased, i’ll see if wrapping some paracord would help.

So yea, I thought it’s pretty cool and share. Let me know what yall think.

Have a wonderful weekend!

2024 Tacoma Roof mount light bar with homemade roof mounting angles 51103-971b42862953773a92d3fe1a0d67f7aa


2024 Tacoma Roof mount light bar with homemade roof mounting angles IMG_6201
2024 Tacoma Roof mount light bar with homemade roof mounting angles IMG_6202
2024 Tacoma Roof mount light bar with homemade roof mounting angles IMG_6205
2024 Tacoma Roof mount light bar with homemade roof mounting angles IMG_6204
2024 Tacoma Roof mount light bar with homemade roof mounting angles IMG_6203
Sponsored


DaveTaco17

TRD Off-Road
Member
First Name
Dave
Joined
Mar 27, 2026
Threads
1
Messages
8
Reaction score
6
Location
Denver, CO
Vehicle(s)
2026 Tacoma TRD Offroad
The Diode Dynamics Kuat DEK rack integrates into the roof holes. Gives you an Stage series light bar and roof rack. It does add some drag at higher speeds, as expected, but zero whistling and acts as a portable sun when you need it. Took me about two hours to get everything where I wanted.
 

Will721

TRD Off-Road
Well-known member
First Name
Will
Joined
Nov 19, 2025
Threads
3
Messages
425
Reaction score
481
Location
Quad Cities
Vehicle(s)
2025 TRD OR
Its a creative solution. If it were me, now that you have everything fitting exactly like you want, I'd pull it all off and start trimming and shaping it. Trace around that light bars foot and cut it all out. Then add a nice angle cut on the top of the angle iron thats parallel to the door. Then just round all the edges. Using a bed liner spray with some texture hides any imperfections and seals the metal from corrosion.


The only difference between a home made solution and a production product is the details. The more time you spend shaping and cleaning it up the more professional the end appearance will be. Plus, minimizing front facing flat surfaces and rounding edges will cut wind noise.
 
OP
OP
toothpaste22

toothpaste22

Trailhunter
Member
First Name
Ryan
Joined
Aug 31, 2025
Threads
2
Messages
13
Reaction score
11
Location
Dallas
Vehicle(s)
6G4R, 4GTaco
The Diode Dynamics Kuat DEK rack integrates into the roof holes. Gives you an Stage series light bar and roof rack. It does add some drag at higher speeds, as expected, but zero whistling and acts as a portable sun when you need it. Took me about two hours to get everything where I wanted.
i just looked it up, it is quite expensive!
 

Sponsored

OP
OP
toothpaste22

toothpaste22

Trailhunter
Member
First Name
Ryan
Joined
Aug 31, 2025
Threads
2
Messages
13
Reaction score
11
Location
Dallas
Vehicle(s)
6G4R, 4GTaco
Its a creative solution. If it were me, now that you have everything fitting exactly like you want, I'd pull it all off and start trimming and shaping it. Trace around that light bars foot and cut it all out. Then add a nice angle cut on the top of the angle iron thats parallel to the door. Then just round all the edges. Using a bed liner spray with some texture hides any imperfections and seals the metal from corrosion.


The only difference between a home made solution and a production product is the details. The more time you spend shaping and cleaning it up the more professional the end appearance will be. Plus, minimizing front facing flat surfaces and rounding edges will cut wind noise.
Oh definitely! I still got some more aluminum angles to mess around with. As you can tell, there’s imperfection such as the lightbar foots are slightly extend beyond the mounting bracket. And there are “second”holes on the mounting brackets as well… those were too low.
But yea, your points make perfect sense, I’ll probably make another set in the near future
 

MandRautomotive

TRD Pro
Member
BASIC Sponsor
First Name
Colby
Joined
Sep 6, 2025
Threads
6
Messages
15
Reaction score
8
Location
Burbank CA
Vehicle(s)
Toyota Tacoma
Hi all,

Previously I posted and asked if any manufacturer has come up with a solution just to use the mounting holes for light bar mounting brackets, and couldnt really find one. Most people recommended mounting light bars to roof rack, which is the traditional approach.

I measured and came up with some simple design. Got some 1/4” aluminum 90degree angles, cut, filed, and drilled mounting holes.

Here are some measurements. Roof mounting hole thread is M6-1.0 , it depth/bottoms out (without any mount) is about 17mm. Roof channel width is 1-1/4”, the holes are centered and 2-1/8” apart.

For my set up (you should measure yours prior to making them), roof mounting angle was raised 3-1/4” , side angle is 2-1/8” to provide mounting holes for my light bar mounting style.
The whole set up is pretty solid, cleared the roof about 3/8”. Yes, wind noise increased, i’ll see if wrapping some paracord would help.

So yea, I thought it’s pretty cool and share. Let me know what yall think.

Have a wonderful weekend!

51103-971b42862953773a92d3fe1a0d67f7aa.webp


IMG_6201.webp
IMG_6202.webp
IMG_6205.webp
IMG_6204.webp
IMG_6203.webp
Nice job!
Sponsored


Top