
- Thread starter
- #1
Idea
3D print a bracket system that allows the camera to be fed through the back with ~2 inches of play where the housing of the wire is protected by a split loom and eventually leads into the rear of the cabin (I chose the driver side). A pre-existing track from the rear cabin out to the bed / tail of the Tacoma exists, however I believe this might be for premium upgrade (JBL + rear bed power upgrades) and will remove this assertion if proved false otherwise. In either case either utilizing the pre-existing route that exists or crafting your own is straight forward.
Resources
Mounting Bracket

> Revision 1 required about 3mm to be removed from the bottom of the plating in order to fit the Tacoma's pre-existing mounting location and bode with the traction bumps that exist.
> TODO: Provide STL
Materials Used
Photos

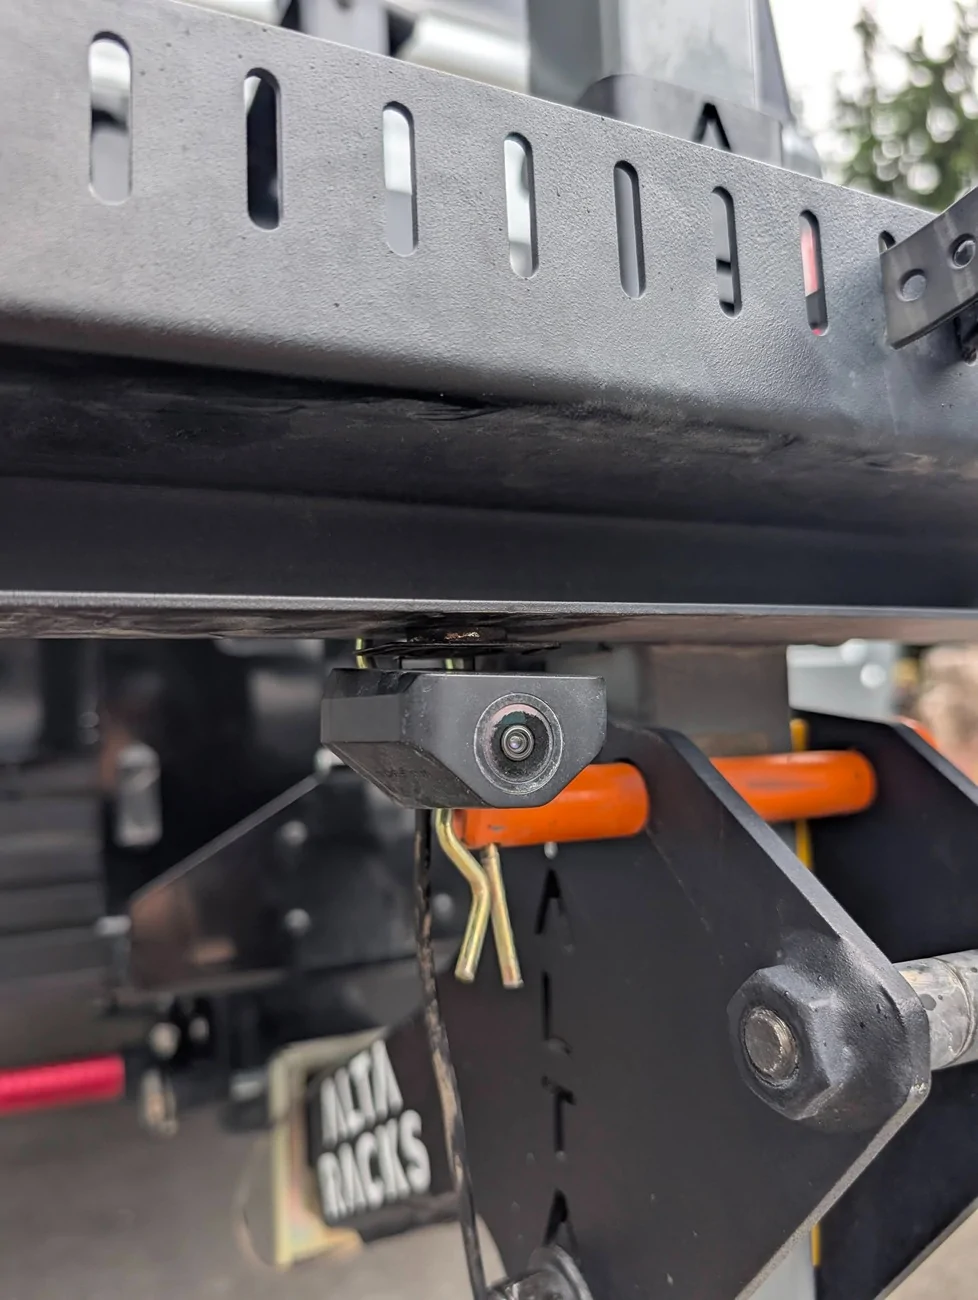
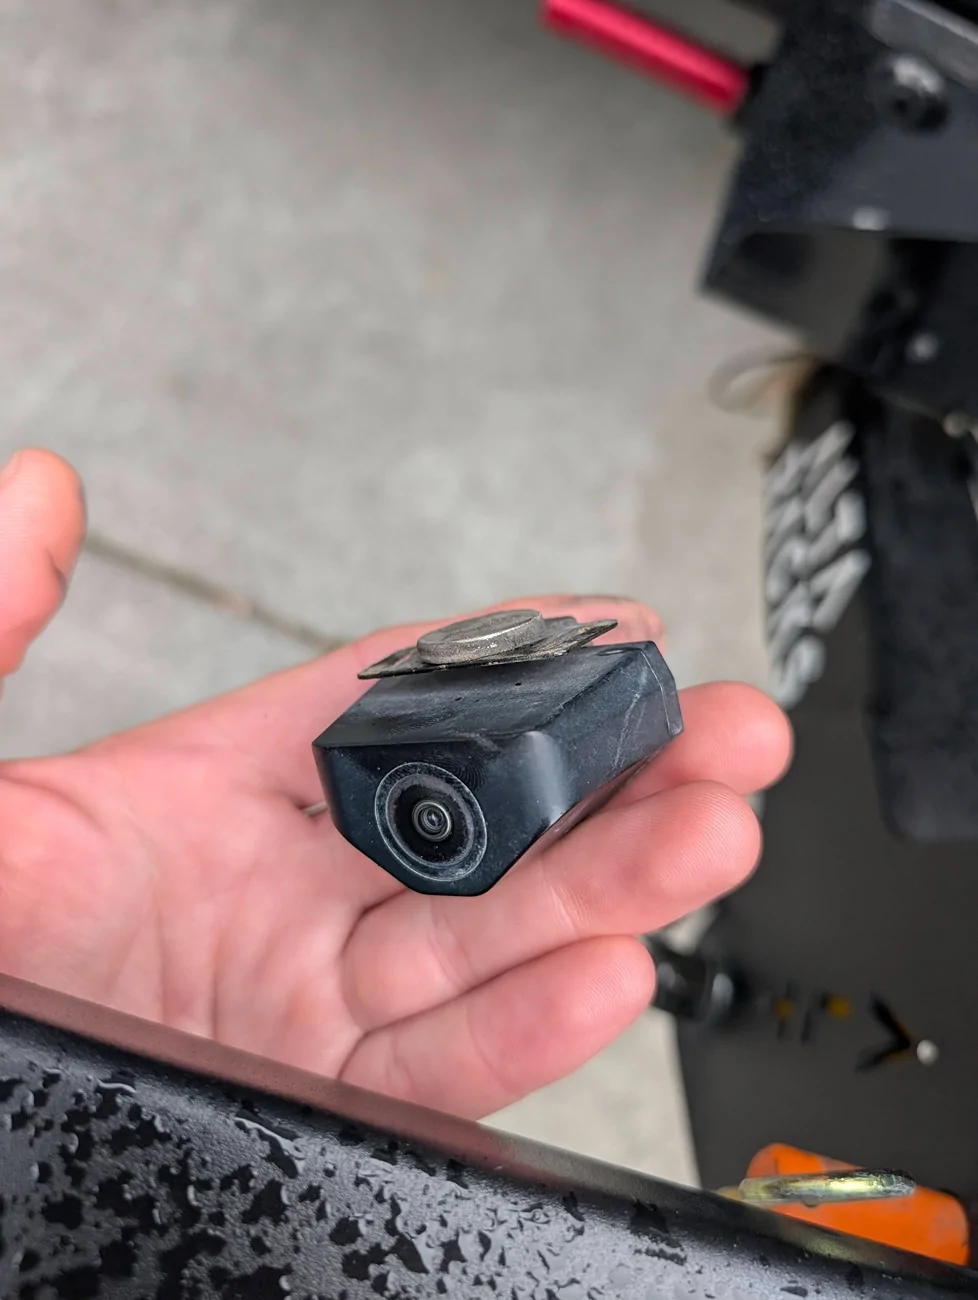
> Plate mounted with camera inside, cable carries itself over into the backing area where pre-existing looms connect / pass through tailgate.
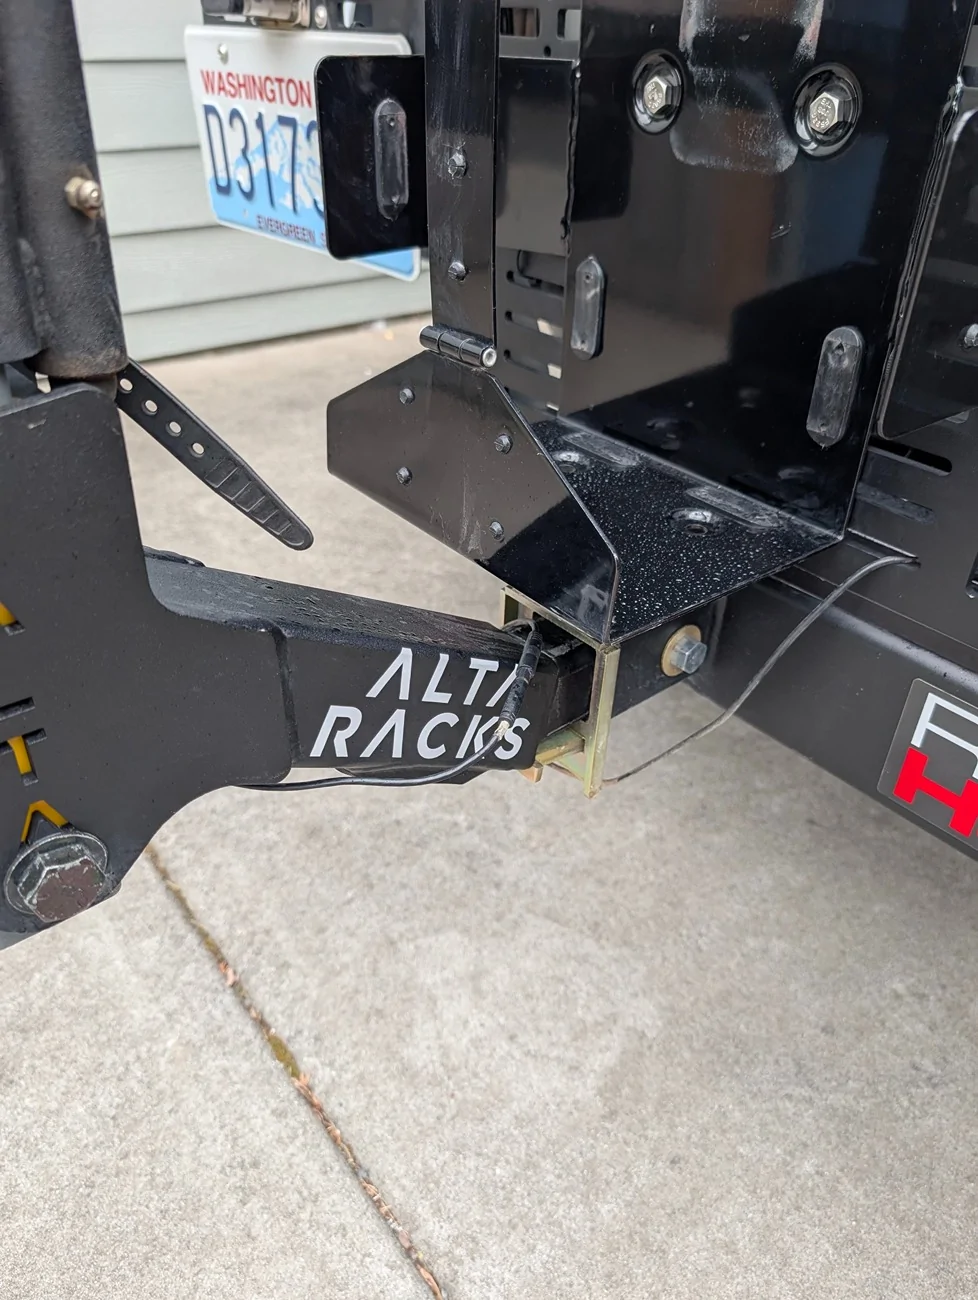
> Clearance when tailgate is dropped. Suggested drop of camera housing might be ideal though doesn't impact it.

> Red line shows the pathing that was taken, clamps every so often. Clamps are oriented where the zip tie connects the closing ends, allowing both looms to sit inside comfortably.
> Without the red line, you should notice the pathing that it takes onto the rail.
> Loom meeting with pre-existing loom.
DO NOT START FROM THE REAR
> Grommet cut to feed the jack through. TL;DR has this going the other way to avoid cutting at all costs, reusing the factory grommet + nipple (No premium === no nipple on the driver side at least)
> Grommet once mounted back into housing. Use Silicon if you wish, I had because of being a dummy and doing this in reverse.
3D print a bracket system that allows the camera to be fed through the back with ~2 inches of play where the housing of the wire is protected by a split loom and eventually leads into the rear of the cabin (I chose the driver side). A pre-existing track from the rear cabin out to the bed / tail of the Tacoma exists, however I believe this might be for premium upgrade (JBL + rear bed power upgrades) and will remove this assertion if proved false otherwise. In either case either utilizing the pre-existing route that exists or crafting your own is straight forward.
Resources
- Rear Seat Delete (Used as comparison for driver side rear. Notice no pre-existing loom exists as user @john170950 has an SR5 without the JBL subwoofer in the back)
https://www.tacoma4g.com/forum/threads/anyone-rear-seat-delete-yet-heres-my-progress.5975/
Mounting Bracket
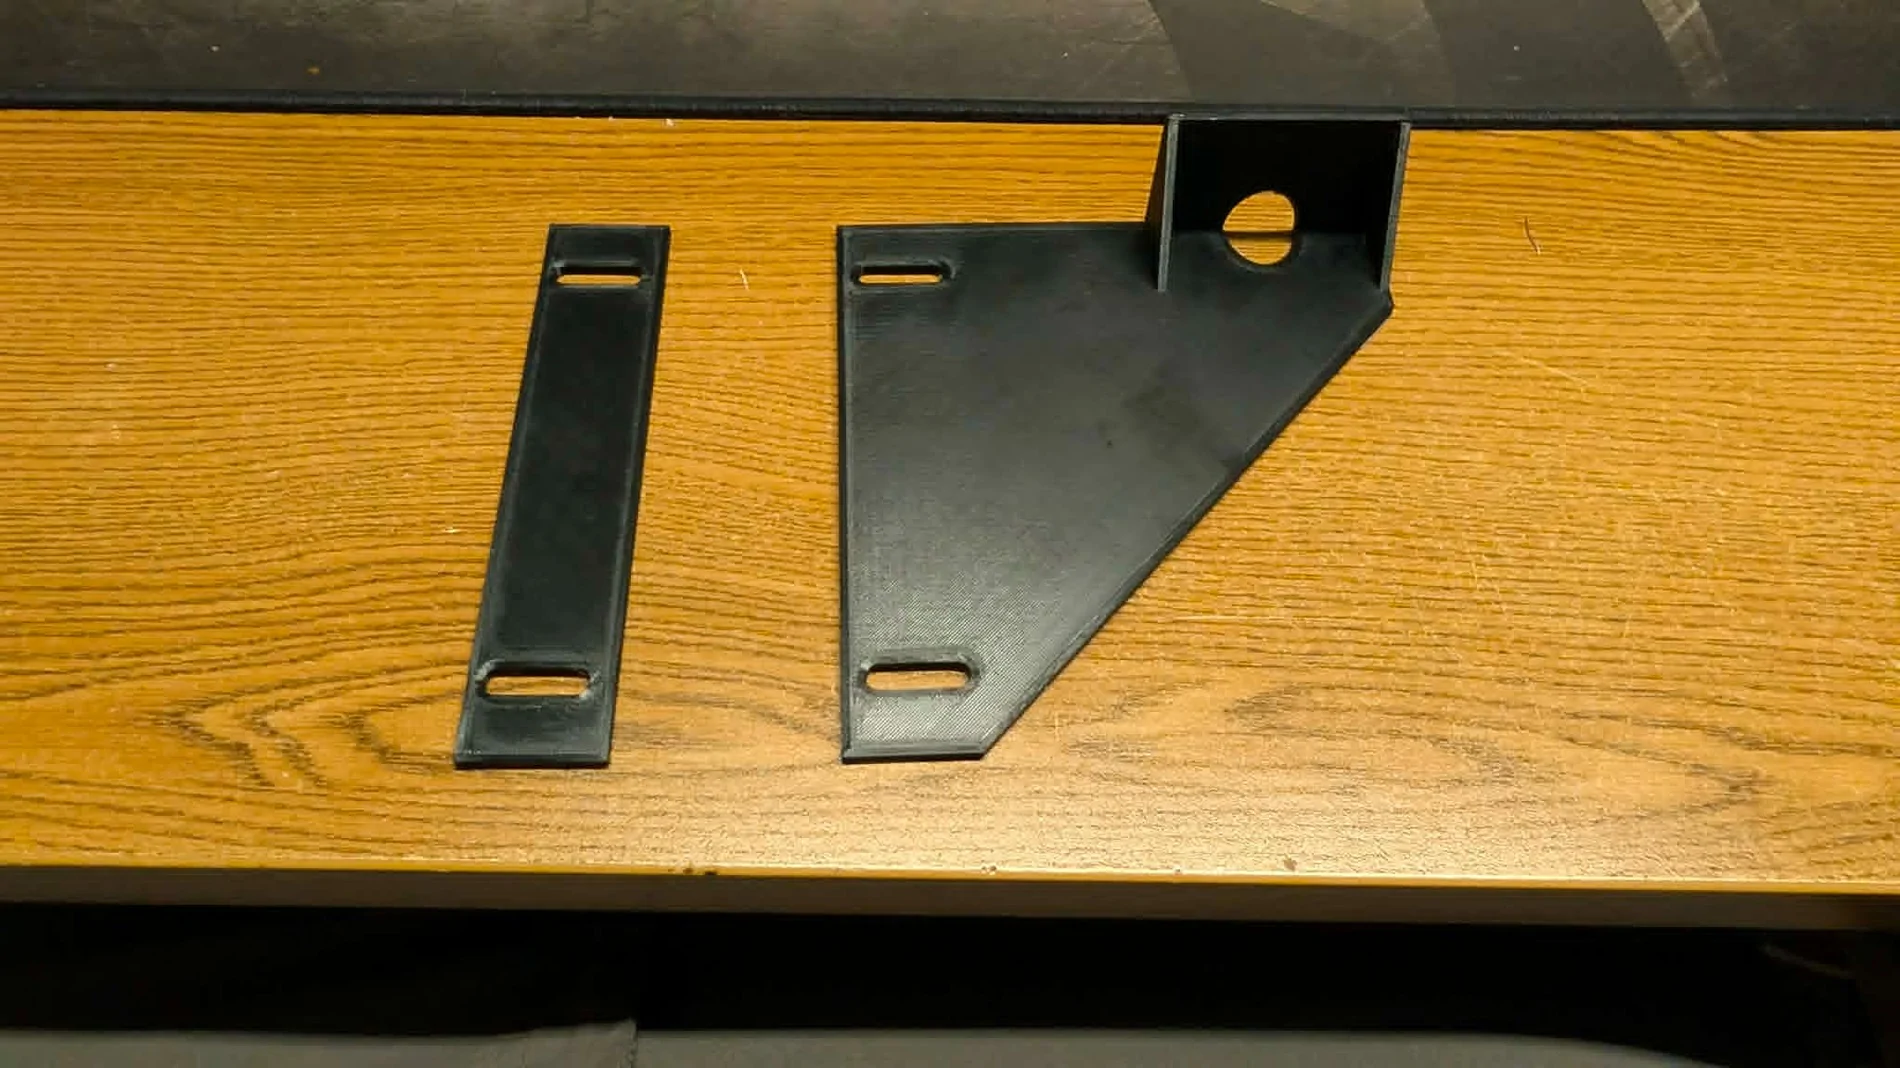
> Revision 1 required about 3mm to be removed from the bottom of the plating in order to fit the Tacoma's pre-existing mounting location and bode with the traction bumps that exist.
> TODO: Provide STL
Materials Used
- 3/8in 6.6ft of split loom tubing
- 1/2in Cable Clamp (Connects to pre-existing route.
- Zip Ties (UV Restistant, Heavy Duty)
- Scotch Super 88 (Great for electrical and heat resistance)
- Silicon RTV (Sealing entry from grommet)
- Heat shrink (Terminate ends of rear backup wire)
- 3M Tape (Secure camera to top of mounting area)
- Bolts, washers, and nuts for license plate & mount.
- Heat gun
- Box Cutter
- Wire Snippers
- Pry Tool (Comes with Wolfbox)
- Plan: Determine what route you will be taking from the front mirror to the rear of the cabin.
- Plan: Review underneath the truck to identify which grommet has a pre-existing loom of wires leaving it from the rear (easiest spot to perform this job). Confirm your route from the bottom of the cab to the bed along rail system.
- Review: Refer to resources rear seat delete, note only a small portion of the tub siding needs to be removed.
- Review: Take the 3D mount and fit camera inside with 3M tape or any other desired adhesive. Mount plate underneath license plate, fully work the mount into the desired final state.
- Do: Remove the panel on the floor (use pry tool to pop clips), push in the pins and take them out with the pry tool (easy to remove) and remove the side of the tub to access the grommet.
- Do: Feed rear camera wire through pre-existing loom of wires. This appears tricky and tight, might require cutting though try to avoid then you could avoid the silicon step later on.
NOTE!!! The rear camera input is a right-angled jack that does not feed through the pre-existing grommet nipple, I goofed and went in the reverse which required cutting. - Do: Route your rear camera wire from the rear cabin up to the camera. I won't be covering this portion but it's as simple as going along the weather stripping in the rear, into the panel / head liner, to the camera. Offer any slack where desired - I left mine in the head liner though it can be easily piled up under the rear seat tub we removed in (4).
- Optional: Take rear camera wire and terminate the end, I used heat shrink thereafter to seal off the end while leaving the wire in length incase I wanted to perform the auto switch to rear mod.
- Do: Feed wire into loom using either cotter key, flat head, anything to separate the loom.
NOTE: Taped using the Scotch Super 88 every 6 inches.
NOTE: Since I did this in reverse I measured the loom at the outlet of the grommet, you'll be doing this once you reach the end of your wire. DO NOT CUT ANYTHING YET. - Do: Begin routing the loom you created through the channel. Use cable clamps where any junctions or long runs occur at.
NOTE: Try to keep the split loom seam facing down so any water may exit that might build up. - Plan & Review: Since you will at some point need to connect the camera through this next part may be tricky. I suggest taking the loom and lifting it over the back of the license plate, connect the camera together, finish the loom and terminate where needed.
NOTE: I taped the junction between the camera and main run of wire for the camera together so it couldn't disconnect during operation. - Done!
Photos
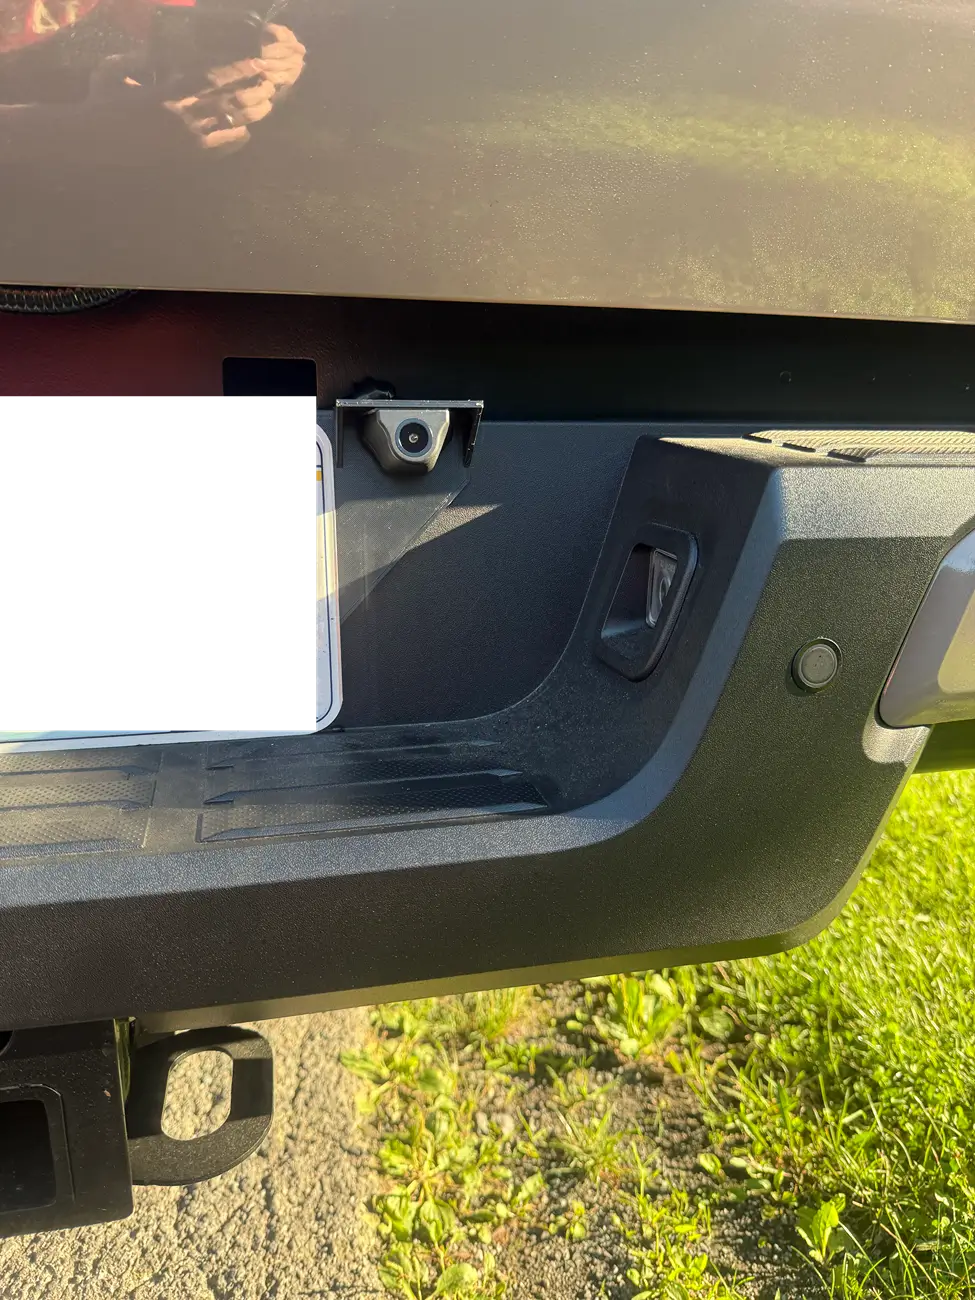
> Plate mounted with camera inside, cable carries itself over into the backing area where pre-existing looms connect / pass through tailgate.
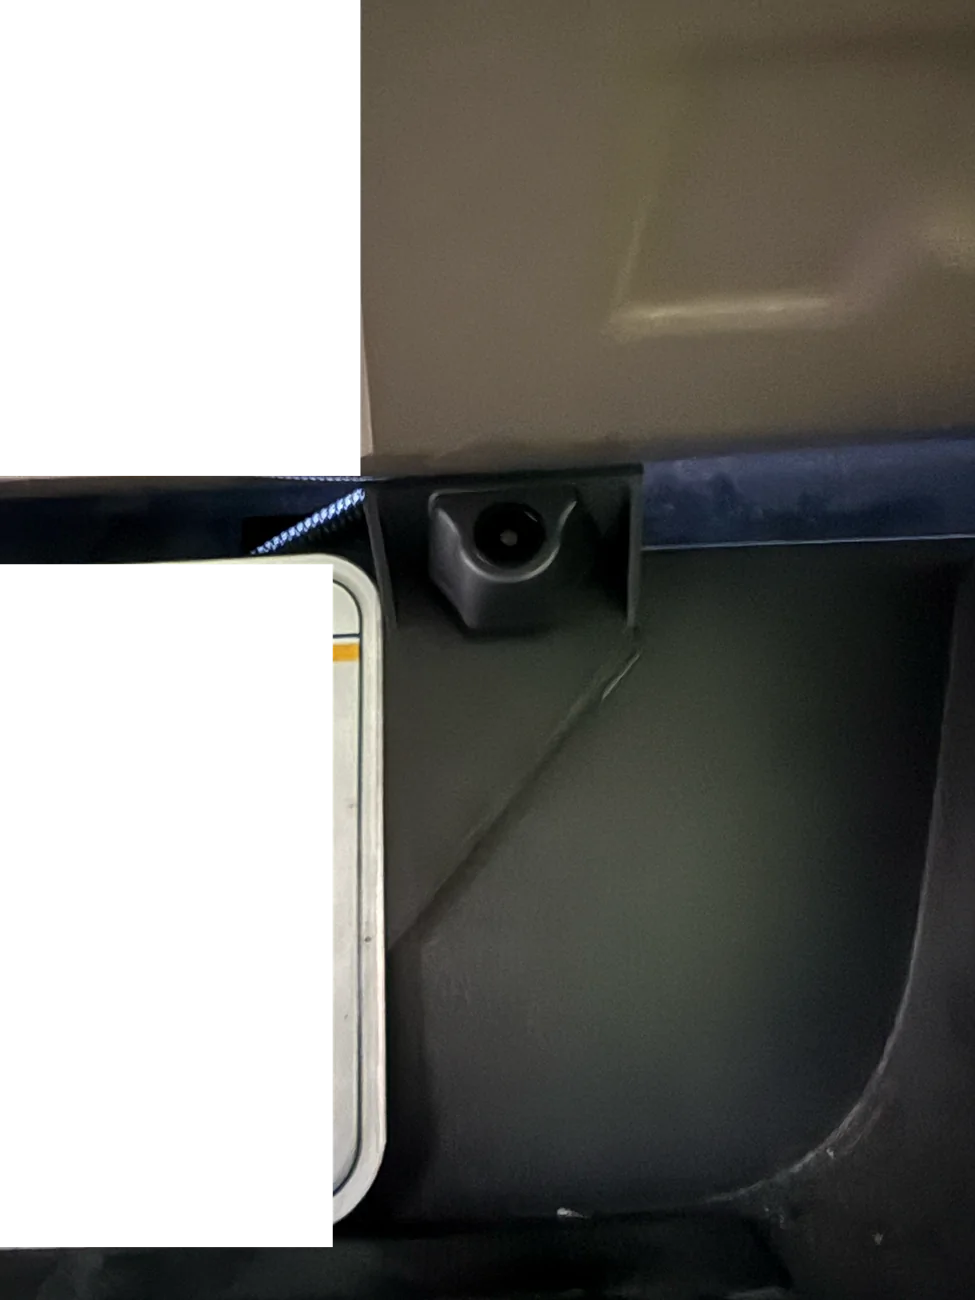
> Clearance when tailgate is dropped. Suggested drop of camera housing might be ideal though doesn't impact it.
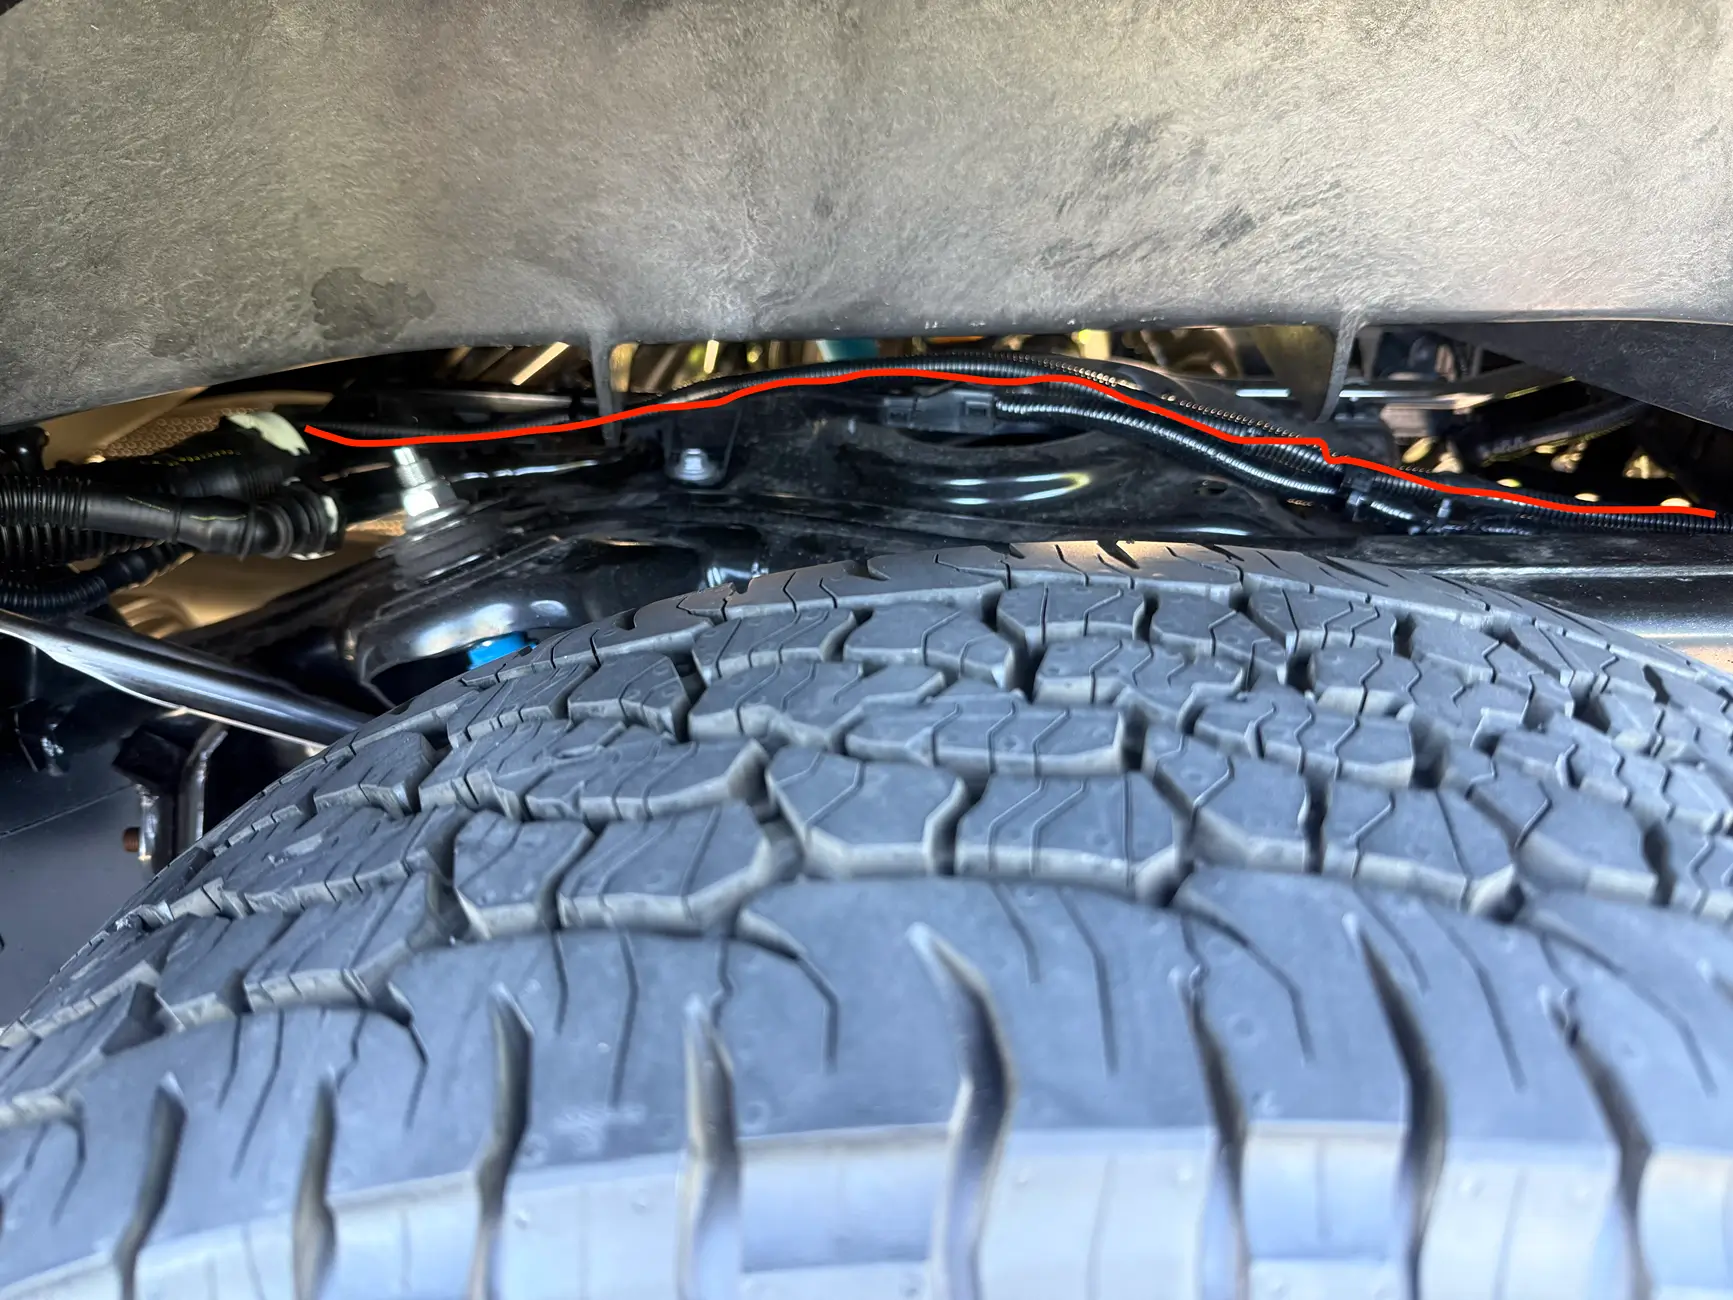
> Red line shows the pathing that was taken, clamps every so often. Clamps are oriented where the zip tie connects the closing ends, allowing both looms to sit inside comfortably.
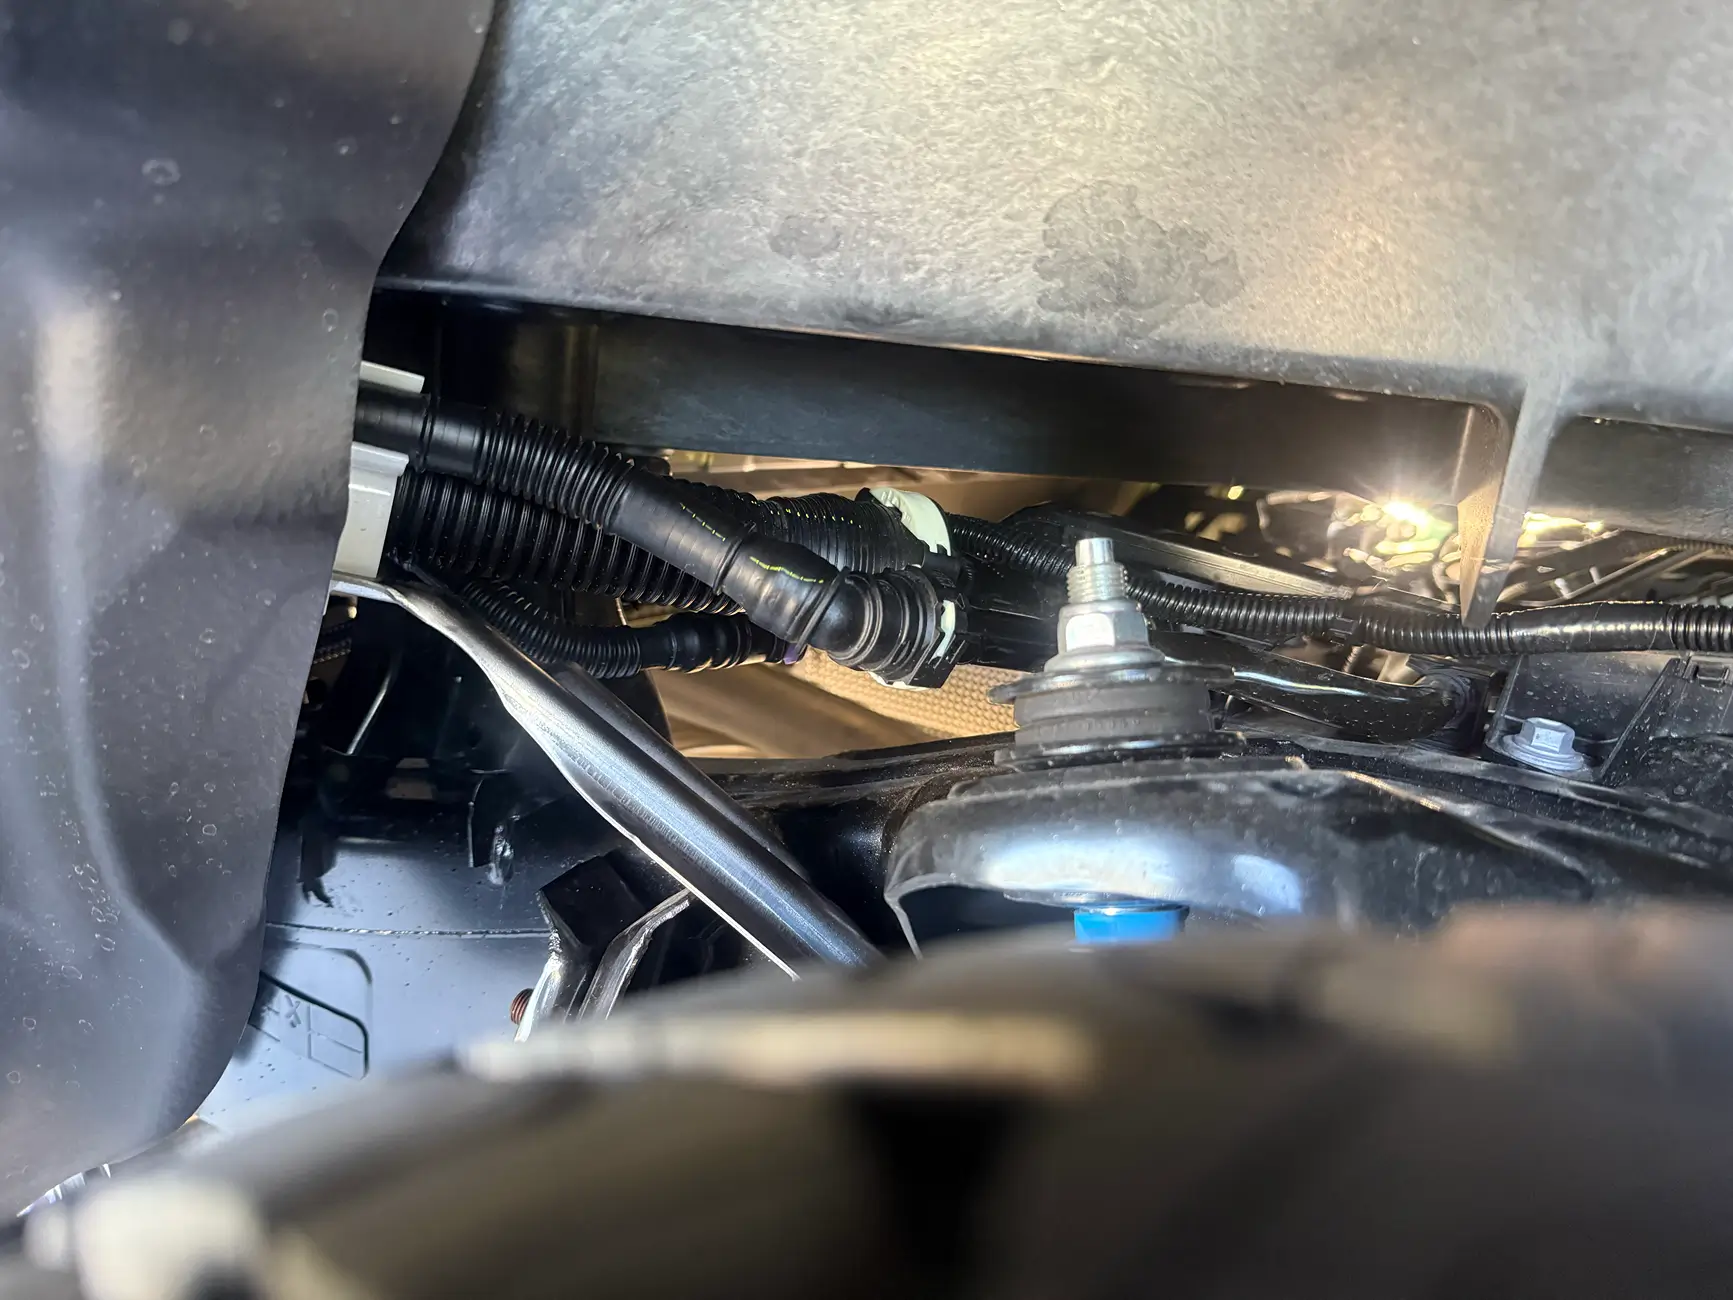
> Without the red line, you should notice the pathing that it takes onto the rail.
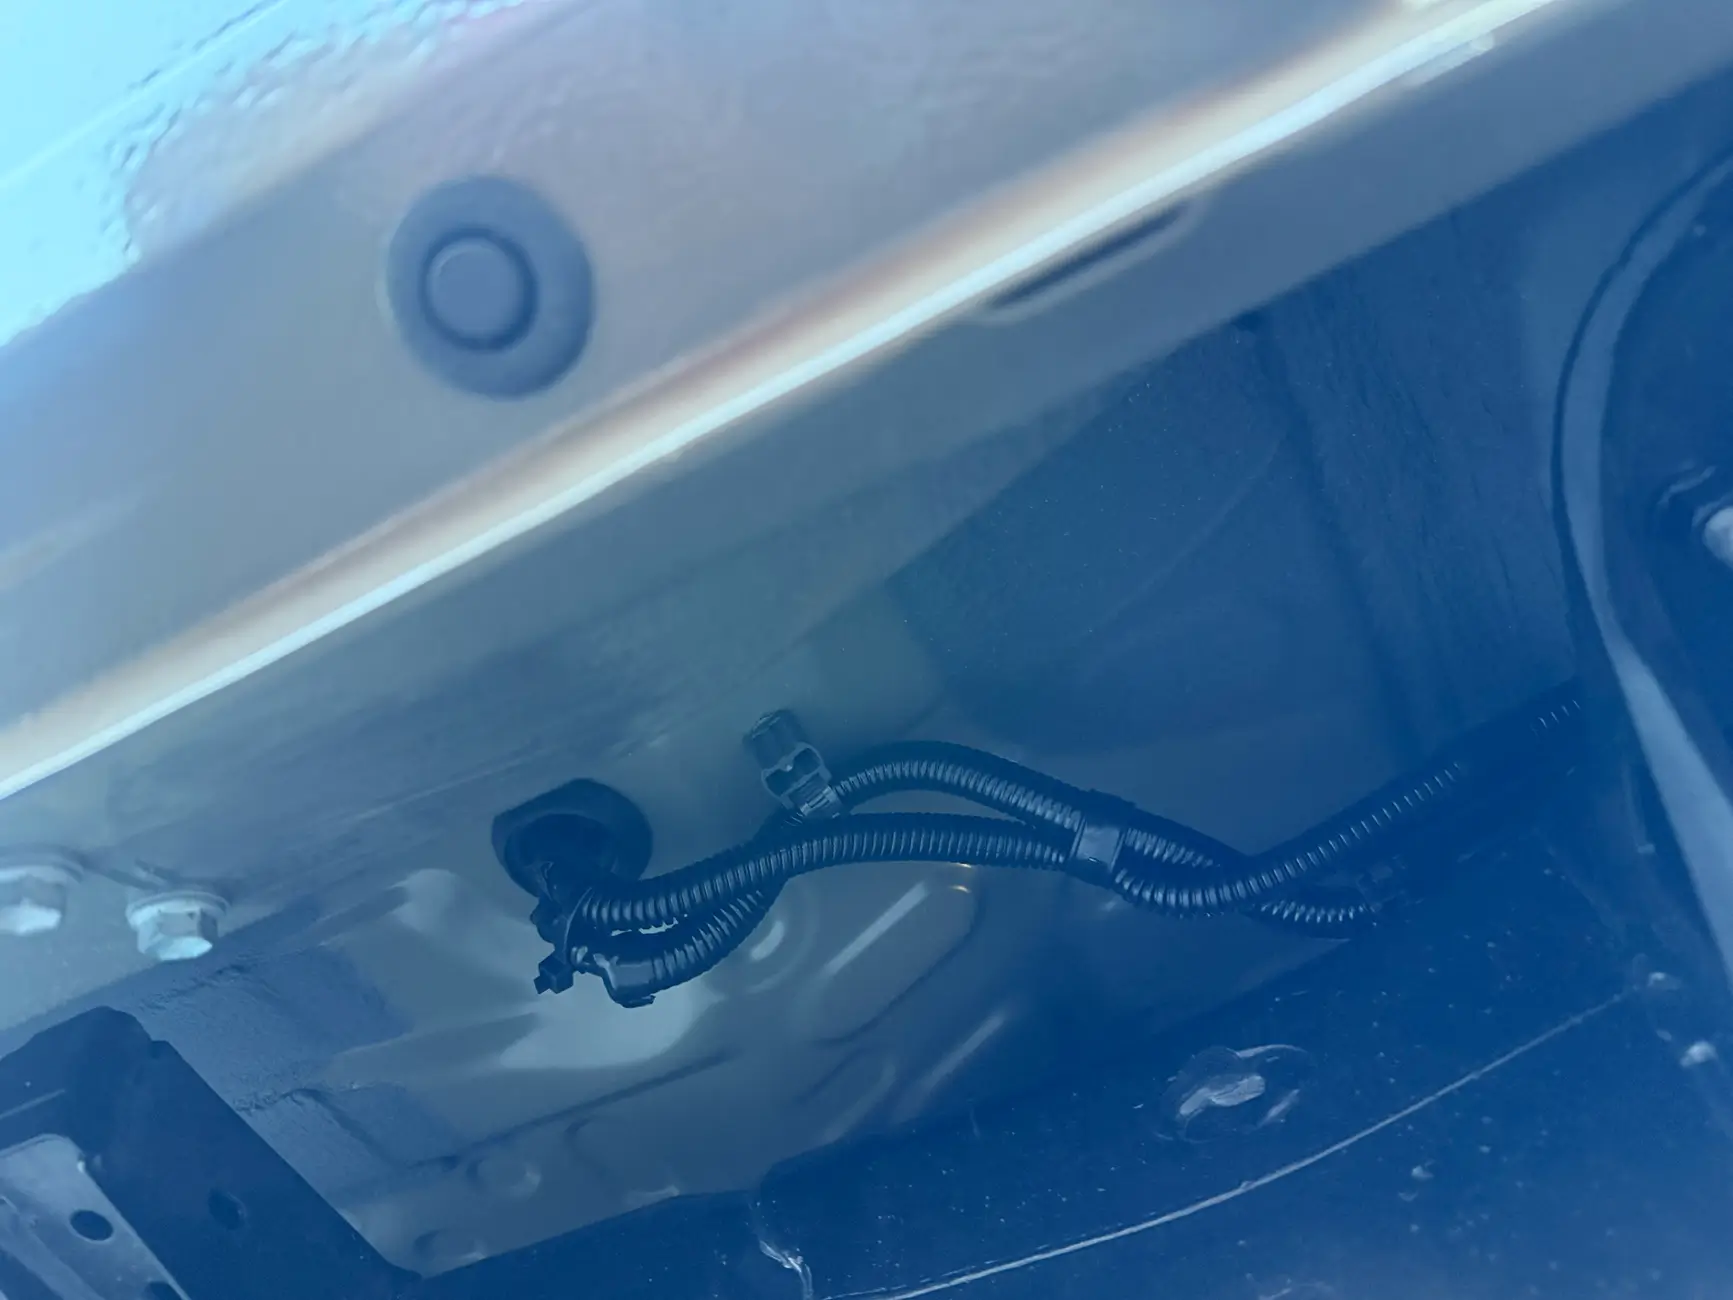
> Loom meeting with pre-existing loom.
DO NOT START FROM THE REAR
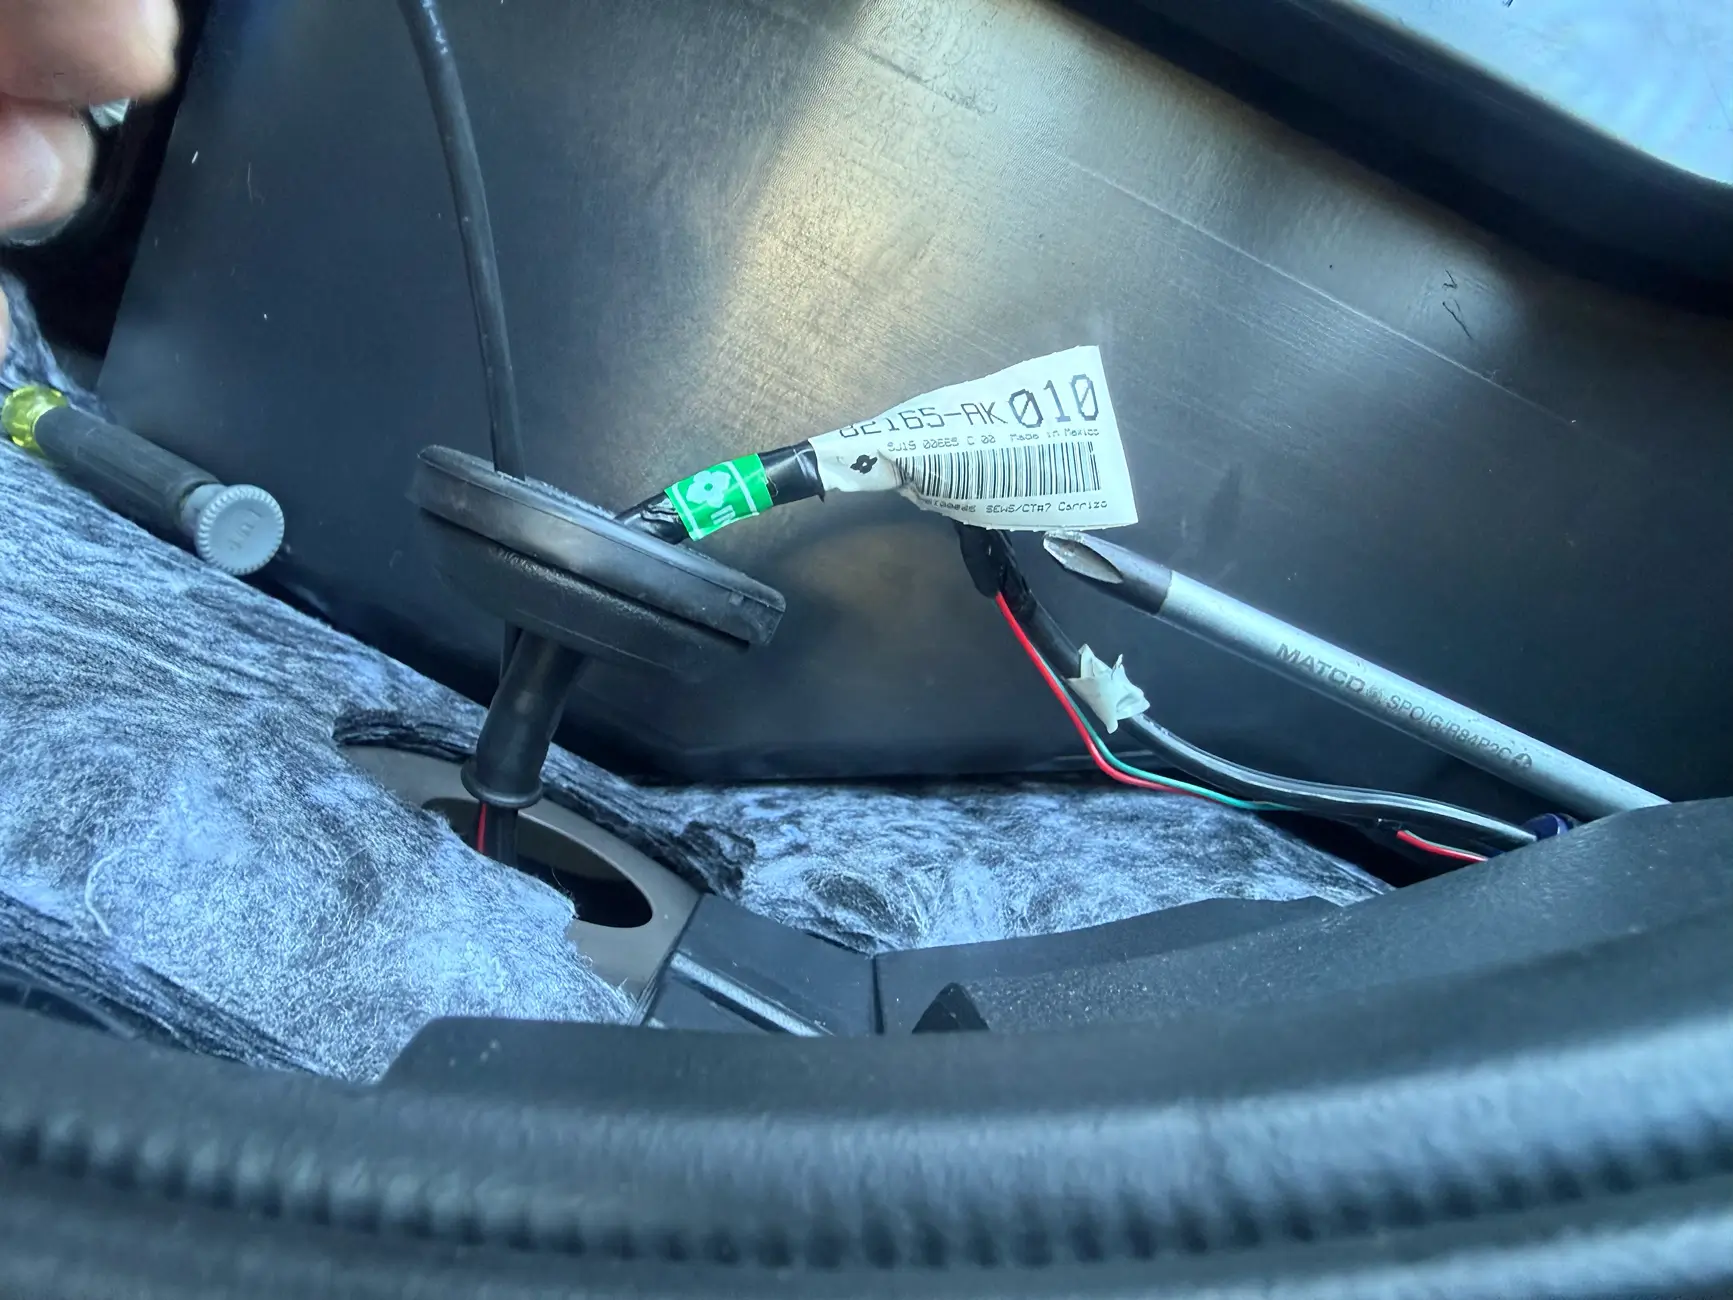
> Grommet cut to feed the jack through. TL;DR has this going the other way to avoid cutting at all costs, reusing the factory grommet + nipple (No premium === no nipple on the driver side at least)
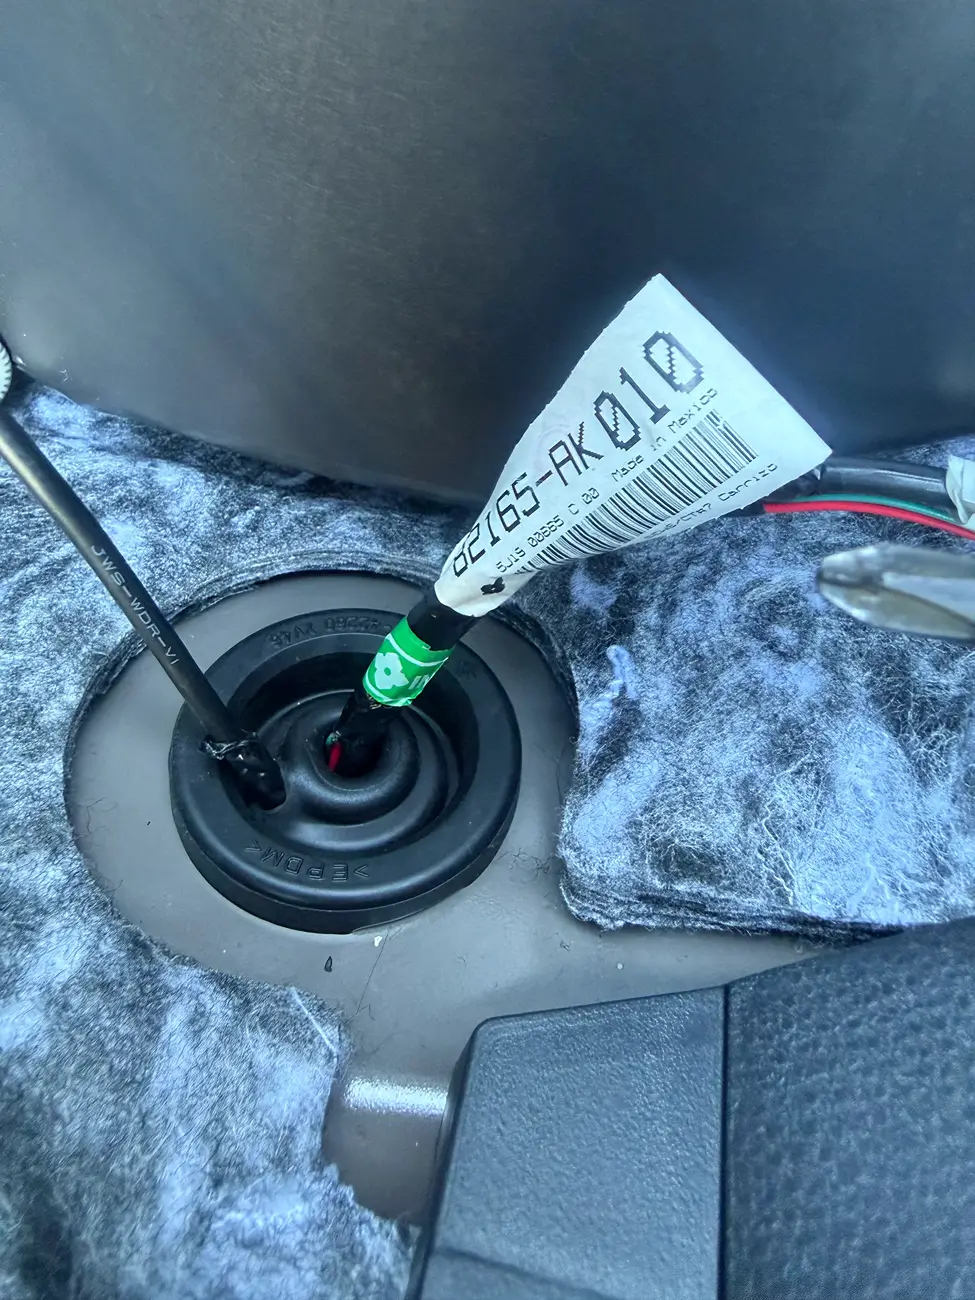
> Grommet once mounted back into housing. Use Silicon if you wish, I had because of being a dummy and doing this in reverse.
Starting Out
Setting up a Wolfbox rear camera to go next to the license plate and was wondering if anyone had experience taking such a route for similar trailer hitch setups? Since the tailgate swings as low as it does, camera license plate brackets are out of the question that cover most of the internet (been scanning for days) and I can't have it covering any part of the license plate (hence the vertical mounts are no bueno when flipped upside down).
Example bracket: https://www.amazon.com/Universal-Professional-Stainless-170-Degree-Adjustment/dp/B0F13YQGXT
Idea #1
Idea is centered around a mount that the license plate mounts onto and extends past it to the right such that the camera system could be mounted on a plate that's anchored into the bracket/mounted surface.
Example: https://www.amazon.com/eoere-Mending-Straps-Straight-Slotted/dp/B0DQ4X834D
Idea #2
Since there's a lip I could see the possibility of building a bracket that slips over the back, front facing then has a right angle bracket that is mounted bracket going over the lip which rests onto the face to prevent movement and place the camera on. That would allow for the cable housing to move freely over the lip and through the pre-existing wiring harness channels without worry of clearance or movement of the camera.
Shoot if all else fails I'll just bore a hole for the cable + housing, mount it next to the license plate and call it a day.
Will keep this thread alive for my progress as I work through this and post the final result in a separate thread. Throw in any creative ideas for either solutions you had done or know of.
Setting up a Wolfbox rear camera to go next to the license plate and was wondering if anyone had experience taking such a route for similar trailer hitch setups? Since the tailgate swings as low as it does, camera license plate brackets are out of the question that cover most of the internet (been scanning for days) and I can't have it covering any part of the license plate (hence the vertical mounts are no bueno when flipped upside down).
Example bracket: https://www.amazon.com/Universal-Professional-Stainless-170-Degree-Adjustment/dp/B0F13YQGXT
Idea #1
Idea is centered around a mount that the license plate mounts onto and extends past it to the right such that the camera system could be mounted on a plate that's anchored into the bracket/mounted surface.
Example: https://www.amazon.com/eoere-Mending-Straps-Straight-Slotted/dp/B0DQ4X834D
Idea #2
Since there's a lip I could see the possibility of building a bracket that slips over the back, front facing then has a right angle bracket that is mounted bracket going over the lip which rests onto the face to prevent movement and place the camera on. That would allow for the cable housing to move freely over the lip and through the pre-existing wiring harness channels without worry of clearance or movement of the camera.
Shoot if all else fails I'll just bore a hole for the cable + housing, mount it next to the license plate and call it a day.
Will keep this thread alive for my progress as I work through this and post the final result in a separate thread. Throw in any creative ideas for either solutions you had done or know of.
Sponsored
Last edited: