
Sponsored
OP
OP
VB Taco

VB Taco

TRD Off-Road Premium
Well-known member
First Name
Steve
Joined
May 27, 2025
Threads
4
Messages
160
Reaction score
102
Location
Virginia Beach, Virginia
Vehicle(s)
2025 TRD Off-Road Premium Bronze Oxide Long Bed
Couldn't have said it better myself. :clap:
Truly plug and play.
Sponsored
 

ejosesa

TRD Off-Road Premium
Well-known member
First Name
Joses
Joined
Feb 9, 2025
Threads
0
Messages
60
Reaction score
48
Location
los angeles
Vehicle(s)
tacoma off road 4x4
I’ve just received my bed scene kit. Question though.
does anyone know how to prevent the rust corrosion that’s been happening from water intrusion into the lights?
I tried to take the clear lens off to apply some dielectric anti corrosion product but can’t figure out how.
 

maxx075

TRD Off-Road
Well-known member
Joined
Apr 24, 2024
Threads
6
Messages
1,189
Reaction score
1,403
Location
FL
Vehicle(s)
2024 TRD Off Road
I’ve just received my bed scene kit. Question though.
does anyone know how to prevent the rust corrosion that’s been happening from water intrusion into the lights?
I tried to take the clear lens off to apply some dielectric anti corrosion product but can’t figure out how.
I don't know how the lights are built, but if they're like a two piece construction, maybe a thin bead of silicone around the two pieces of the housing?
 

ejosesa

TRD Off-Road Premium
Well-known member
First Name
Joses
Joined
Feb 9, 2025
Threads
0
Messages
60
Reaction score
48
Location
los angeles
Vehicle(s)
tacoma off road 4x4
Just completed the install. The most time consuming part was removing and reapplying the tonneau rails and tonneau.
I would skip the wheel well portion of this write up entirely and just pop out the bed lights and fish the wires from there to the tail lights. I did use a wire fish though. Hopefully you have one anvailable for your install.
Easy process. Pop out old rails, remove tail lights, fish wires and plug into bed lights, plug it all in, zip tie, tape, apply bed rails, reinstall bed lights, reinstall tail lights, done

Worth the $319, I’d say.
 

ejosesa

TRD Off-Road Premium
Well-known member
First Name
Joses
Joined
Feb 9, 2025
Threads
0
Messages
60
Reaction score
48
Location
los angeles
Vehicle(s)
tacoma off road 4x4
Definitely some water intrusion when washing with a pressure washer under the lens. Won’t be long till I have some rust lol. Oh well.
 

Sponsored

rdaggett

TRD Off-Road Premium
Member
First Name
Robert
Joined
Apr 23, 2026
Threads
2
Messages
6
Reaction score
0
Location
Northern Virginia
Vehicle(s)
19 ZR2, 22 Bronco OBX 2dr, 23 Model Y & 24 Defender 90
Just completed the install. The most time consuming part was removing and reapplying the tonneau rails and tonneau.
I would skip the wheel well portion of this write up entirely and just pop out the bed lights and fish the wires from there to the tail lights. I did use a wire fish though. Hopefully you have one anvailable for your install.
Easy process. Pop out old rails, remove tail lights, fish wires and plug into bed lights, plug it all in, zip tie, tape, apply bed rails, reinstall bed lights, reinstall tail lights, done

Worth the $319, I’d say.
$319 where did you get it for that price?
 

ejosesa

TRD Off-Road Premium
Well-known member
First Name
Joses
Joined
Feb 9, 2025
Threads
0
Messages
60
Reaction score
48
Location
los angeles
Vehicle(s)
tacoma off road 4x4
$319 where did you get it for that price?
Toyota parts store, during one of their sales.
Specifically Hendricks Toyota Apex.
Wait for a sale, maybe Memorial Day. And wait for free shipping.
 
OP
OP
VB Taco

VB Taco

TRD Off-Road Premium
Well-known member
First Name
Steve
Joined
May 27, 2025
Threads
4
Messages
160
Reaction score
102
Location
Virginia Beach, Virginia
Vehicle(s)
2025 TRD Off-Road Premium Bronze Oxide Long Bed
Knowing now how easy to do the install, I'll do it again if the rust issue starts to happen.
Plus I'll put a thin bead of clear silicone around the outer edge to hopefully prevent future rust.
Heck, I should just do it now. What am I thinking. 🤪🤔
 

HardCorTaco

TRD Off-Road Premium
Active member
First Name
Cory
Joined
Jan 19, 2024
Threads
4
Messages
40
Reaction score
75
Location
Utah
Website
youtube.com
Vehicle(s)
2024 Tacoma
A few of you asked for a video. Just finished installing the OEM Bed Scene Lighting on my 2024 Tacoma and put together a full install video for anyone considering this upgrade.

After using it, I can definitely say it’s one of my favorite mods. It’s also pretty easy to do, anyone can do it. It’s one of those upgrades you don’t think you need until you’re loading gear in the dark.


tipsyjam

TRD Sport
Well-known member
Joined
Oct 29, 2025
Threads
3
Messages
67
Reaction score
77
Location
Hawai'i
Vehicle(s)
2024 Tacoma TRD Sport
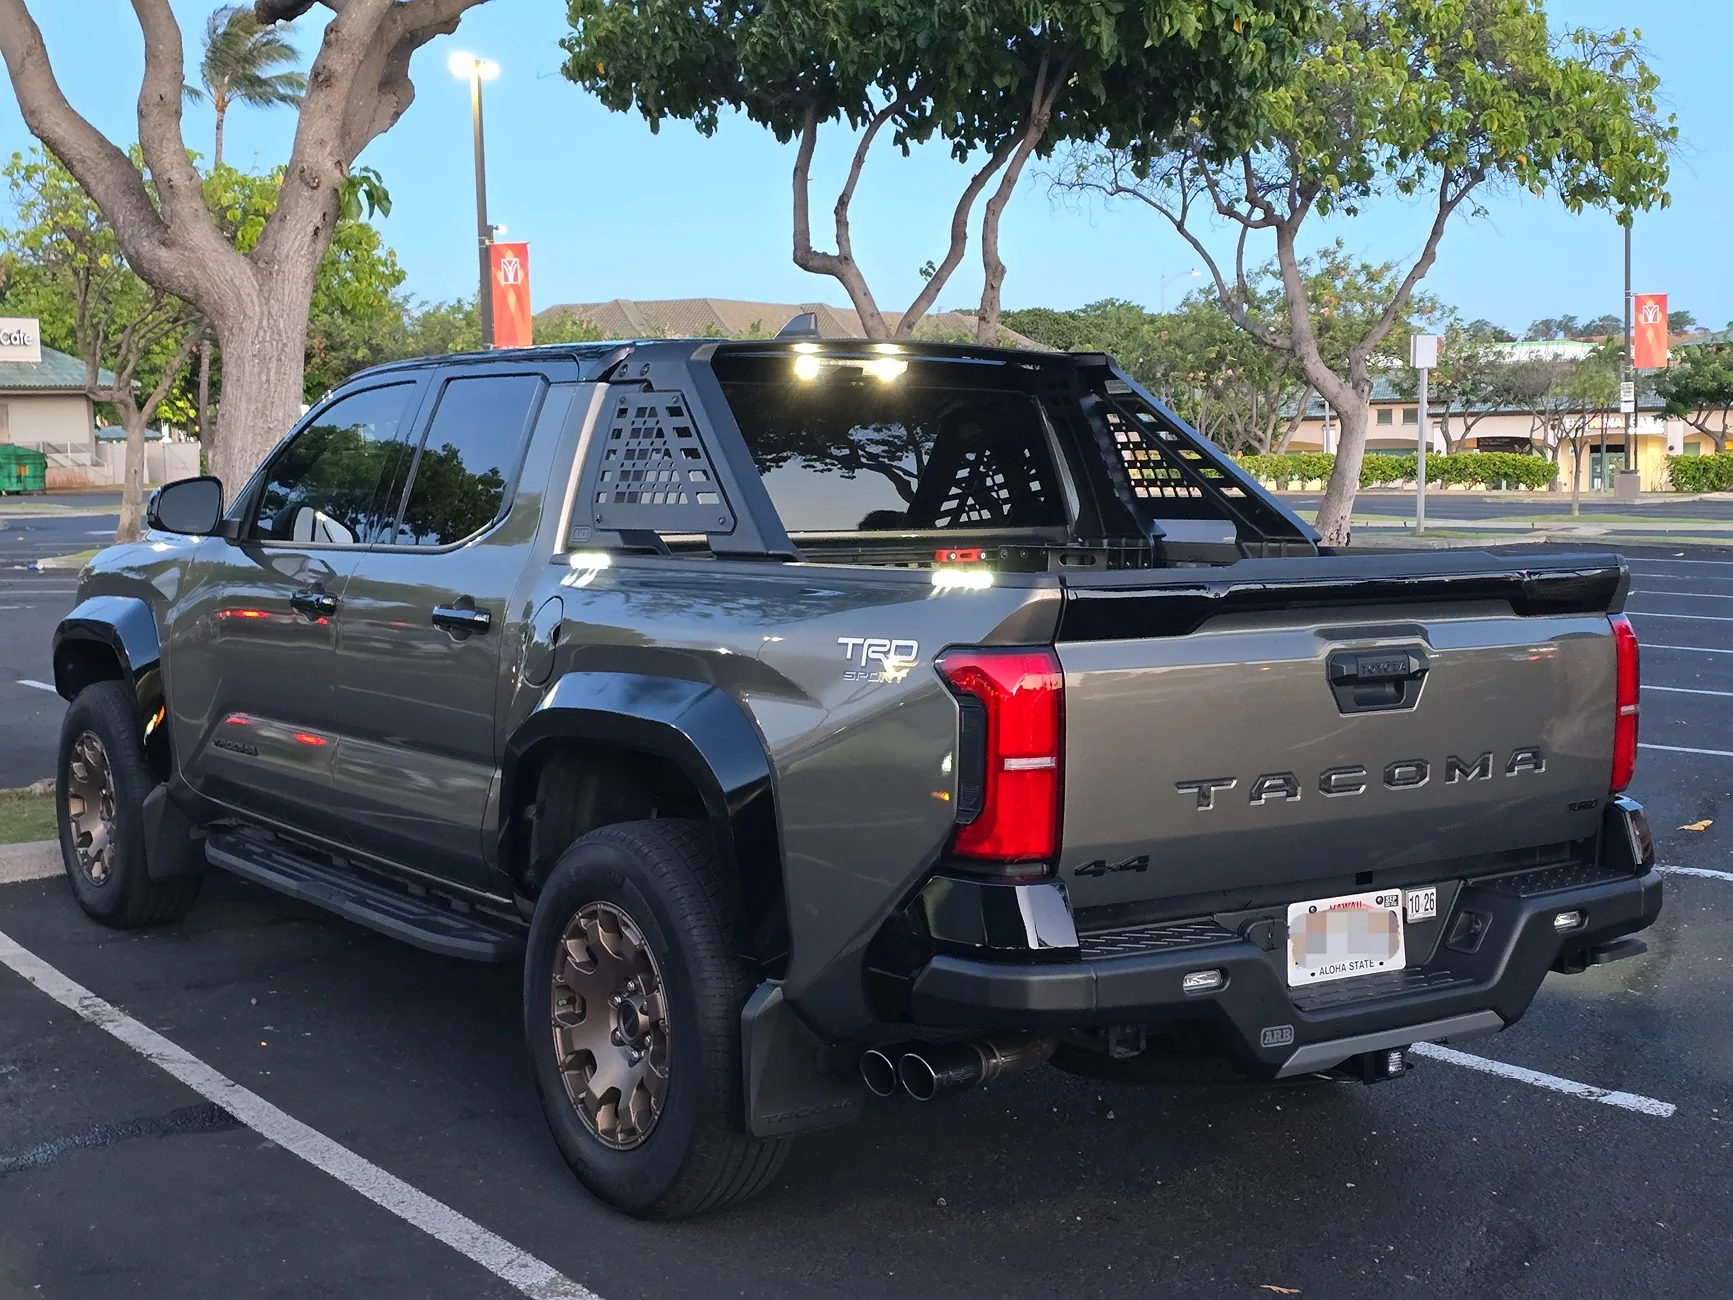
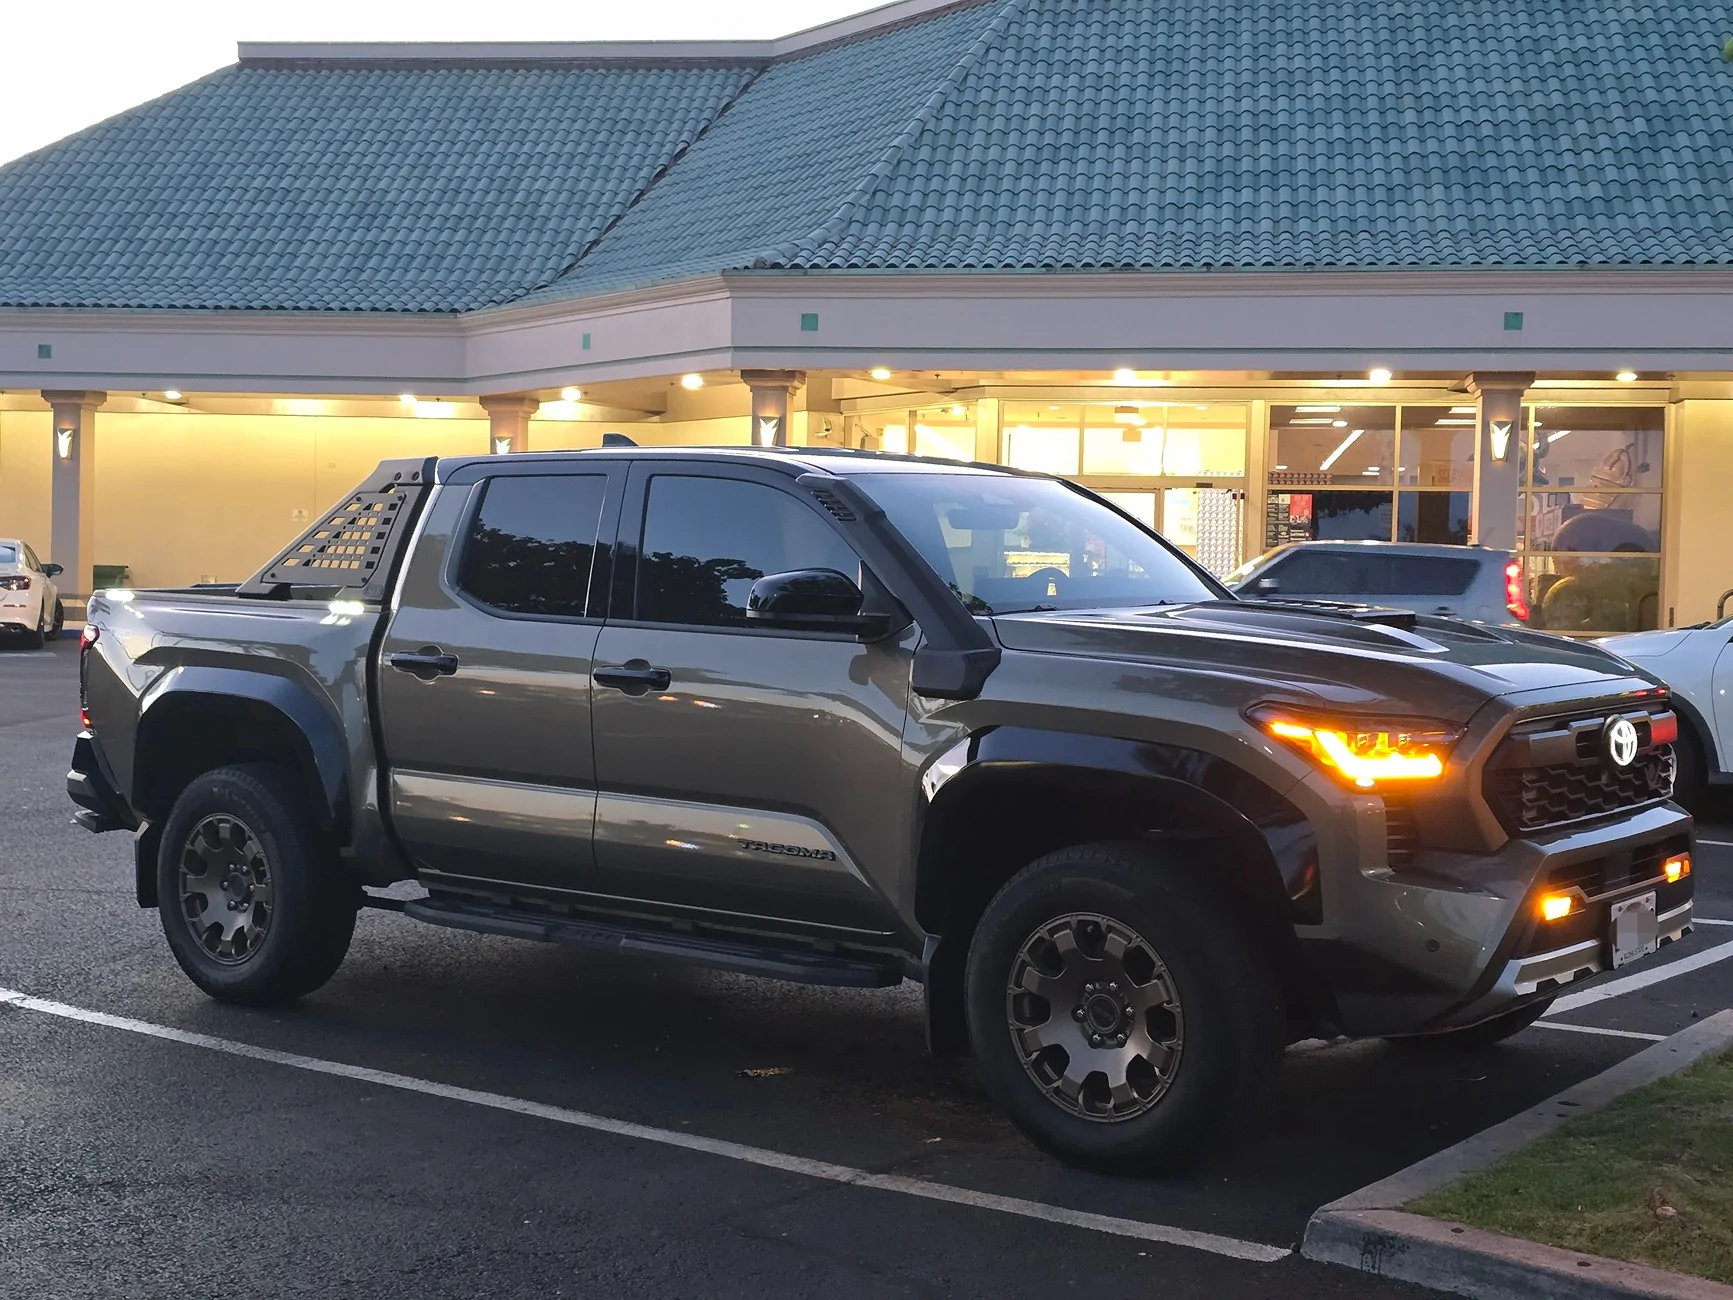
Wanted to thank all of you in this thread for figuring out the bed scene lighting installation. One of my favorite mods so far. Been using my key fob more to unlock so I can see it light up as I walk to the truck. I even turn them on sometimes when driving to light up the blind spot and look at them in my sideview mirrors. Highly recommend!

Couple pics at dusk:

2024 Tacoma Bed Cap Scene Light Installation 20260802_192223(1)

2024 Tacoma Bed Cap Scene Light Installation 20260802_192254(1)
 

Sponsored

tipsyjam

TRD Sport
Well-known member
Joined
Oct 29, 2025
Threads
3
Messages
67
Reaction score
77
Location
Hawai'i
Vehicle(s)
2024 Tacoma TRD Sport
Your truck looks sick man. How was it doing the pro front bumper conversion? Did you get the wheel well liners as well or did you just cut your existing?
Thanks! That was one of the first mods I did when I got my Trailhunter wheels. Yes, I got the wheel well liners as it comes out cleaner in my opinion. You will also need the pro or trailhunter fender flares since the your old ones won't fit. Trailhunter flares are cheaper since they are unpainted.

At a high level, remove your front bumper and front fender flares. Take apart your entire front bumper assembly - grille shutter, grille, fangs, fog light fascia, lower valance, etc. This is the the only way to get to all your front bumper cover screws. Remember that everything only goes back together one way, so just go for it and be sure to collect all your parts and screws.

Put your new bumper cover on the inner plastic frame piece then reassemble, and remember that there are three screws that must be installed from the outside that go on pretty early on when reassembling. I missed these three screws once and I didn't figure it out until the whole thing was basically put back together. Extra hour of work easily. I started noticing something was up when the bumper cover wasn't sitting nicely against the inner plastic frame pieces and I was forcing it into place to snap the fangs back in. Then at the very end I found three extra screws :(

Bumper Cover comes UNPAINTED:
52119-AK902

TRD Pro or Trailhunter Front driver and front passenger fender well liners:
53876-AK020
53875-AK020

TRD Pro GLOSS BLACK Fender Flares:
75085-AK040
75086-AK040
75087-AK040
75088-AK040

Trailhunter Matte Black Fender Flares:
75085-AK030
75086-AK030
75087-AK030
75088-AK030

Fender liner grommets if need:
90189-06236
 

bmthandrew

TRD Off-Road Premium
Member
First Name
Alvin
Joined
Feb 23, 2026
Threads
2
Messages
18
Reaction score
26
Location
Alvin, TX
Vehicle(s)
2024 Toyota Tacoma TRD Off-Road
Thanks! That was one of the first mods I did when I got my Trailhunter wheels. Yes, I got the wheel well liners as it comes out cleaner in my opinion. You will also need the pro or trailhunter fender flares since the your old ones won't fit. Trailhunter flares are cheaper since they are unpainted.

At a high level, remove your front bumper and front fender flares. Take apart your entire front bumper assembly - grille shutter, grille, fangs, fog light fascia, lower valance, etc. This is the the only way to get to all your front bumper cover screws. Remember that everything only goes back together one way, so just go for it and be sure to collect all your parts and screws.

Put your new bumper cover on the inner plastic frame piece then reassemble, and remember that there are three screws that must be installed from the outside that go on pretty early on when reassembling. I missed these three screws once and I didn't figure it out until the whole thing was basically put back together. Extra hour of work easily. I started noticing something was up when the bumper cover wasn't sitting nicely against the inner plastic frame pieces and I was forcing it into place to snap the fangs back in. Then at the very end I found three extra screws :(

Bumper Cover comes UNPAINTED:
52119-AK902

TRD Pro or Trailhunter Front driver and front passenger fender well liners:
53876-AK020
53875-AK020

TRD Pro GLOSS BLACK Fender Flares:
75085-AK040
75086-AK040
75087-AK040
75088-AK040

Trailhunter Matte Black Fender Flares:
75085-AK030
75086-AK030
75087-AK030
75088-AK030

Fender liner grommets if need:
90189-06236
You are the fkn GOAT thank you for the info. There’s no videos out there for this kind of install and this is by far the most help I’ve seen going over this subject. I’ve always wanted to do it, maybe one day! The only thing stopping me is I feel like I’d have to get new wheels (which I don’t want to do) because mine are a +25 offset. With the fenders being wider, I feel like id have to get a new set of wheels with an even more aggressive offset just to keep that slight poke.
 

tipsyjam

TRD Sport
Well-known member
Joined
Oct 29, 2025
Threads
3
Messages
67
Reaction score
77
Location
Hawai'i
Vehicle(s)
2024 Tacoma TRD Sport
You are the fkn GOAT thank you for the info. There’s no videos out there for this kind of install and this is by far the most help I’ve seen going over this subject. I’ve always wanted to do it, maybe one day! The only thing stopping me is I feel like I’d have to get new wheels (which I don’t want to do) because mine are a +25 offset. With the fenders being wider, I feel like id have to get a new set of wheels with an even more aggressive offset just to keep that slight poke.
No worries. With the TH 18x8.5J et20 wheels and stock width 265 tires, only the bulge of the face of the tire pokes a tiny bit. Pretty much flush with the fender flare outer edge. I've seen a real Trailhunter near me and he has the Rays Homura 17x8.5J et10 wheels with 35x12.5 tires I believe, and his tire tread pokes just a little bit. I seen it once when I was driving and it looks pretty good. Instagram link here:


Here's the only photo I really have that shows straight down the side of the my truck. I'm more of a flush stance guy:

2024 Tacoma Bed Cap Scene Light Installation 20260621_113948(1)(1)
 

bmthandrew

TRD Off-Road Premium
Member
First Name
Alvin
Joined
Feb 23, 2026
Threads
2
Messages
18
Reaction score
26
Location
Alvin, TX
Vehicle(s)
2024 Toyota Tacoma TRD Off-Road
No worries. With the TH 18x8.5J et20 wheels and stock width 265 tires, only the bulge of the face of the tire pokes a tiny bit. Pretty much flush with the fender flare outer edge. I've seen a real Trailhunter near me and he has the Rays Homura 17x8.5J et10 wheels with 35x12.5 tires I believe, and his tire tread pokes just a little bit. I seen it once when I was driving and it looks pretty good. Instagram link here:

Nice! You got more angles of your truck?
 

lauren01

Trailhunter
Well-known member
First Name
Lauren
Joined
Aug 20, 2025
Threads
5
Messages
837
Reaction score
735
Location
Ventura, CA USA
Vehicle(s)
2025 Tacoma Trailhunter LB
Wanted to thank all of you in this thread for figuring out the bed scene lighting installation. One of my favorite mods so far. Been using my key fob more to unlock so I can see it light up as I walk to the truck. I even turn them on sometimes when driving to light up the blind spot and look at them in my sideview mirrors. Highly recommend!

Couple pics at dusk:

20260802_192223(1).webp

20260802_192254(1).webp
BEE-YOO-TEEE-FULLLL!!
Sponsored


Top