- First Name
- Steve
- Joined
- May 27, 2025
- Threads
- 4
- Messages
- 160
- Reaction score
- 101
- Location
- Virginia Beach, Virginia
- Vehicle(s)
- 2025 TRD Off-Road Premium Bronze Oxide Long Bed
- Thread starter
- #1
If you have bed lights and want to upgrade to include scene lights, getting this kit will be all you need.
First time posting "how to" installations so bare with me. Pics are using both right and left side. I'll specify which side the pics are referring to if needed.
Part # PT944-35240 is for the 5 Ft bed. (Taco Lamp Assembly Work)
Part # PT944-35241 is for the 6 Ft bed. (Taco Lamp Assembly Work)
Don't mess with the "-AA" and "-AB" that shows up on some sites.
EDIT: I originally got them from the stealership but then found them $63 cheaper (even with shipping) so I returned them and just had to wait a couple more days.
Check out https://toyota.oempartsonline.com/
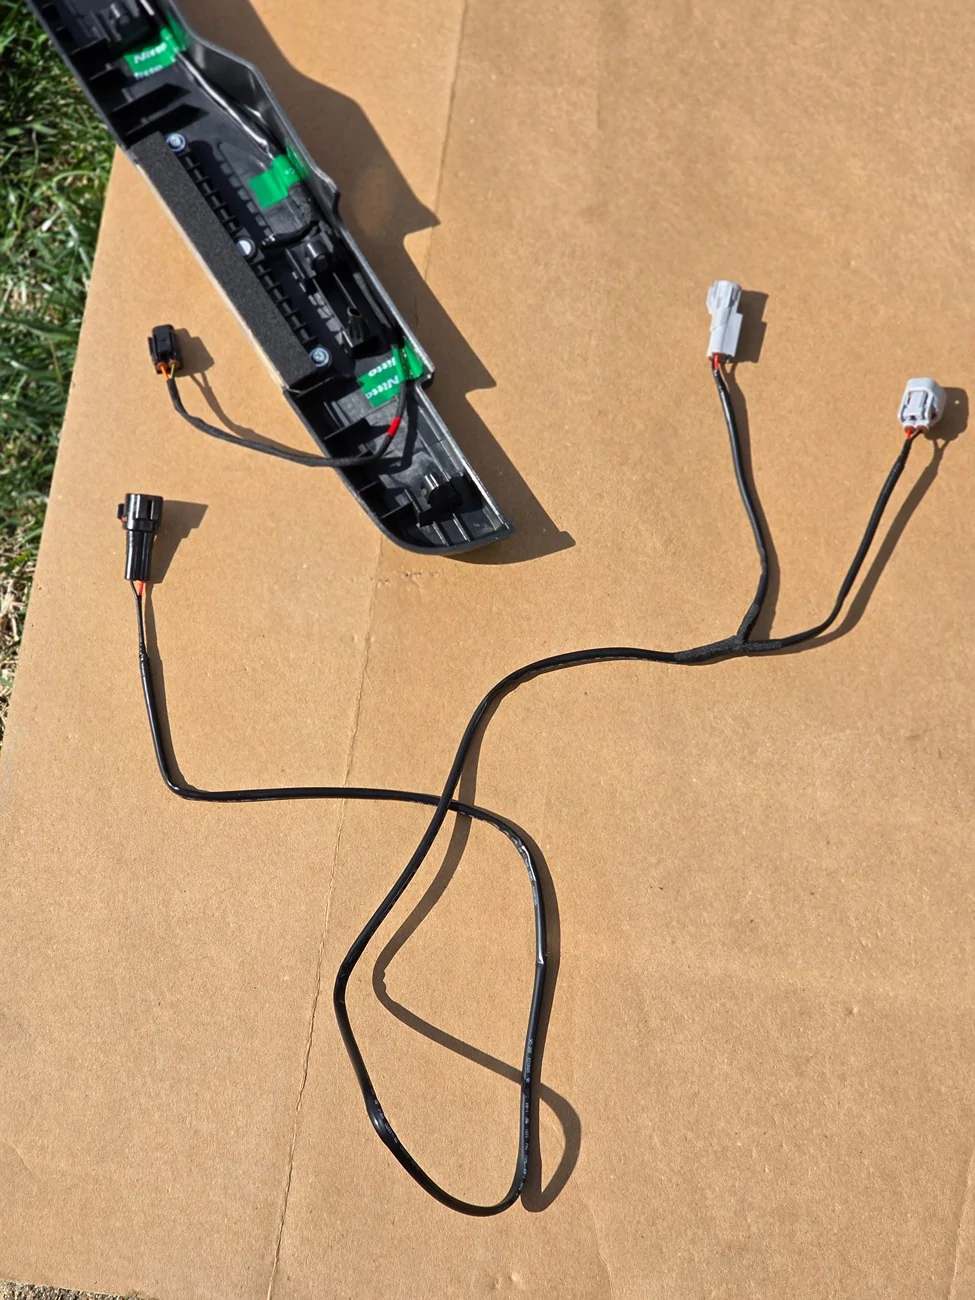
These kits come with both left and right bed caps and electrical harnesses.


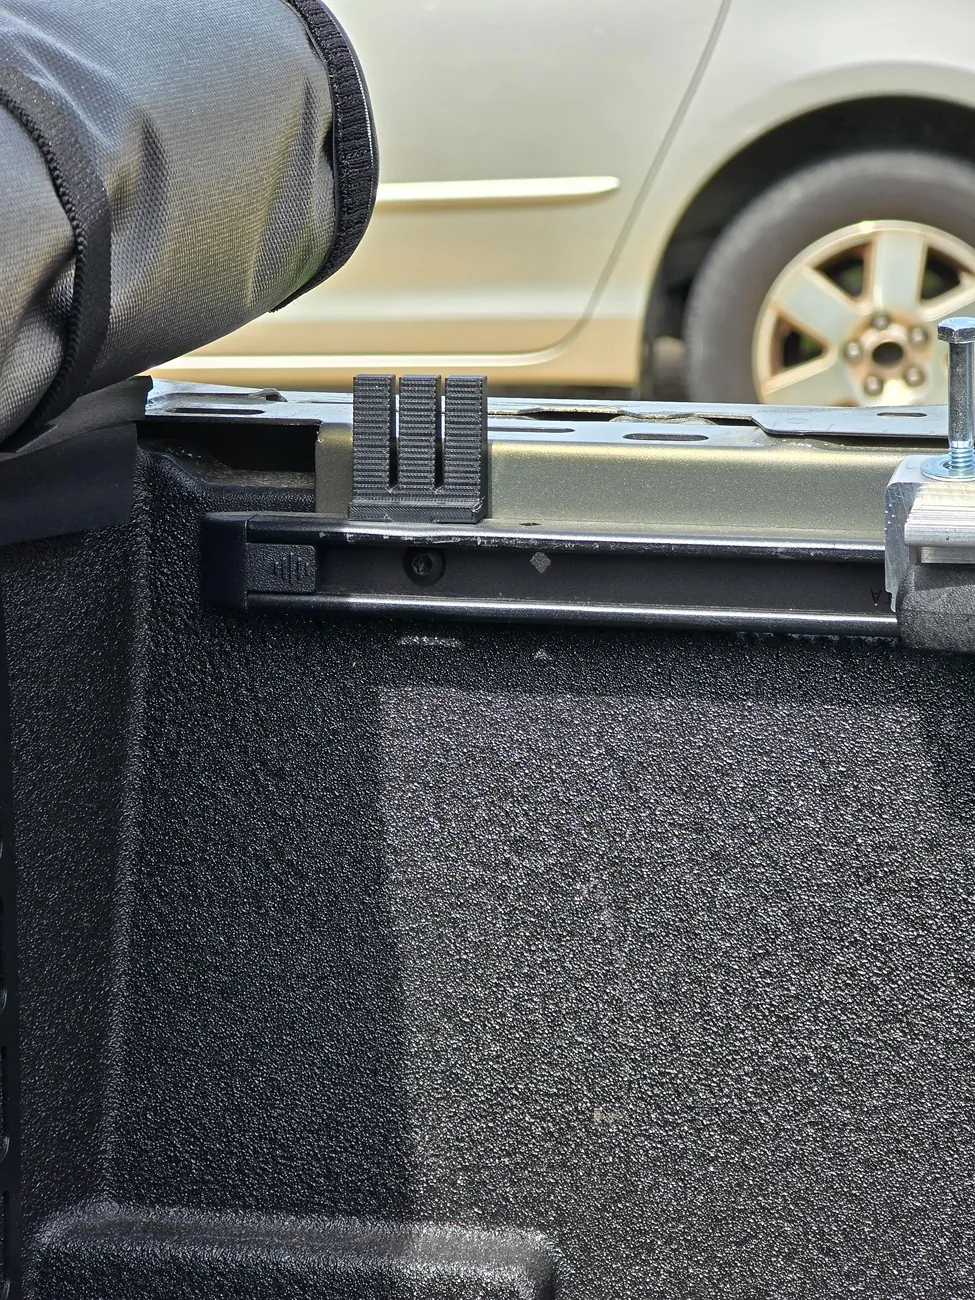
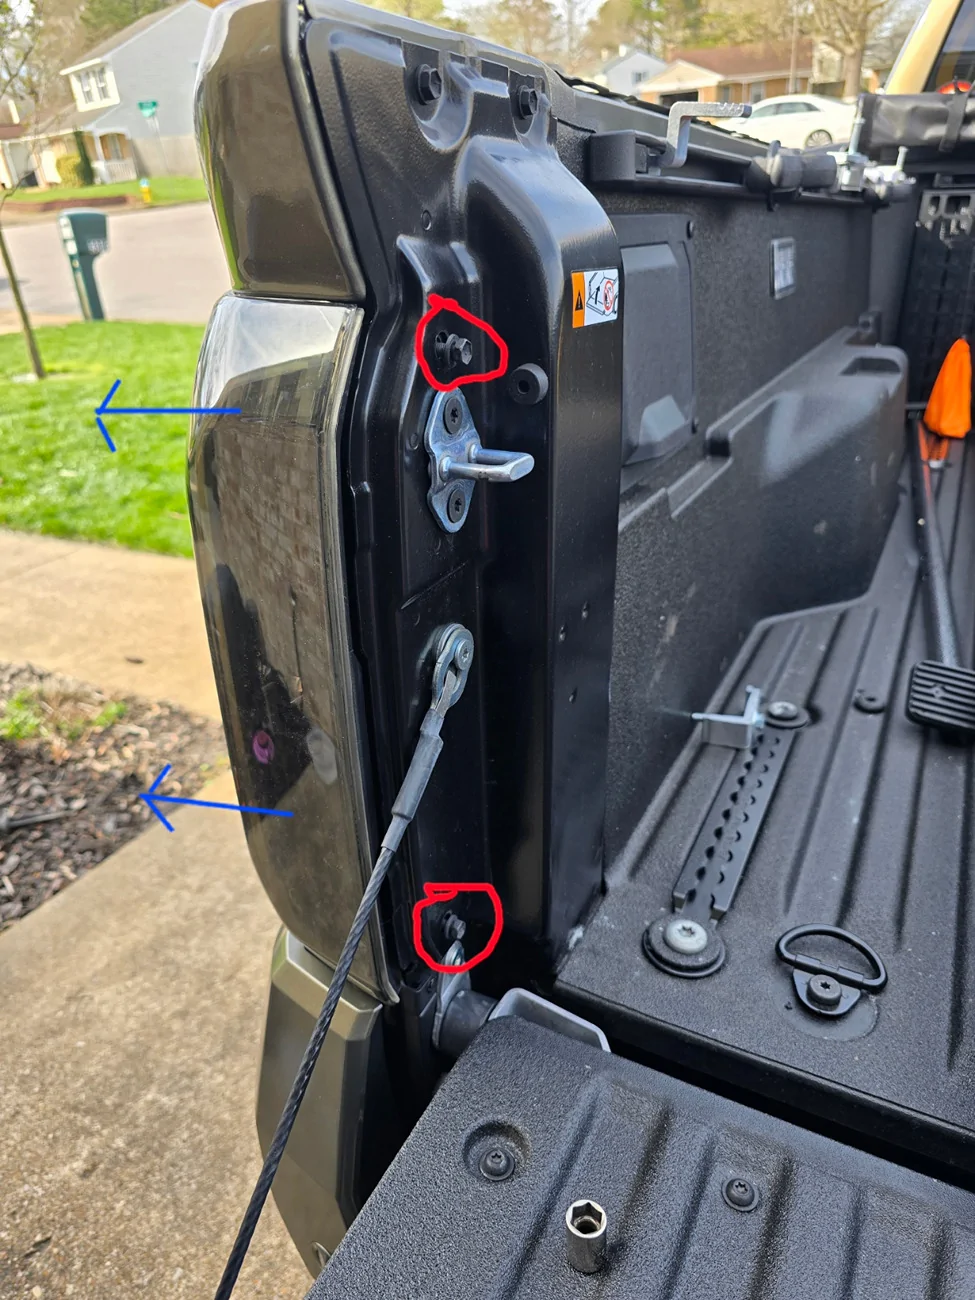
Taking off the old bed caps is pretty easy. Just pulling straight up. I did use a plastic bar to help pop some of the more stubborn clips.
I then took off the taillights. Easy two 10mm bolts and disconnecting the plugs. Pull the lights straight outboard.
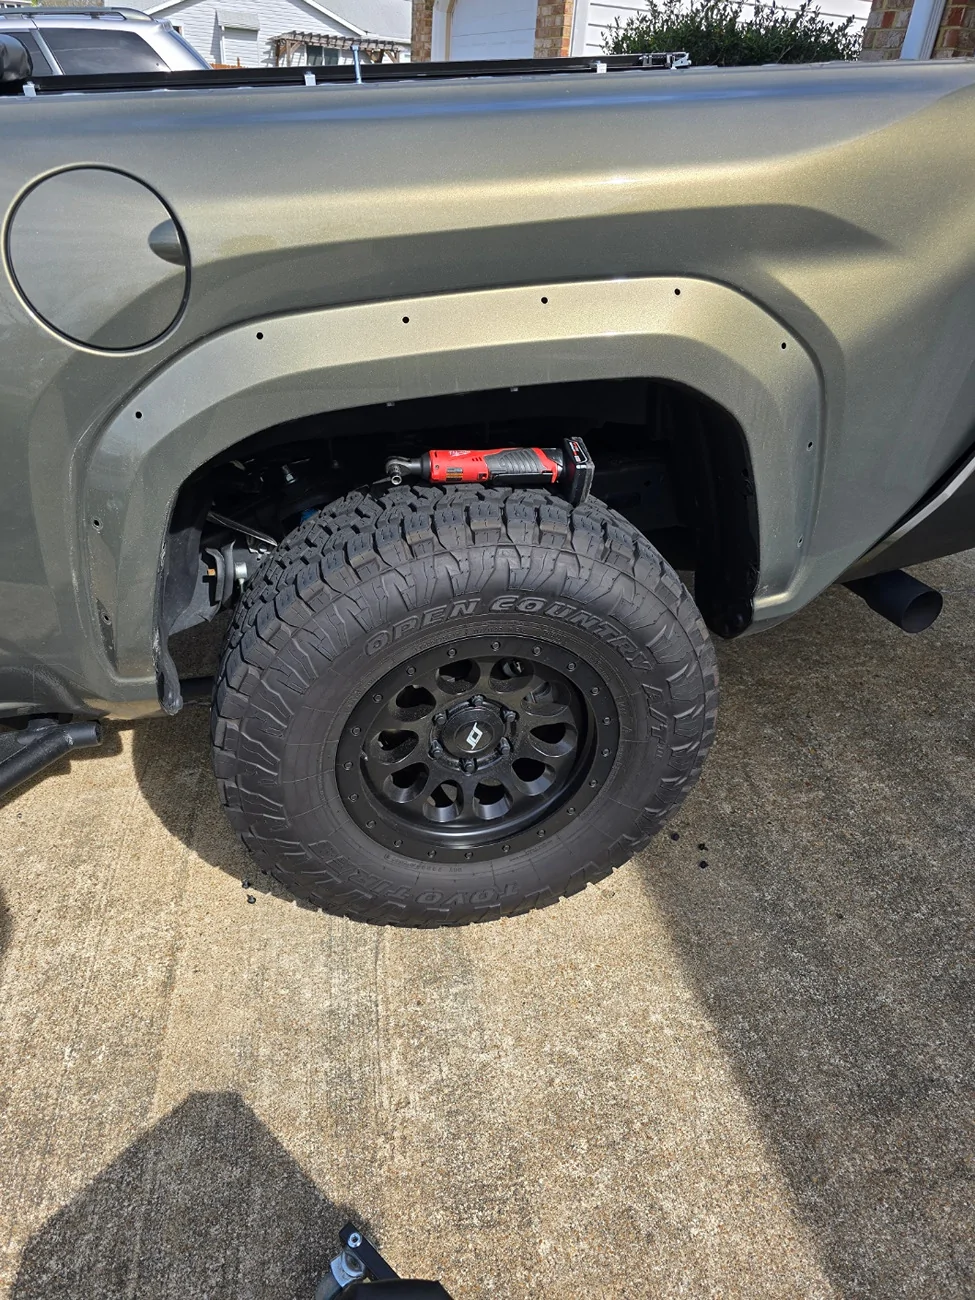
Had to take off the fender flare. Its just pulling straight back. Nothing to hard with this step.
Now the fun began. Have to move the plastic liner some to gain access to the back of the bed light to disconnect the cannon plug.
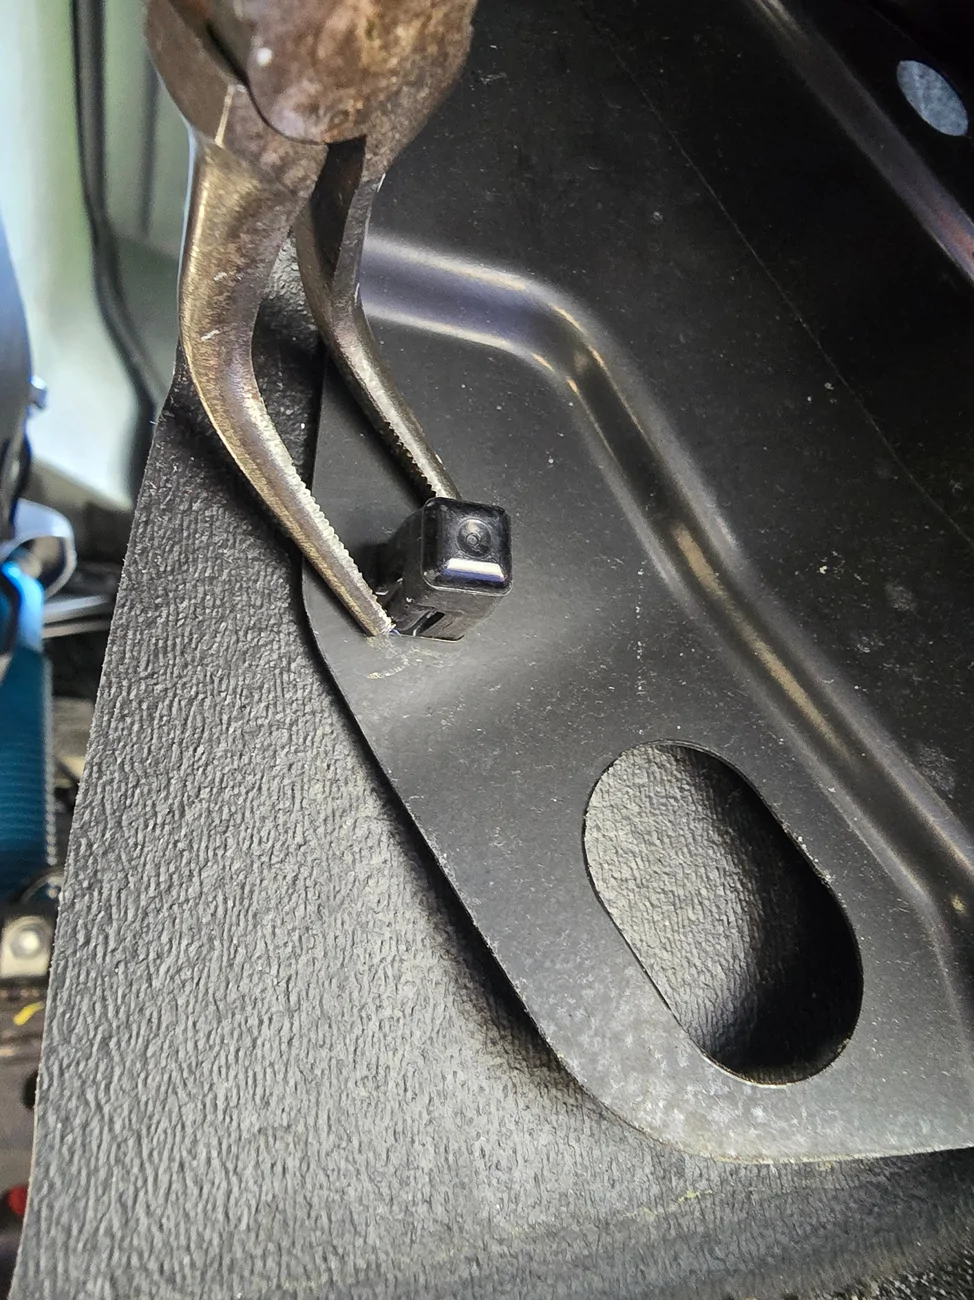
Starting from the bottom, I ended up removing 7 of these buggers and was able to reach up and get to the bed light.
I found the best way to get them out was with 90 degree needle nose pliers and just squeeze the two opposite corners.
Once I got enough of them out to reach up to the bed light, I was good to go.
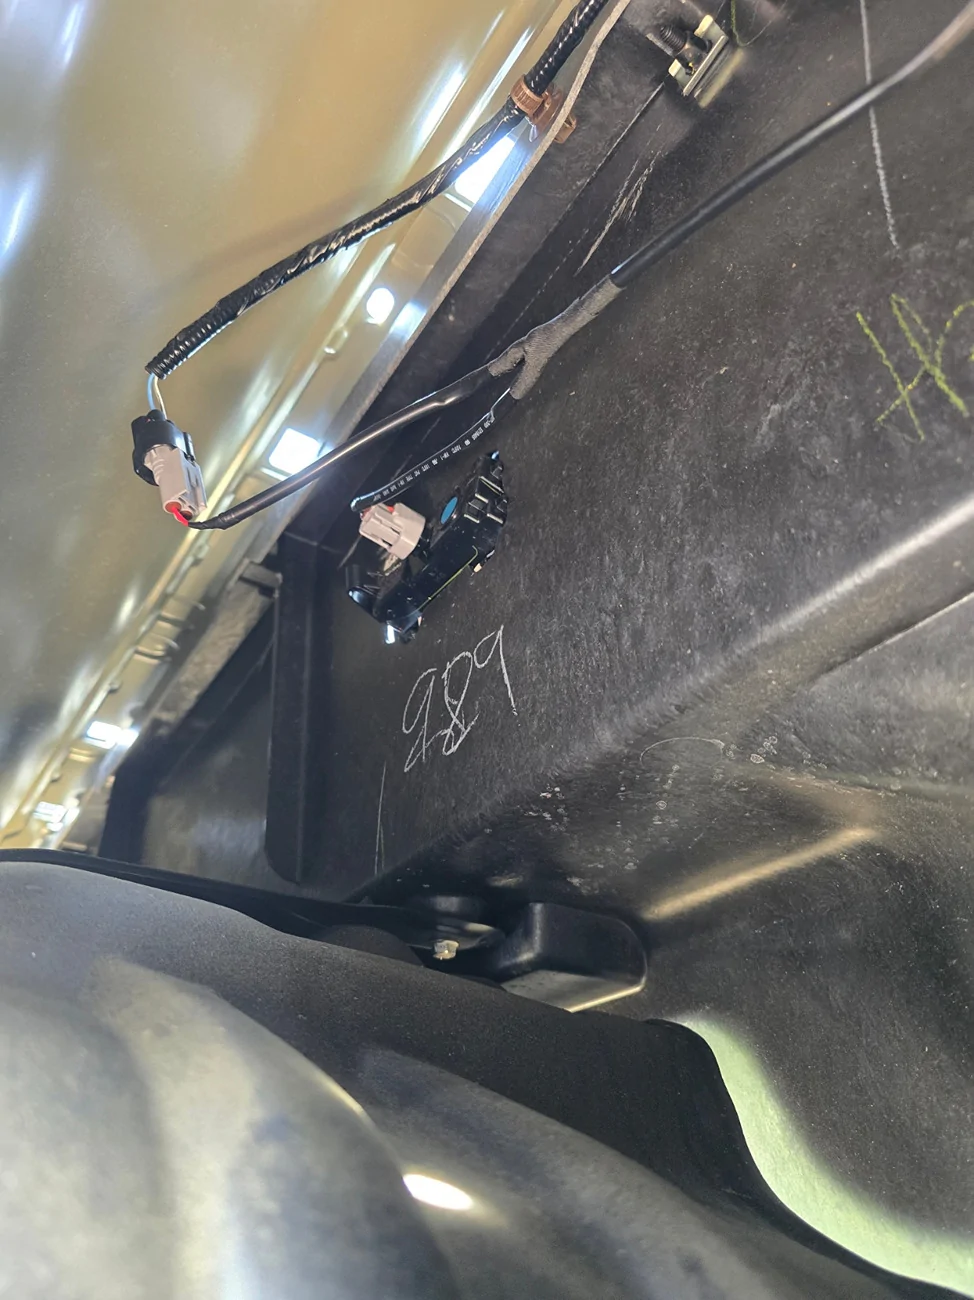
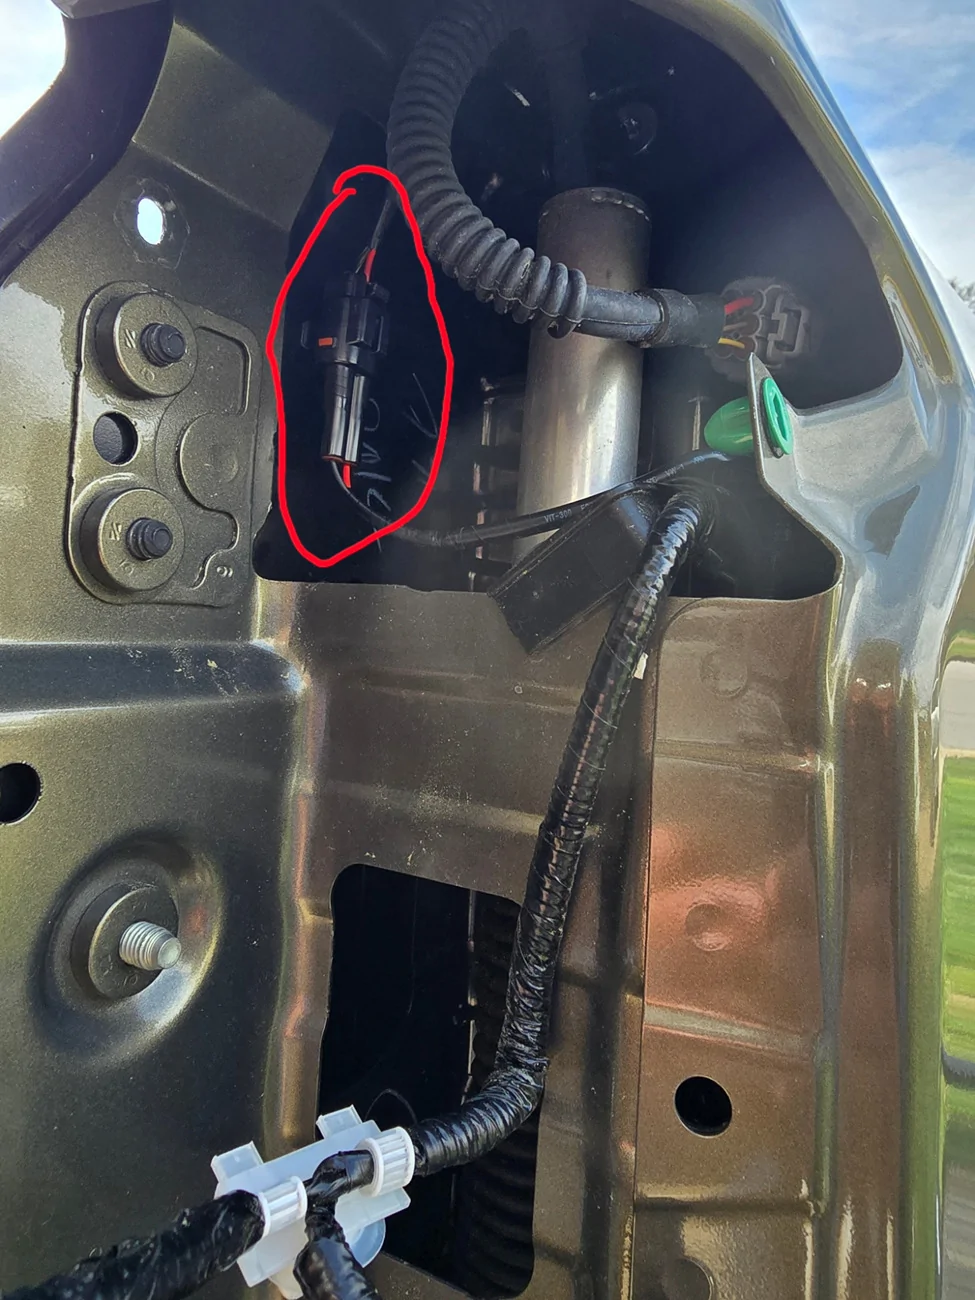
Here's a shot looking up on the drivers side. Time to disconnect the light and plug the supplied harness in.
After having a hard time disconnecting the passengers side, I ended up just popping the light out first and then doing my connections. Soooo much easier than trying to do all the unplugging and plugging with your arms reaching up there.

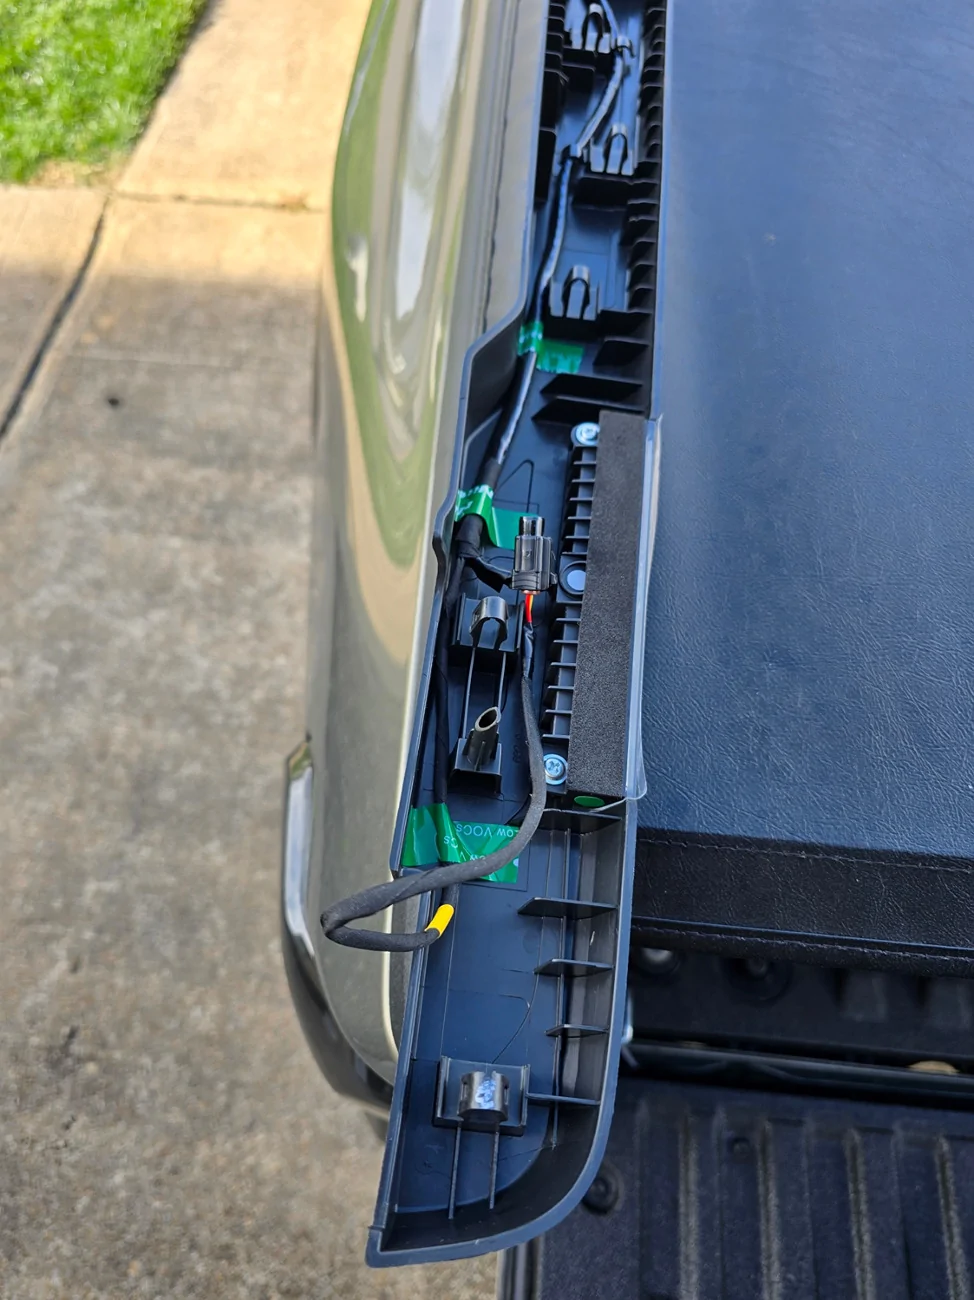
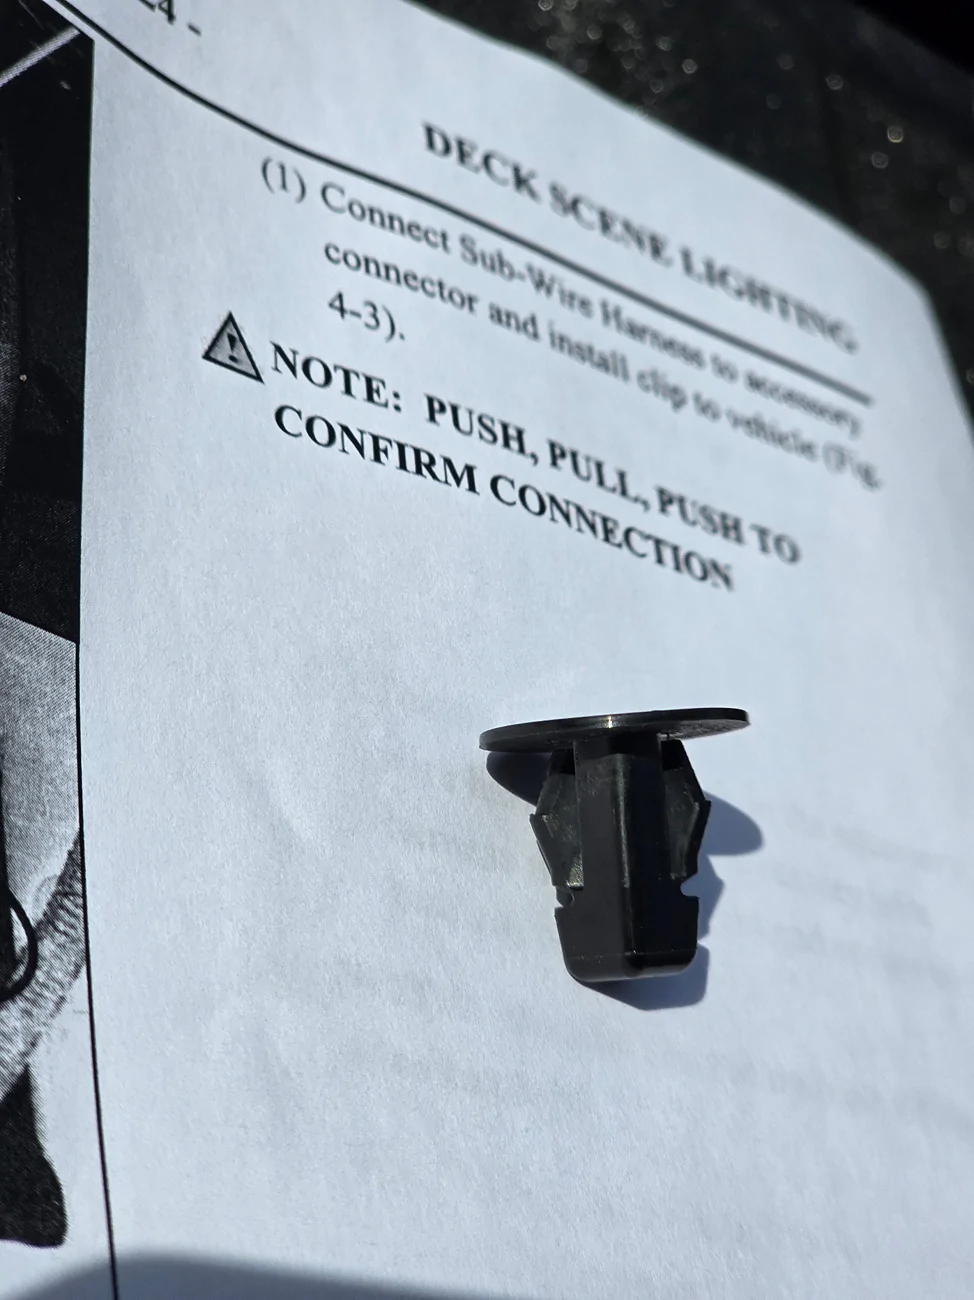
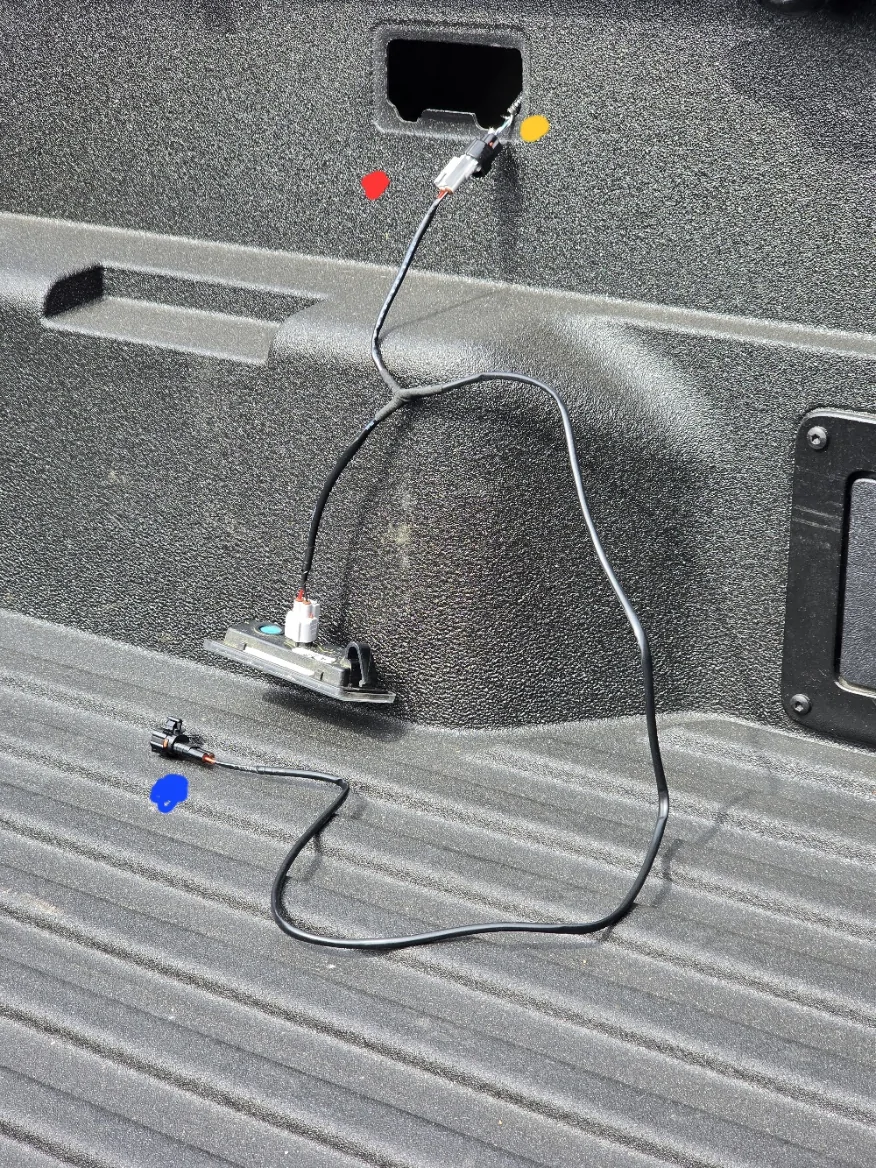
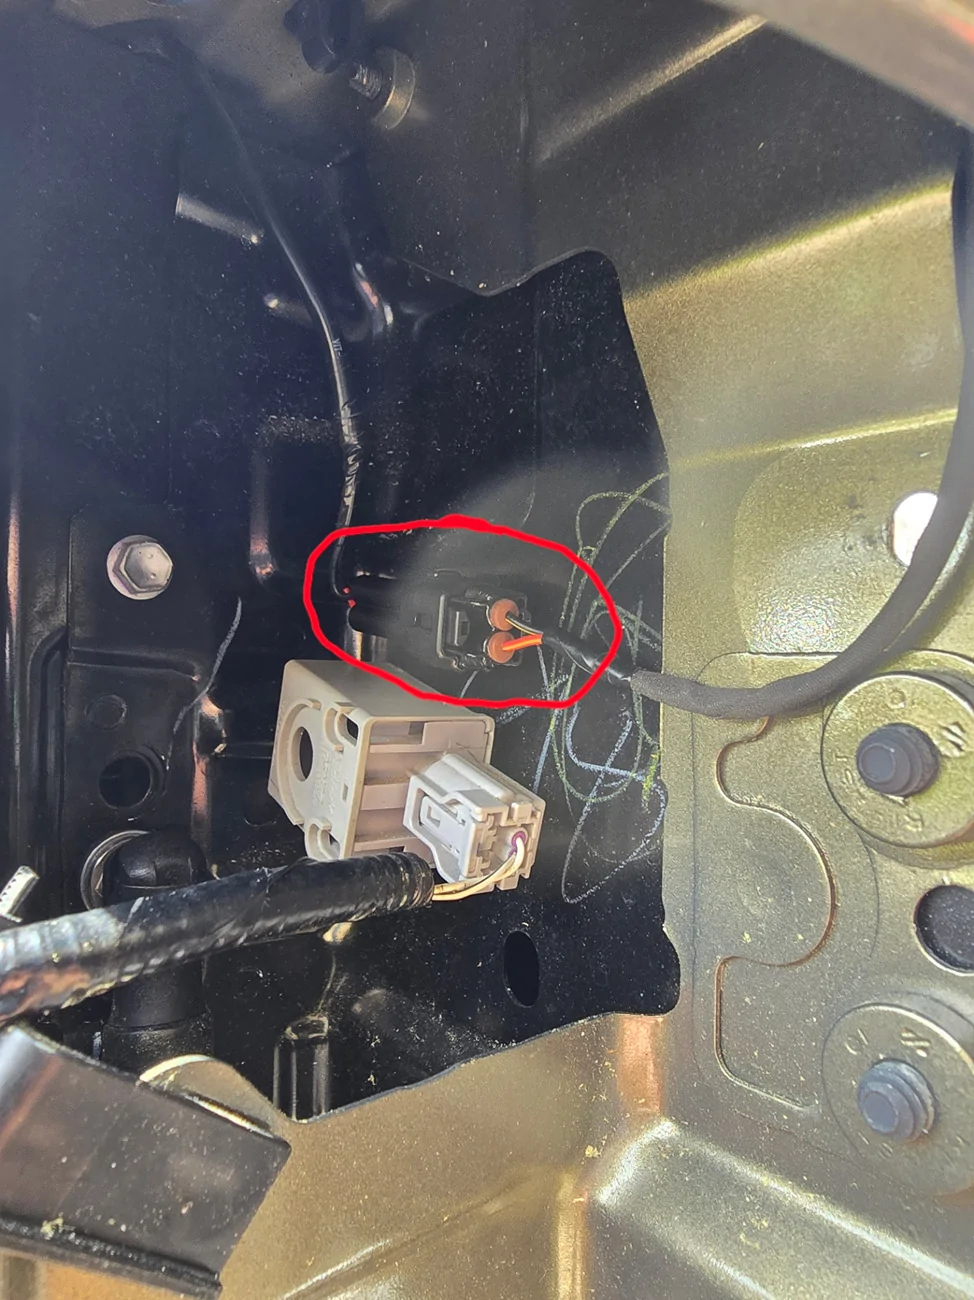
The yellow dot is the original connection to the bed light. Take the supplied harness and plug it into the bed light (red) and then fish the harness back to the taillight. Once the end of the harness is at the taillight, I put the bed cap on and made the connection to the new harness. Used supplied zip ties to secure the harness to the original power line and time to put back together. Found the spot to mount the new wire harness tab. First pic is the drivers side and then the passenger.
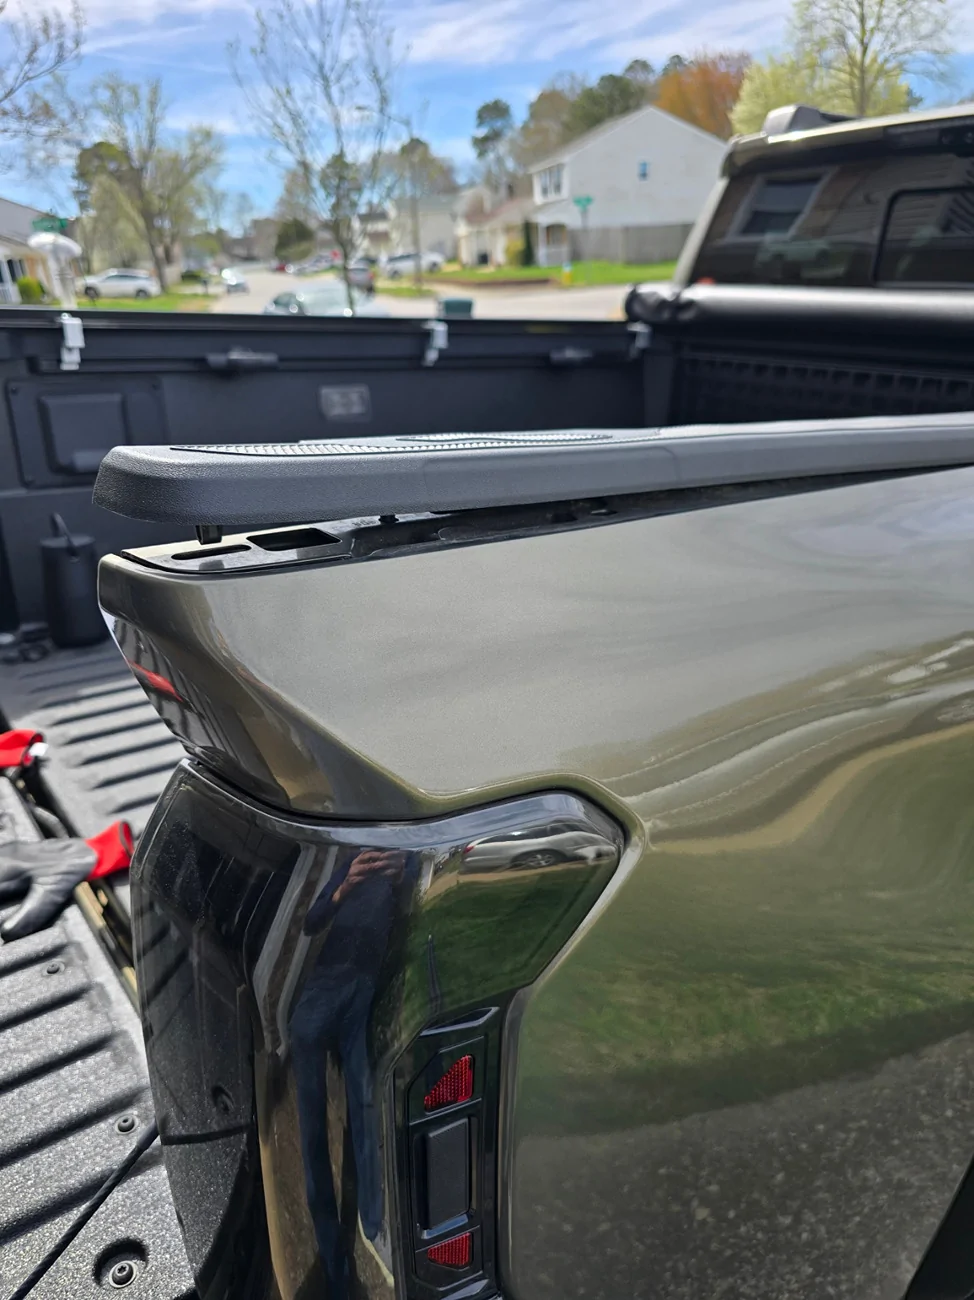
Well I hope this makes sense and hopefully will help others out. Not too hard of an upgrade IMHO.
First time posting "how to" installations so bare with me. Pics are using both right and left side. I'll specify which side the pics are referring to if needed.
Part # PT944-35240 is for the 5 Ft bed. (Taco Lamp Assembly Work)
Part # PT944-35241 is for the 6 Ft bed. (Taco Lamp Assembly Work)
Don't mess with the "-AA" and "-AB" that shows up on some sites.
EDIT: I originally got them from the stealership but then found them $63 cheaper (even with shipping) so I returned them and just had to wait a couple more days.
Check out https://toyota.oempartsonline.com/
These kits come with both left and right bed caps and electrical harnesses.
Taking off the old bed caps is pretty easy. Just pulling straight up. I did use a plastic bar to help pop some of the more stubborn clips.
I then took off the taillights. Easy two 10mm bolts and disconnecting the plugs. Pull the lights straight outboard.
Had to take off the fender flare. Its just pulling straight back. Nothing to hard with this step.
Now the fun began.
Have to move the plastic liner some to gain access to the back of the bed light to disconnect the cannon plug.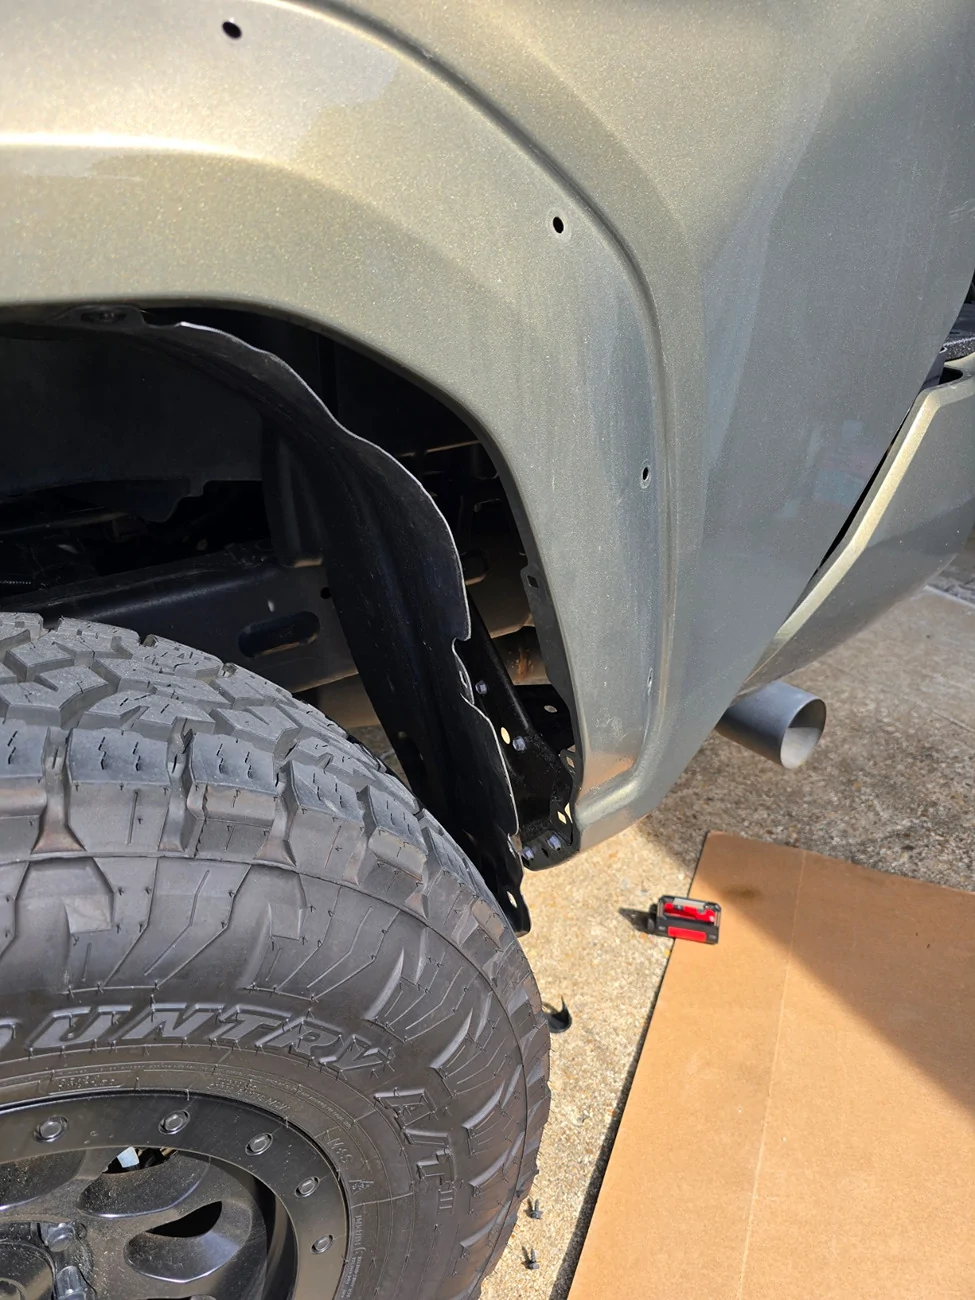
Starting from the bottom, I ended up removing 7 of these buggers and was able to reach up and get to the bed light.
I found the best way to get them out was with 90 degree needle nose pliers and just squeeze the two opposite corners.
Once I got enough of them out to reach up to the bed light, I was good to go.
Here's a shot looking up on the drivers side. Time to disconnect the light and plug the supplied harness in.
After having a hard time disconnecting the passengers side, I ended up just popping the light out first and then doing my connections. Soooo much easier than trying to do all the unplugging and plugging with your arms reaching up there.
The yellow dot is the original connection to the bed light. Take the supplied harness and plug it into the bed light (red) and then fish the harness back to the taillight. Once the end of the harness is at the taillight, I put the bed cap on and made the connection to the new harness. Used supplied zip ties to secure the harness to the original power line and time to put back together. Found the spot to mount the new wire harness tab. First pic is the drivers side and then the passenger.
Well I hope this makes sense and hopefully will help others out. Not too hard of an upgrade IMHO.
Sponsored
Last edited: